

Intro to Building and Managing Workflows
For a conceptual overview of what workflows are and how they fit into the platform – including the relationship between checkers, steps, workflows, and templates – see our Workflows, Steps & Checkers primer.
My Workflows
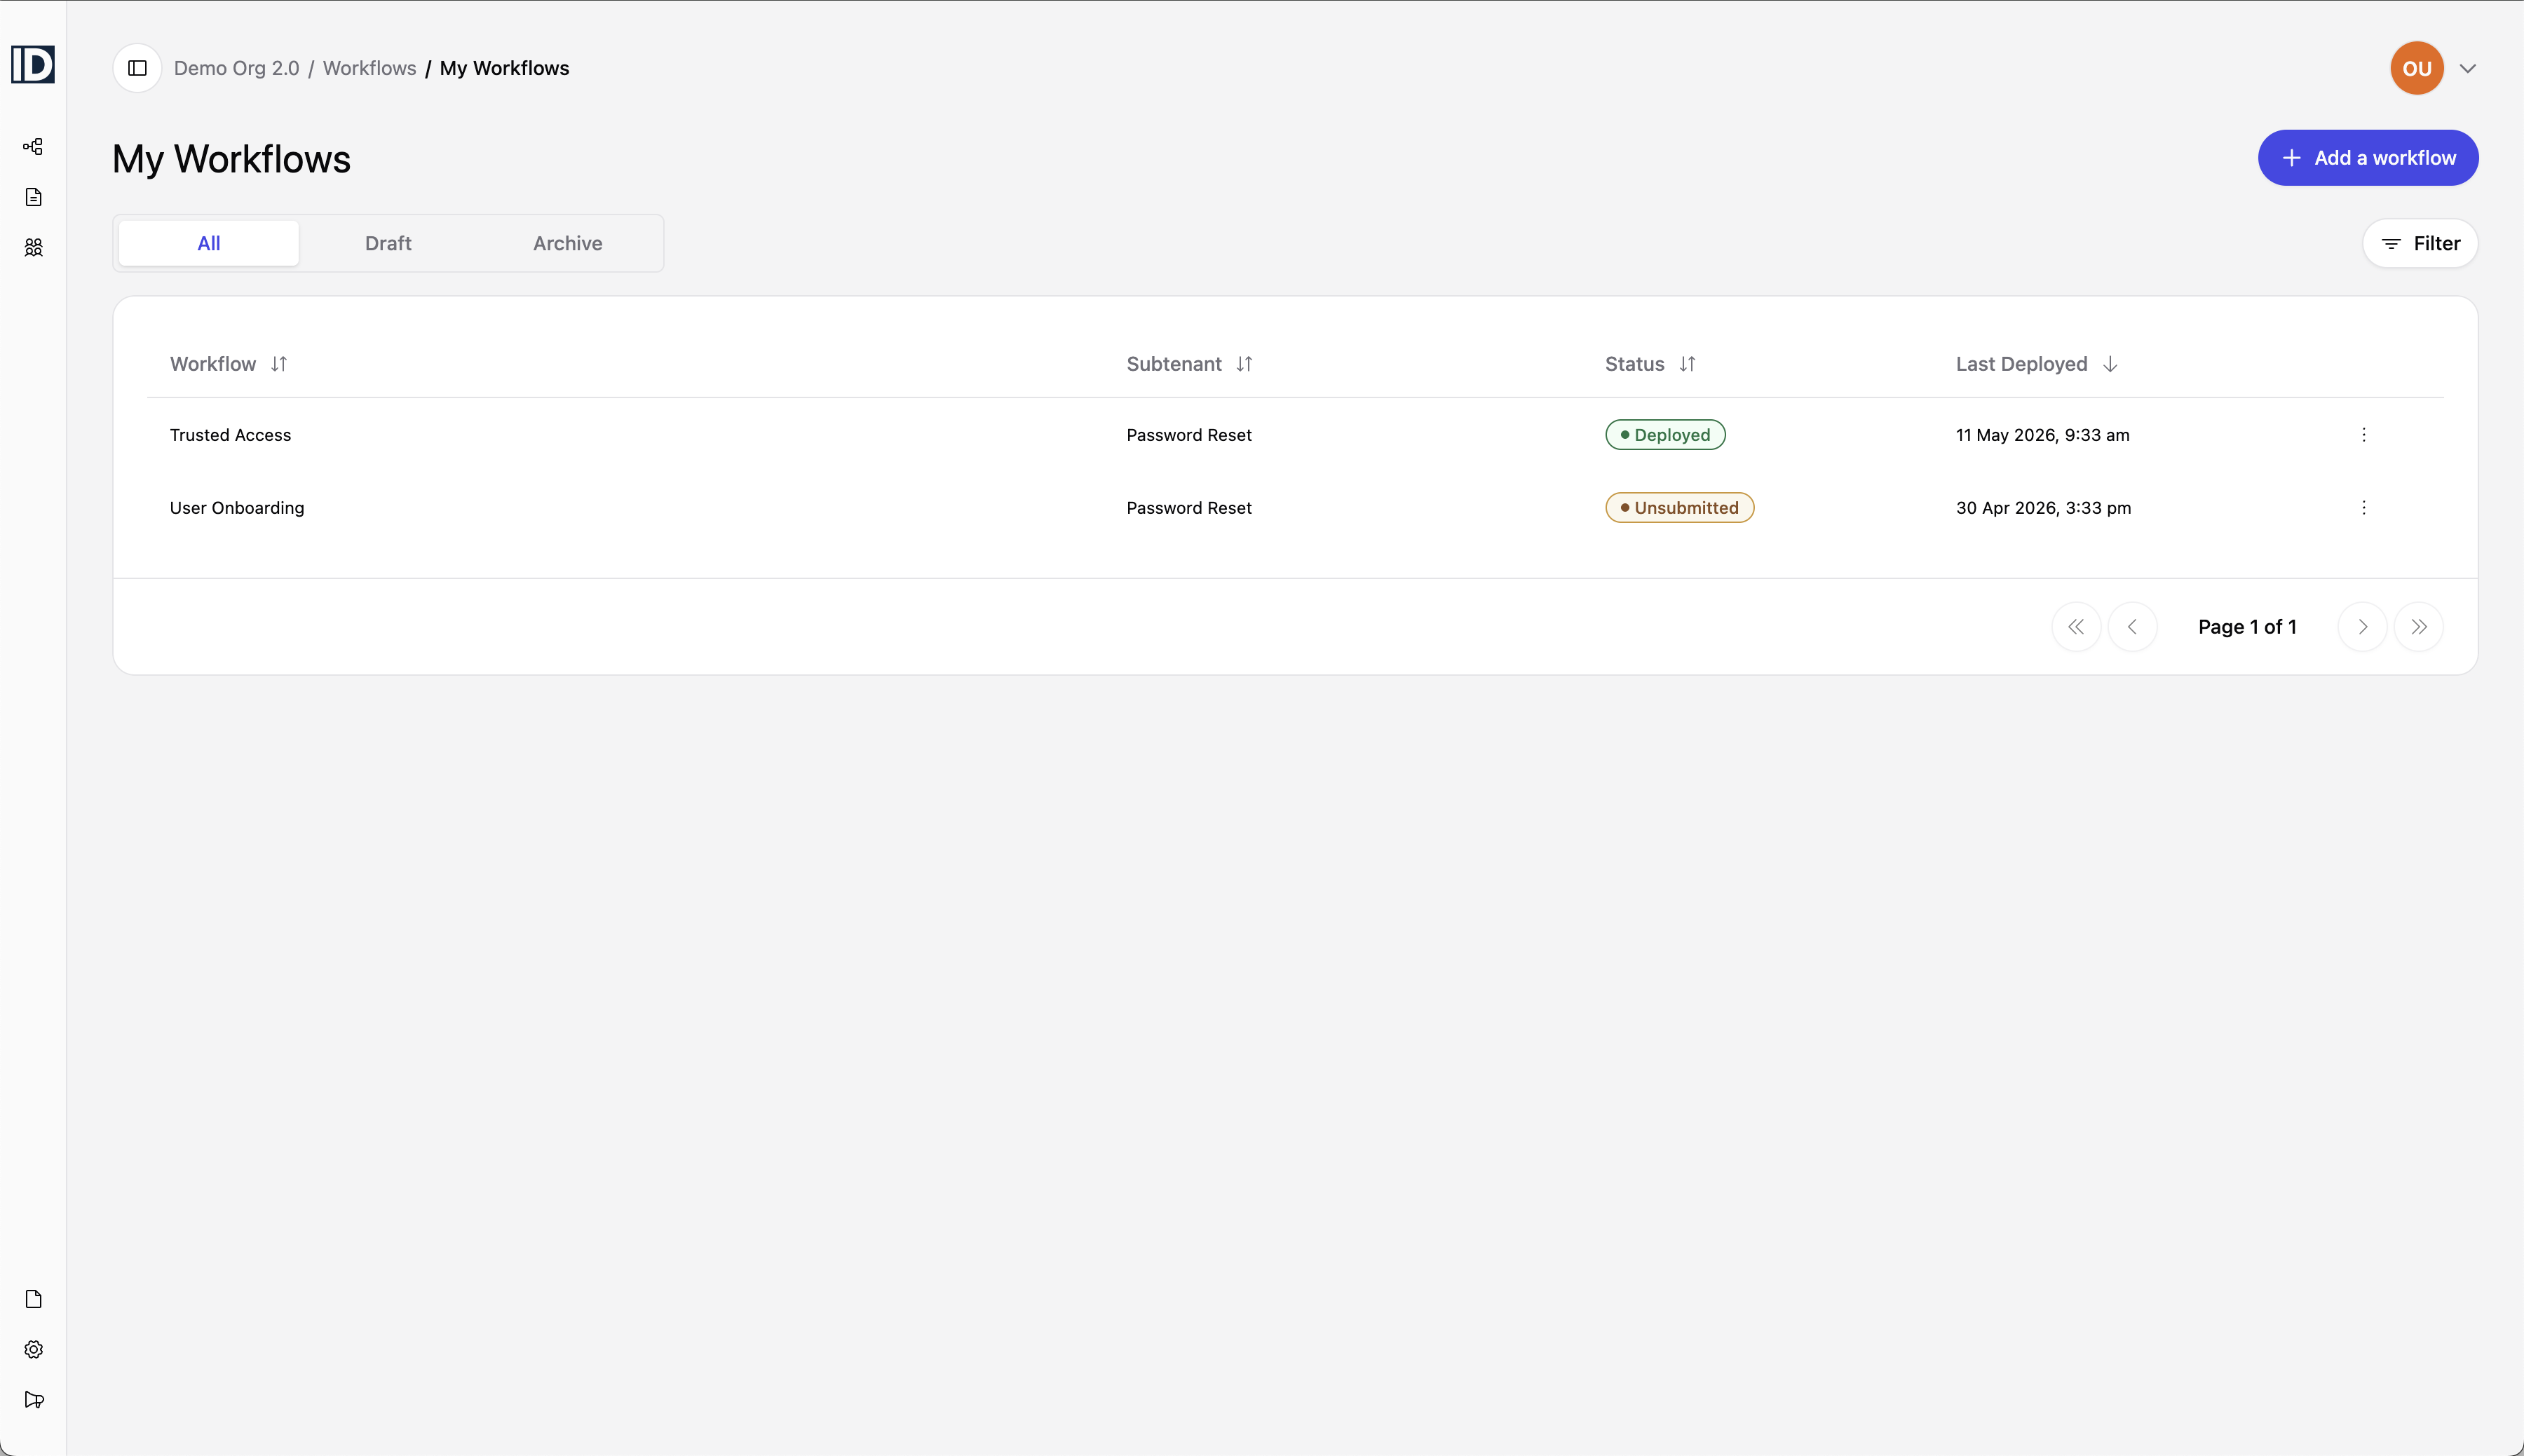
My Workflows is your home base for managing verification workflows. To get there, expand Workflows in the left navigation and click My Workflows.
The left nav under Workflows also gives you quick access to:
- Workflow Gallery – browse pre-built workflow templates (see [Choosing a Workflow Template])
- Identity Providers – manage federated IDP configurations (see [Advanced Configs > Federated IDP])
The My Workflows list shows all workflows you have access to and their deployment statuses. Use the All, Draft, and Archive tabs to view workflows across lifecycle statuses.
Quick actions
Each workflow row has a three-dot menu (⋮) on the right with two groups of actions:
Initiate
- Generate verification link – create a shareable link to start a verification session. You'll provide a credential, optionally an App ID, select a country, and choose a delivery method (Send SMS, Send Email, or Copy Link).
- Start verification session – launch a verification session directly from the console, useful for agent-assisted or call center scenarios. You'll provide a credential, optionally an App ID, country, and redirect URL.
Configuration
- Manage workflow – open the workflow detail view (same as clicking the workflow name)
- Export workflow – export the workflow configuration
- Archive workflow – move the workflow to the Archive tab
- Delete workflow – permanently remove the workflow
Creating or Opening a Workflow
From the My Workflows page, you have two paths forward:
Create a new workflow – click the "+ Add a workflow" button in the top right corner. This opens the Workflow Templates modal where you can browse and select a pre-built template, copy an existing workflow, or import a workflow.
Open an existing workflow – click any workflow name in the list to go directly to the workflow detail view.
Either way, you'll land on the workflow detail view – a three-tab workspace where all workflow configuration happens.
The Workflow Builder View
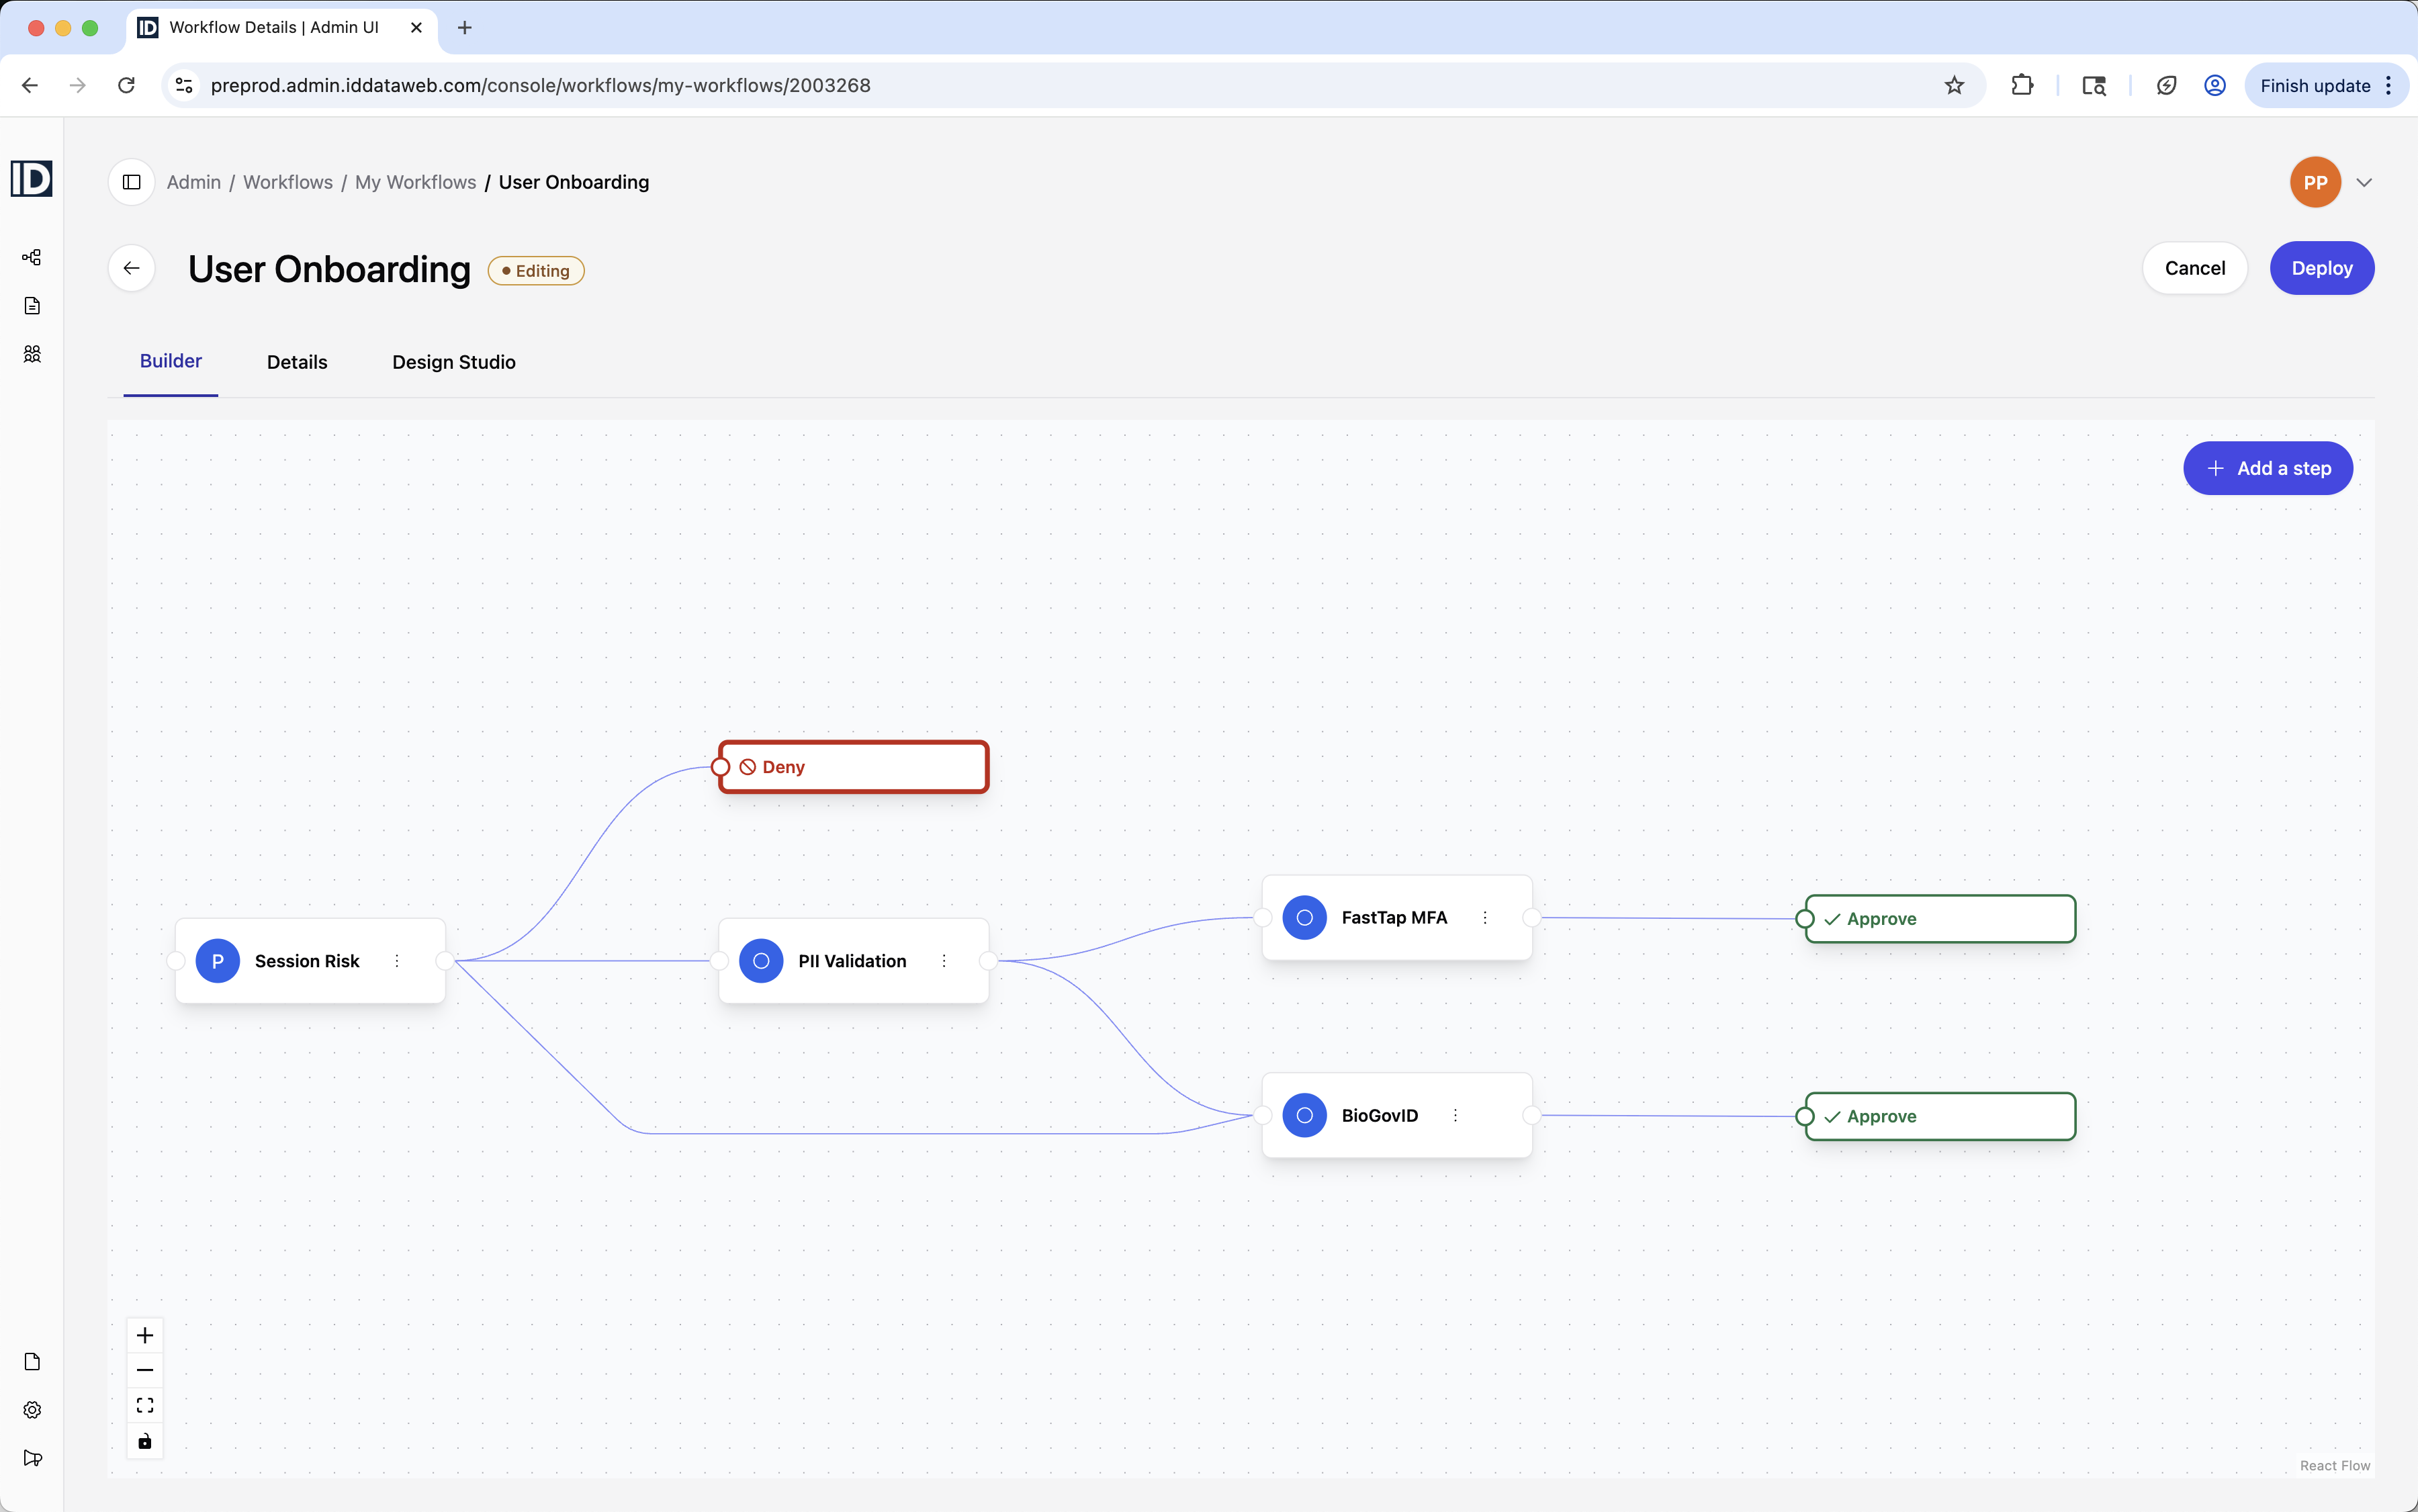
When you open a workflow, you see its name at the top along with a status badge (e.g., "Deployed," "Editing") and three tabs:
Builder – the visual flow canvas. This is where you see your workflow's step sequence, branching logic, and outcomes (Approve, Deny) laid out as an interactive diagram. You can add steps, rearrange the flow, and click into any step to configure it. It's made of the following elements:
- Step nodes – the individual steps (typically a user interaction) that are either required, or step-ups.
- Connection lines – the paths between steps, showing how the flow branches based on policy decisions
- Outcome nodes – terminal states: Approve (green checkmark) and Deny (red)
This view is interactive, so it's not only how you get a birds-eye view of your workflow, but also how you drill into each step.
Details – workflow-level settings that apply across the entire workflow, such as integration type, session expiration, and redirect URLs.
Design Studio – the visual editor for customizing the end-user-facing verification experience. This is where you control theming (colors, fonts, logos), form layout, header and footer content, processing screens, and custom landing pages for approve/deny outcomes.
Drilling into a step
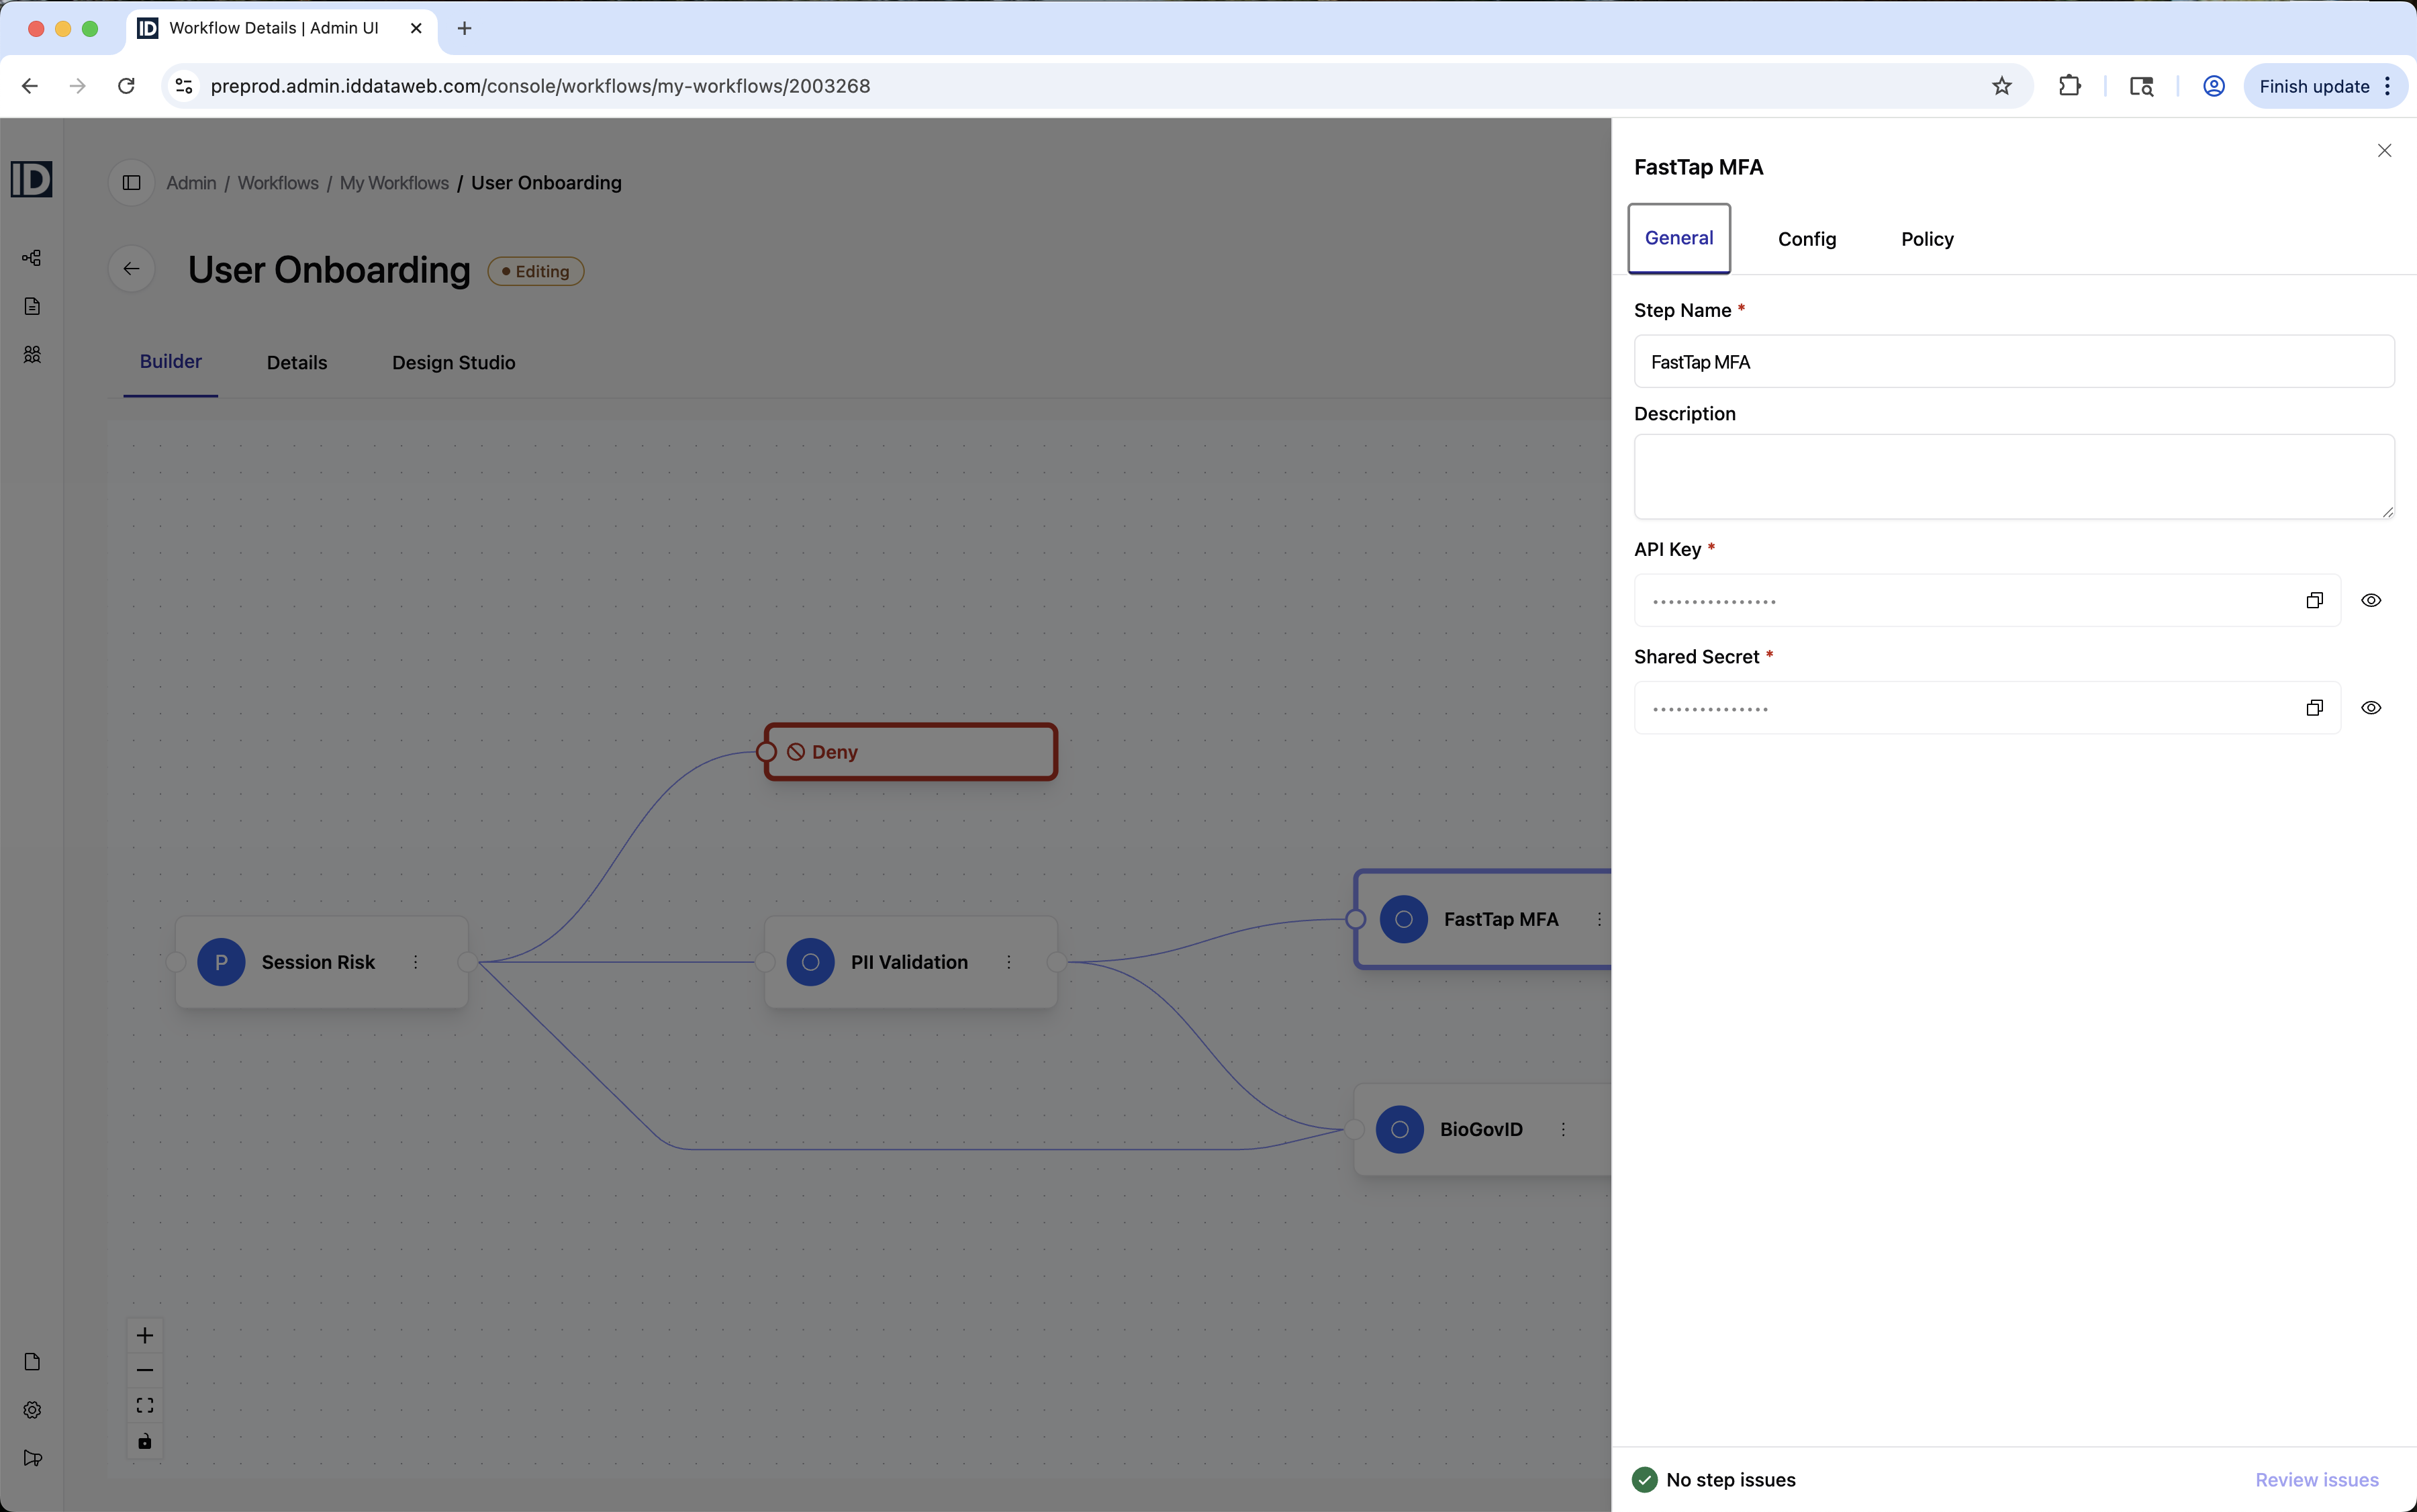
Click any step node to open a side panel with that step's configuration options. The side panel has three tabs – General, Config, and Policy – covering everything from inputs and checkers to decision rules. For details on step-level configuration, take a look at the Configure Steps and Policy Manager articles.
Updated 5 months ago