Transaction Report
Overview
When something goes wrong with a verification – or when you need to understand why a specific decision was made – the Transaction Details Report is where you go. It shows you the full story of a transaction: which steps ran, what data was collected, which rules fired, and why the platform reached the outcome it did.
This matters because identity verification decisions are rarely simple. A single transaction usually involves multiple steps, dozens (if not hundreds) of checks across several layered data sources, and complex policy logic. Without clear visibility into what happened and why, troubleshooting becomes guesswork. The Transaction Details Report eliminates that guesswork.
Finding a Transaction
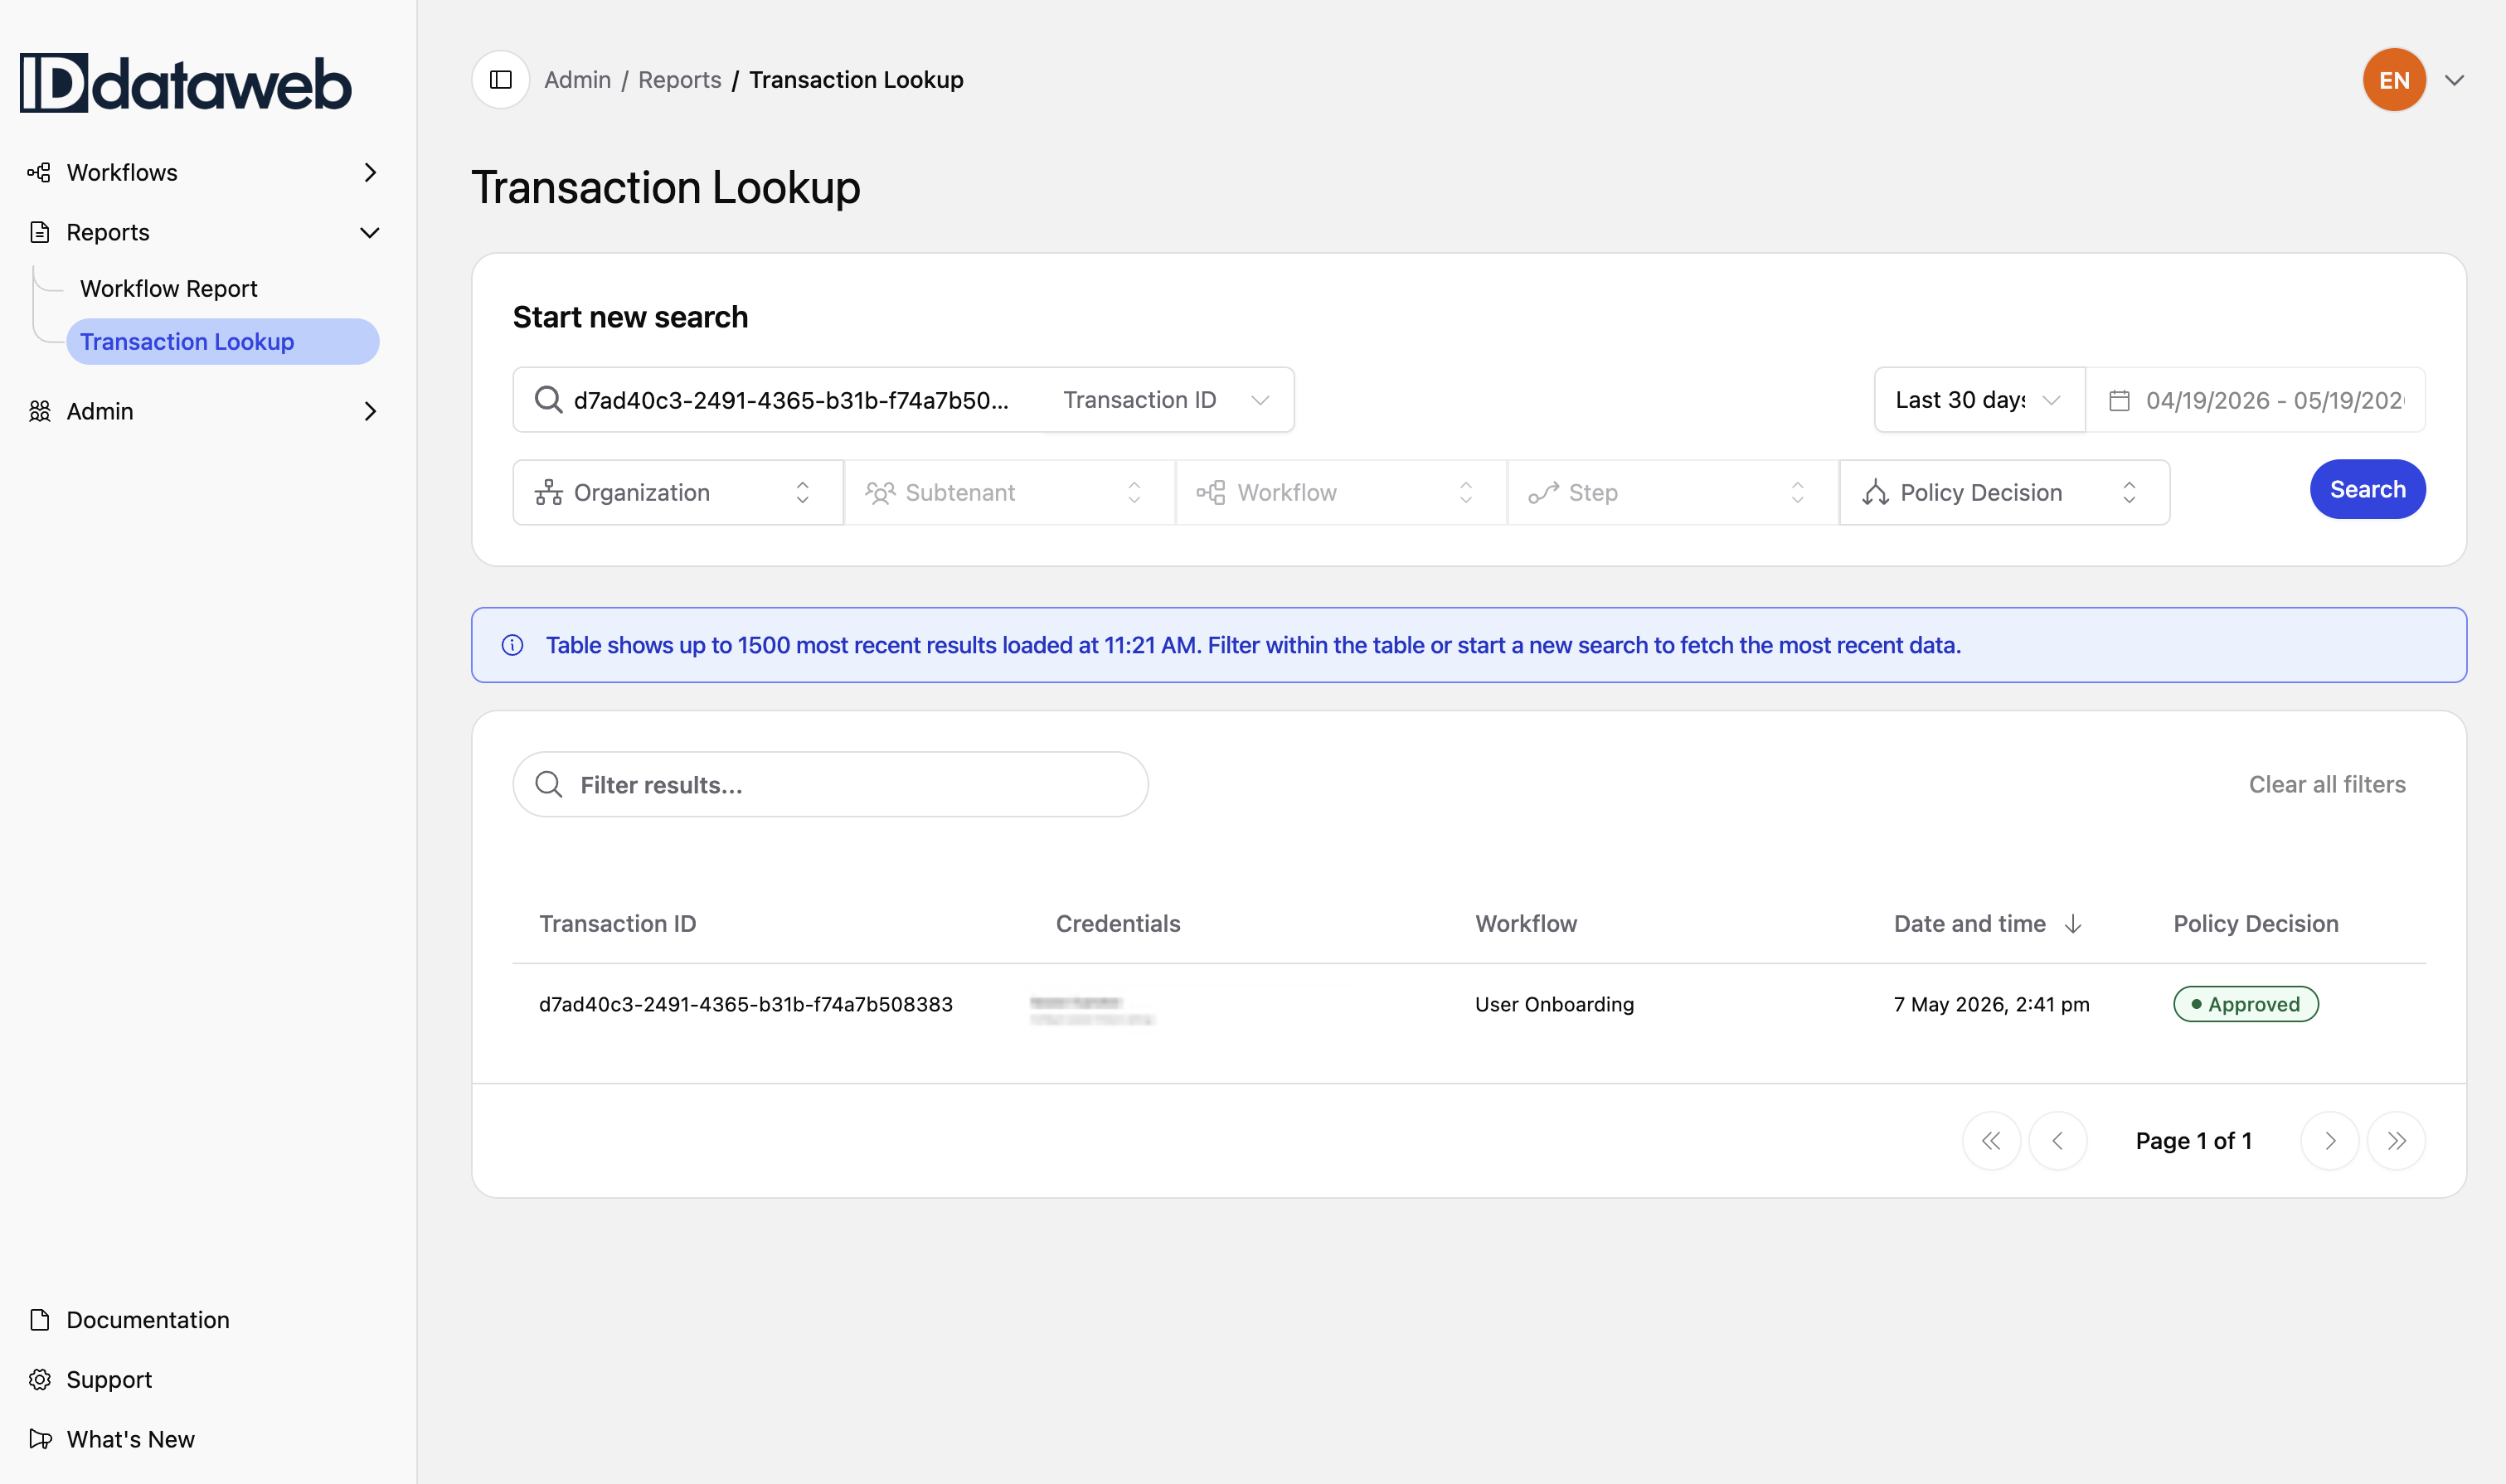
Navigate to Reports in the left navigation. You have two entry points:
Workflow Report – aggregate reporting across all transactions for a given workflow. Use this when you're looking at trends, approval rates, and completion rates rather than a specific transaction.
Transaction Lookup – search for a specific transaction by ID or filter by Organization, Subtenant, Workflow, Step, Policy Decision, and date range. Use this when you're investigating a specific user's experience or troubleshooting a reported issue.
From Transaction Lookup, enter a Transaction ID or apply filters and click Search. Results show a table with Transaction ID, Credentials, Workflow, Date and time, and Policy Decision (with a color-coded badge: Approved, Denied, Obligation).
Click any row to open the full Transaction Details view.
The Transaction Details View
When you open a transaction, you see two things at once: a summary header and the workflow visualization with the transaction's path highlighted. This is a significant change from the legacy report, which presented transaction data as a flat page of tables. Seeing the transaction in the context of the workflow means you can immediately understand where the user went, where they stopped, and which path led to the outcome.
Transaction Header
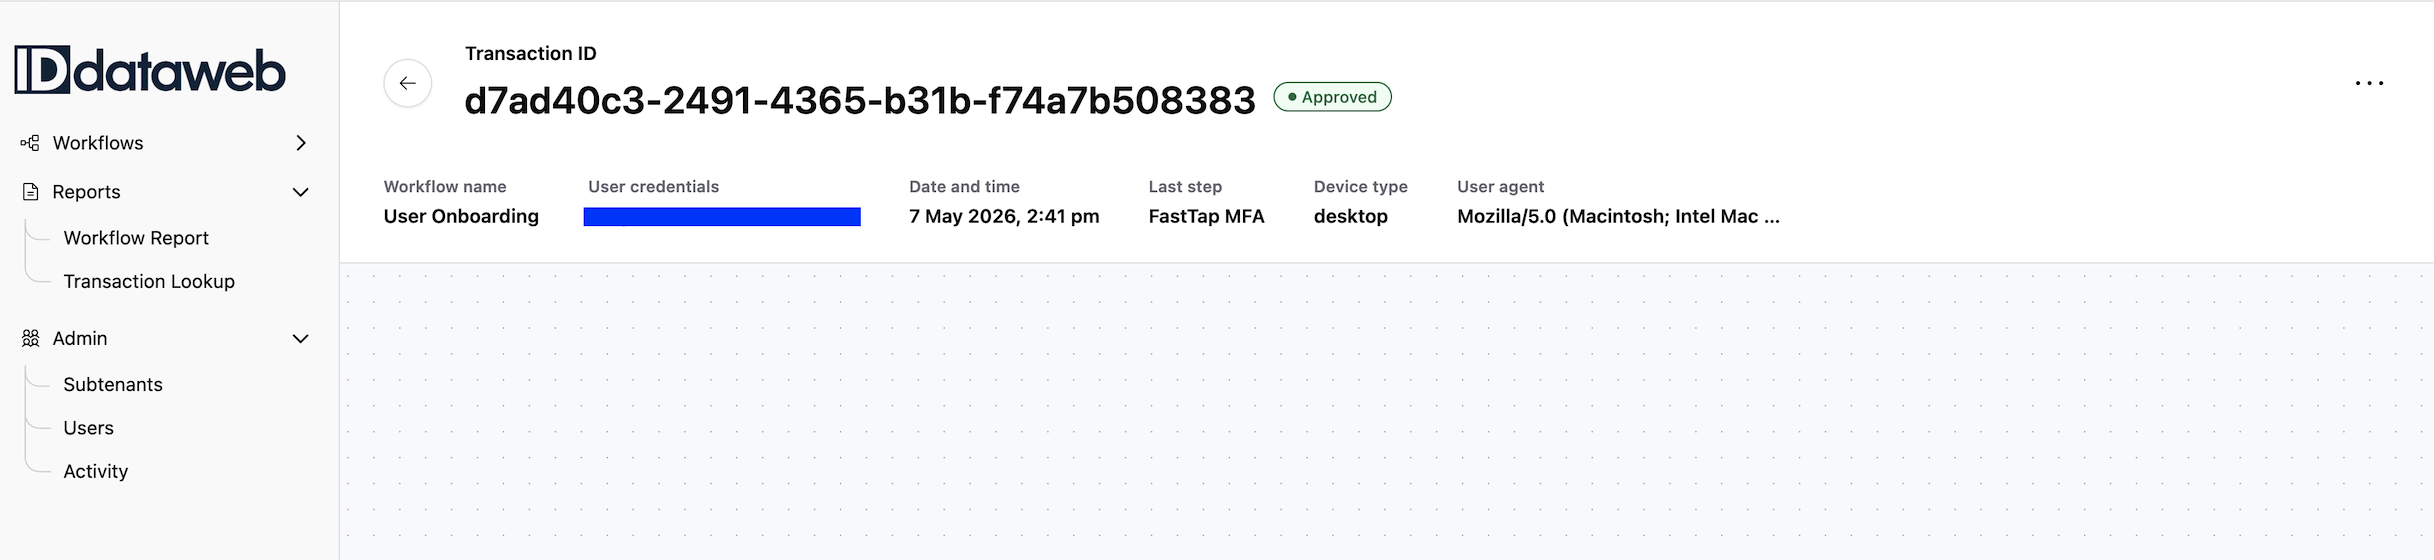
The header provides at-a-glance context:
- Transaction ID – the unique identifier for this transaction
- Policy Decision – the final outcome badge (Approved, Denied, Obligation)
- Note: Policy Decision reflects the platform’s decision outcome. It does not always mean the user completed the full workflow.
- Workflow name – which workflow this transaction ran through
- User credentials – the user's identifier (e.g., email address). This field is masked by default for privacy; hover or click to reveal.
- Date and time – when the transaction occurred
- Last step – the last step the user completed. This is especially useful for understanding drop-offs: if a user was denied or abandoned the flow, this tells you exactly where.
- Device type – desktop or mobile
- User agent – the browser and operating system
The "Last step" field is one of the most practically useful additions in Admin 2.0. In the legacy report, figuring out where a user stopped required scrolling through step-by-step data and piecing it together. Now it's right at the top.
Workflow Visualization
Below the header, you see the full workflow diagram with the transaction's path overlaid. Steps the user reached are shown in full color with active connections; steps they didn't reach (e.g., an alternative branch like Government ID and Selfie Match when the user went through SMS Link) appear faded.
Outcome nodes (Approve, Deny) are shown at the end of each path. The path the user actually took is visually distinct, so you can trace the journey without reading a single table.
This visualization answers the first question you always have: "What happened?" Before you dig into any data, you already know the route.
Step Details
Click any step node in the visualization to open its detail panel. The panel has three tabs: Decision, Data, and Logs. Each serves a different purpose in the investigation.
Decision Tab
The Decision tab shows which policy rules were evaluated for this step and which one drove the outcome. This is the "why" behind the decision.
What you'll see:
Each rule is displayed with its full name, type (e.g., "Obligation rule"), and the IF/THEN logic that was evaluated. The deciding rule – the one that actually determined the outcome – is listed first and is marked with a blue "Deciding rule" badge in the top right corner.
A color-coded banner below each rule tells you what happened:
- Green – "All of the following conditions were satisfied, so the action for this rule was executed." The rule fired and its action was applied.
- Pink/red – "None of the following conditions were satisfied, so the action for this rule was not executed." The rule was evaluated but didn't match.
Each condition in the rule shows the policy group name, its category badge (color-coded), and the actual result from the transaction (e.g., "was Pass"). Conditions are expandable – click the arrow to see the individual checks that make up the group.
Why this matters:
In the legacy report, you could see that a transaction was denied or obligated, but understanding why required cross-referencing policy configurations with raw check results. The Decision tab puts the rule logic and the actual outcomes side by side, so the reasoning is transparent.
Viewing additional rules:
If the step has multiple rules, click "Show additional rules" to expand and see how every rule was evaluated – not just the deciding one. This is valuable when you need to understand why a particular rule didn't fire, or to verify that your rule hierarchy is working as intended. Click "Hide additional rules" to collapse.
Data Tab
The Data tab shows everything the platform collected and evaluated during this step. It's organized into three sub-tabs:
Inputs – the data the user provided (or that was prefilled) at this step. Fields are grouped by category (e.g., Name > First Name, Middle Name, Last Name, Suffix; Address; Telephone). This is what the user entered into the form.
Checks – the individual check results from each checker that ran during this step. Displayed as a table with three columns: Checker (the data source, e.g., "Phone Ownership and Risk," "Authoritative Database"), Check (the specific assertion evaluated, e.g., "Provided Full Name Matches Registered Phone Full Name"), and Status (Pass, Fail, or Unverified, shown as a color-coded badge).
Hover over a check name to see a tooltip with the assertion key and a plain-language description of what the check does and what Pass/Fail means. This is useful when you encounter an unfamiliar check name and need to understand it without leaving the page.
Some fields or checks may appear blank, unavailable, or unverified if the user did not provide the input, the checker did not run, the data source returned no match, or the field is restricted by permissions.
The checks table is paginated (e.g., "Page 1 of 3") and includes a search bar and an "In policy only" toggle. When toggled on, the table filters to show only the checks that are referenced in the step's policy rules – cutting out noise and focusing on the checks that actually influenced the decision.
Acquired Data – data returned by checkers during the step that wasn't directly part of the input or check assertions. This includes scores (e.g., Experian Score, Assertion Score, IDW Risk Score), derived attributes (e.g., Phone Service Type, Most Recent Address), and metadata (e.g., Device Type, Consent Timestamp). These values are often used in policy rules as "the value of" conditions or passed downstream to other steps.
Why this matters:
The Data tab gives you the raw evidence behind the decision. If the Decision tab tells you why the rule fired, the Data tab tells you what the data looked like when it did. This is essential for troubleshooting false denials ("the user says they entered the right info – did they?"), investigating fraud patterns ("what risk signals came back?"), and auditing ("what data did we collect and what did we learn from it?").
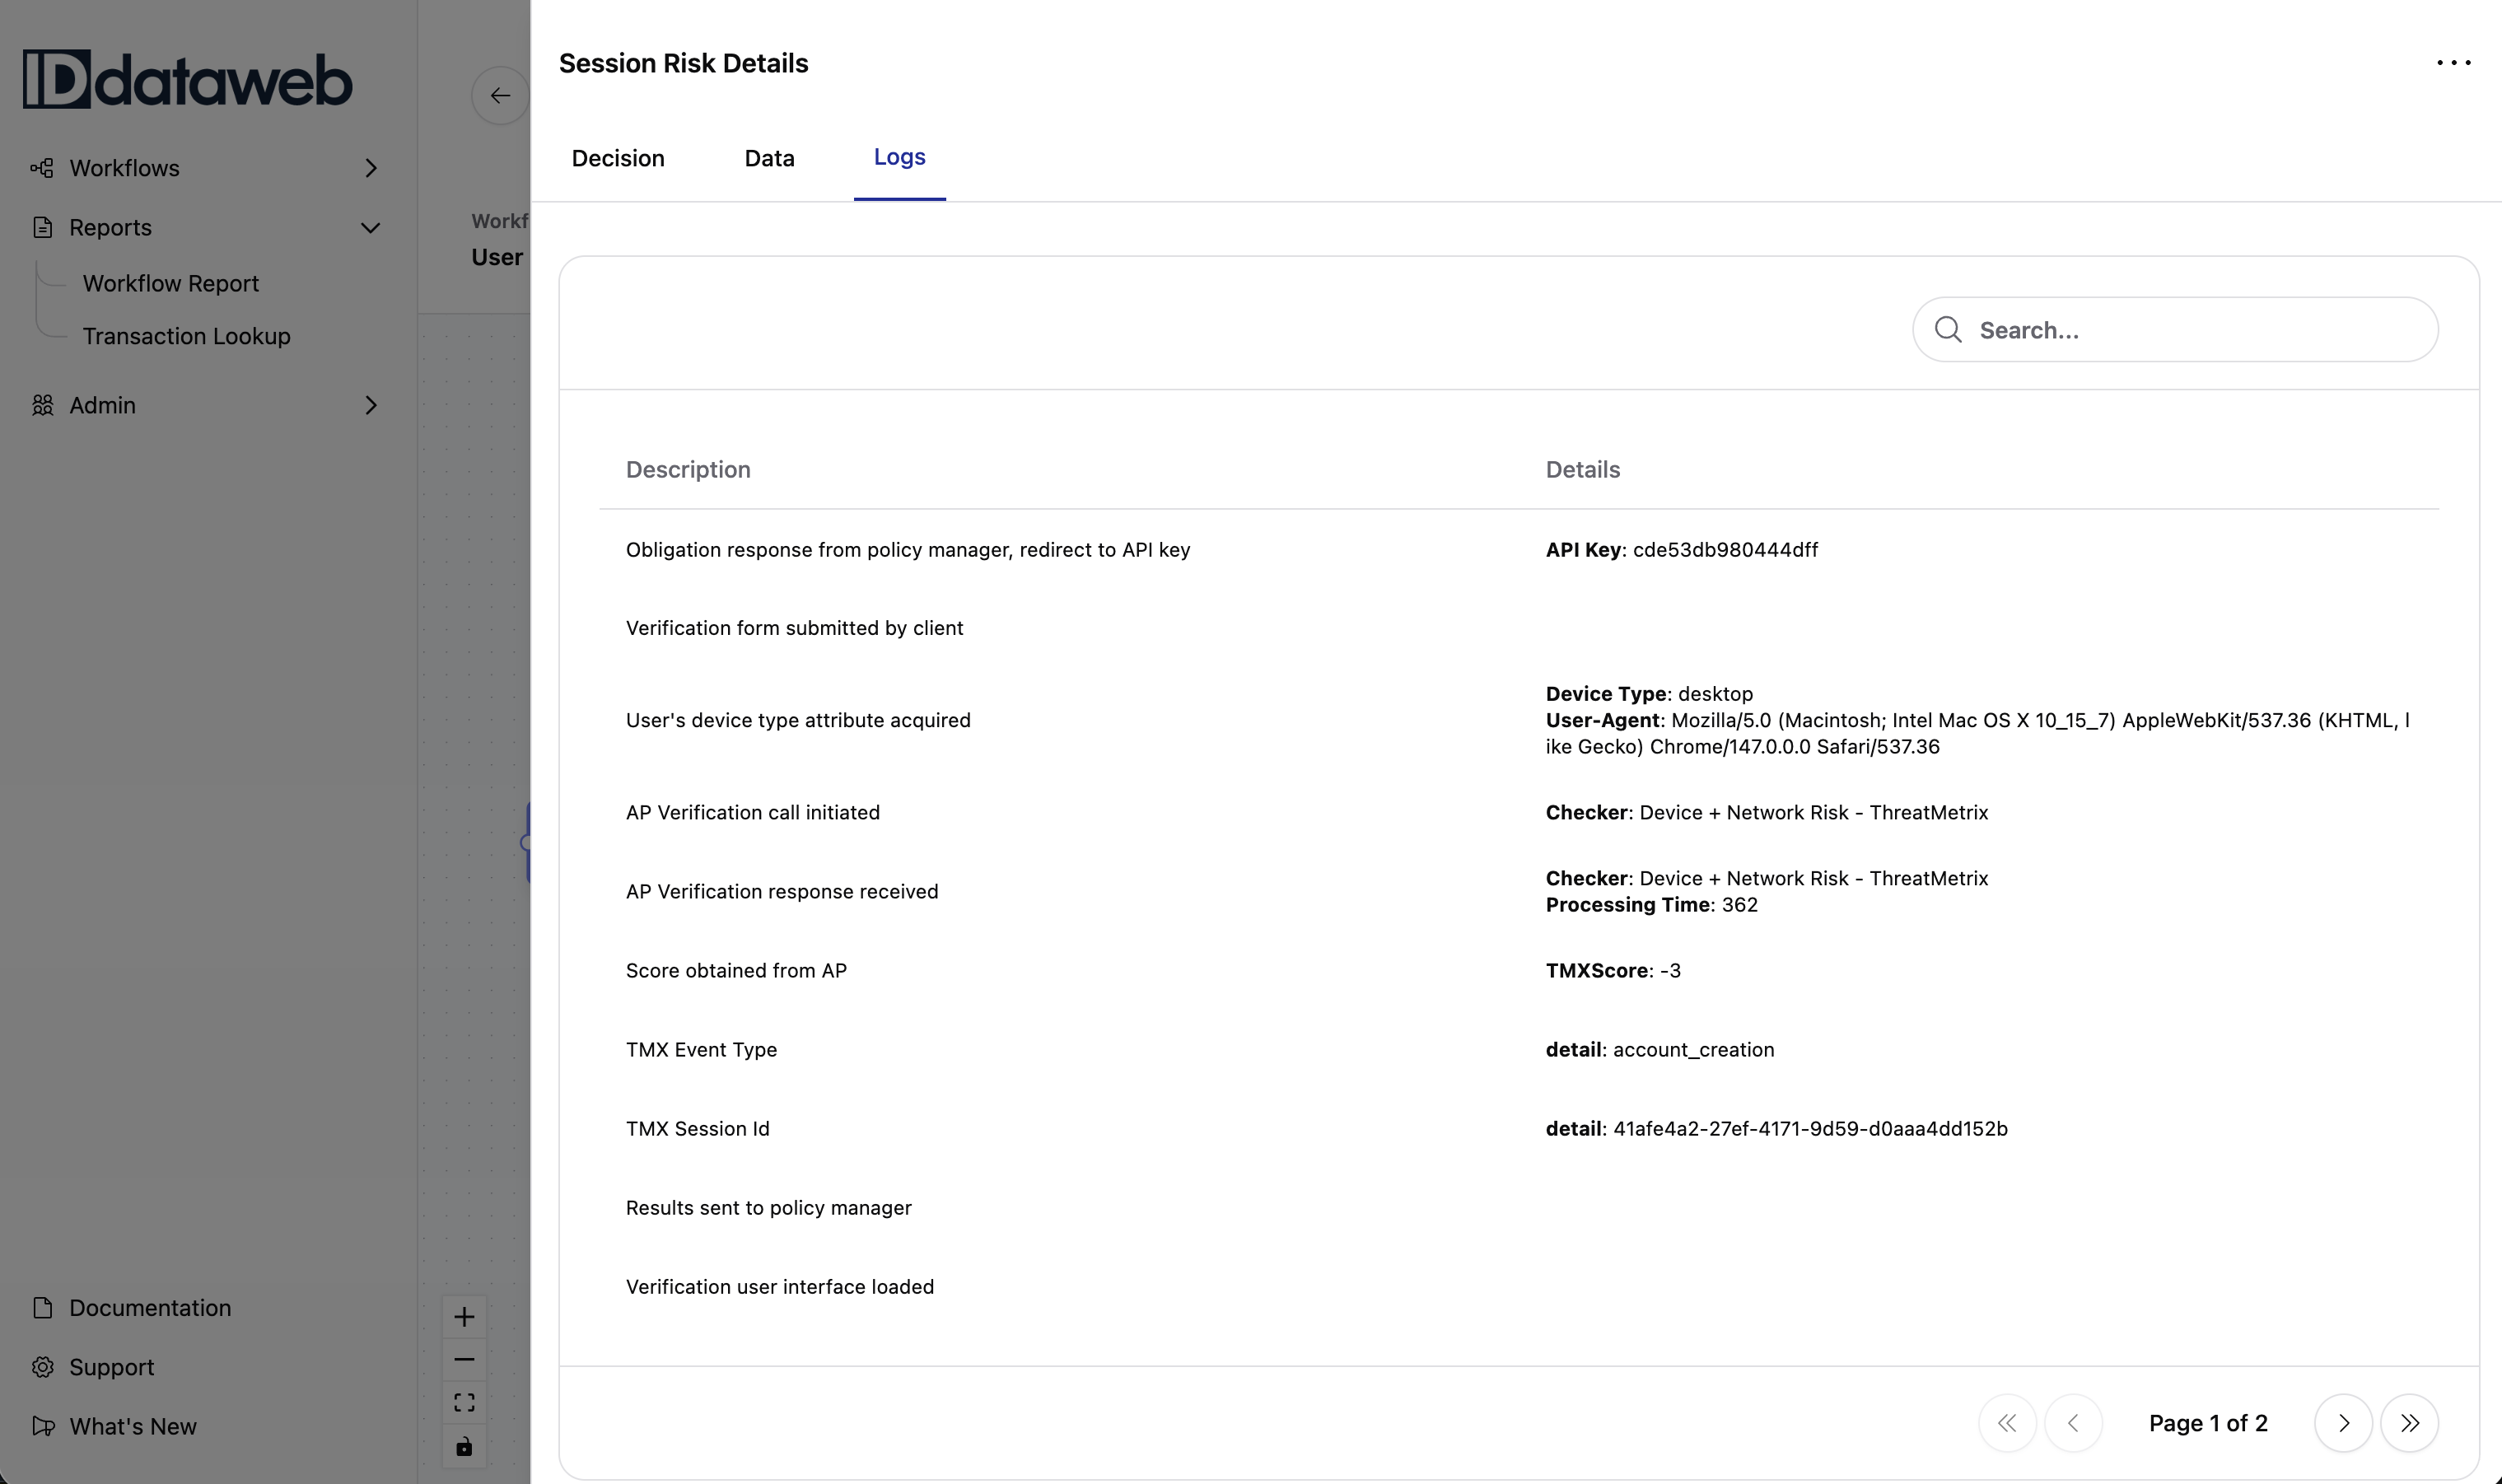
Logs Tab
The Logs tab shows the event-by-event processing sequence for the step. Each row includes a Description (what happened) and Details (technical specifics).
Typical log entries include:
- AP Verification call initiated / response received – with the checker name and processing time in milliseconds
- Scores obtained from data sources (e.g., ExperianScore: 229, AssertionScore: 60, IDWScore: 60)
- Results sent to the policy manager
- Obligation or approval response with the target step's API key
Why this matters: Logs are the chronological audit trail. They're most useful for two things: diagnosing performance issues (which checker took 1183ms to respond?) and providing compliance evidence (what happened, in what order, at what time?).
Quick Actions
The three-dot menu (⋮) in the top right of the step detail panel provides two actions:
Go to workflow step – jumps directly to this step's configuration in the Builder. This is useful when an investigation reveals a policy issue and you want to fix the rule immediately without navigating back through the workflow list.
Submit a ticket – opens a support ticket related to this transaction which sends a message to ID Dataweb support
Tips for Effective Investigation
Start with the visualization. Before clicking into any step, look at the path. Which steps were reached? Where did the user end up? Did they hit Deny, Approve, or get obligated to a step-up? The visual context frames everything that follows.
Check the last step first. The "Last step" field in the header tells you where the user's journey ended. If it's not the final step in the workflow, either the user dropped off or was denied/obligated at that point. Click that step first.
Use "In policy only" to cut noise. A step with 58 configured checks can be overwhelming in the Checks sub-tab. Toggle "In policy only" to see just the checks that mattered for the decision.
Expand the deciding rule's conditions. Click the arrow on each condition in the deciding rule to see exactly which individual checks drove the group result. This is where you find the specific check that passed or failed.
Compare Rule #1 and Rule #2 when obligation paths diverge. If two obligation rules point to different step-up paths (e.g., SMS Link vs. Government ID and Selfie Match), expanding both tells you exactly why the user went one way and not the other.
Use "Go to workflow step" to close the loop. Found a rule that isn't working as expected? Don't navigate away – use the three-dot menu to jump directly to the step configuration in the Builder and make the fix.
Common investigation patterns
- Unexpected denial: Open the last completed step, review the deciding rule, then expand failed conditions.
- Unexpected obligation: Compare obligation rules to see which rule routed the user to the step-up path.
- Drop-off: Use Last step and the visualization to determine whether the user abandoned the flow before a final decision.
Updated 2 months ago