

Create a Workflow
As mentioned in Intro to Building and Managing Workflows, there are a few paths to creating a new workflow.
Starting from a Workflow Template
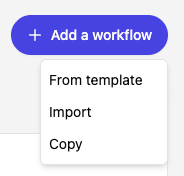
From "+ Add a workflow" if you select "From Template", you'll be brought to the Template Gallery.
The Template Gallery is where you browse pre-built workflow templates. Templates provide ready-to-use step sequences, checker configurations, and policy rules designed for specific use cases, so you can deploy a working workflow quickly and customize from there.
Browsing Templates
The gallery presents templates in a searchable card-based view. Each card shows:
- Template name
- Brief description – a one-to-two sentence summary of what the template does and which verification methods it uses
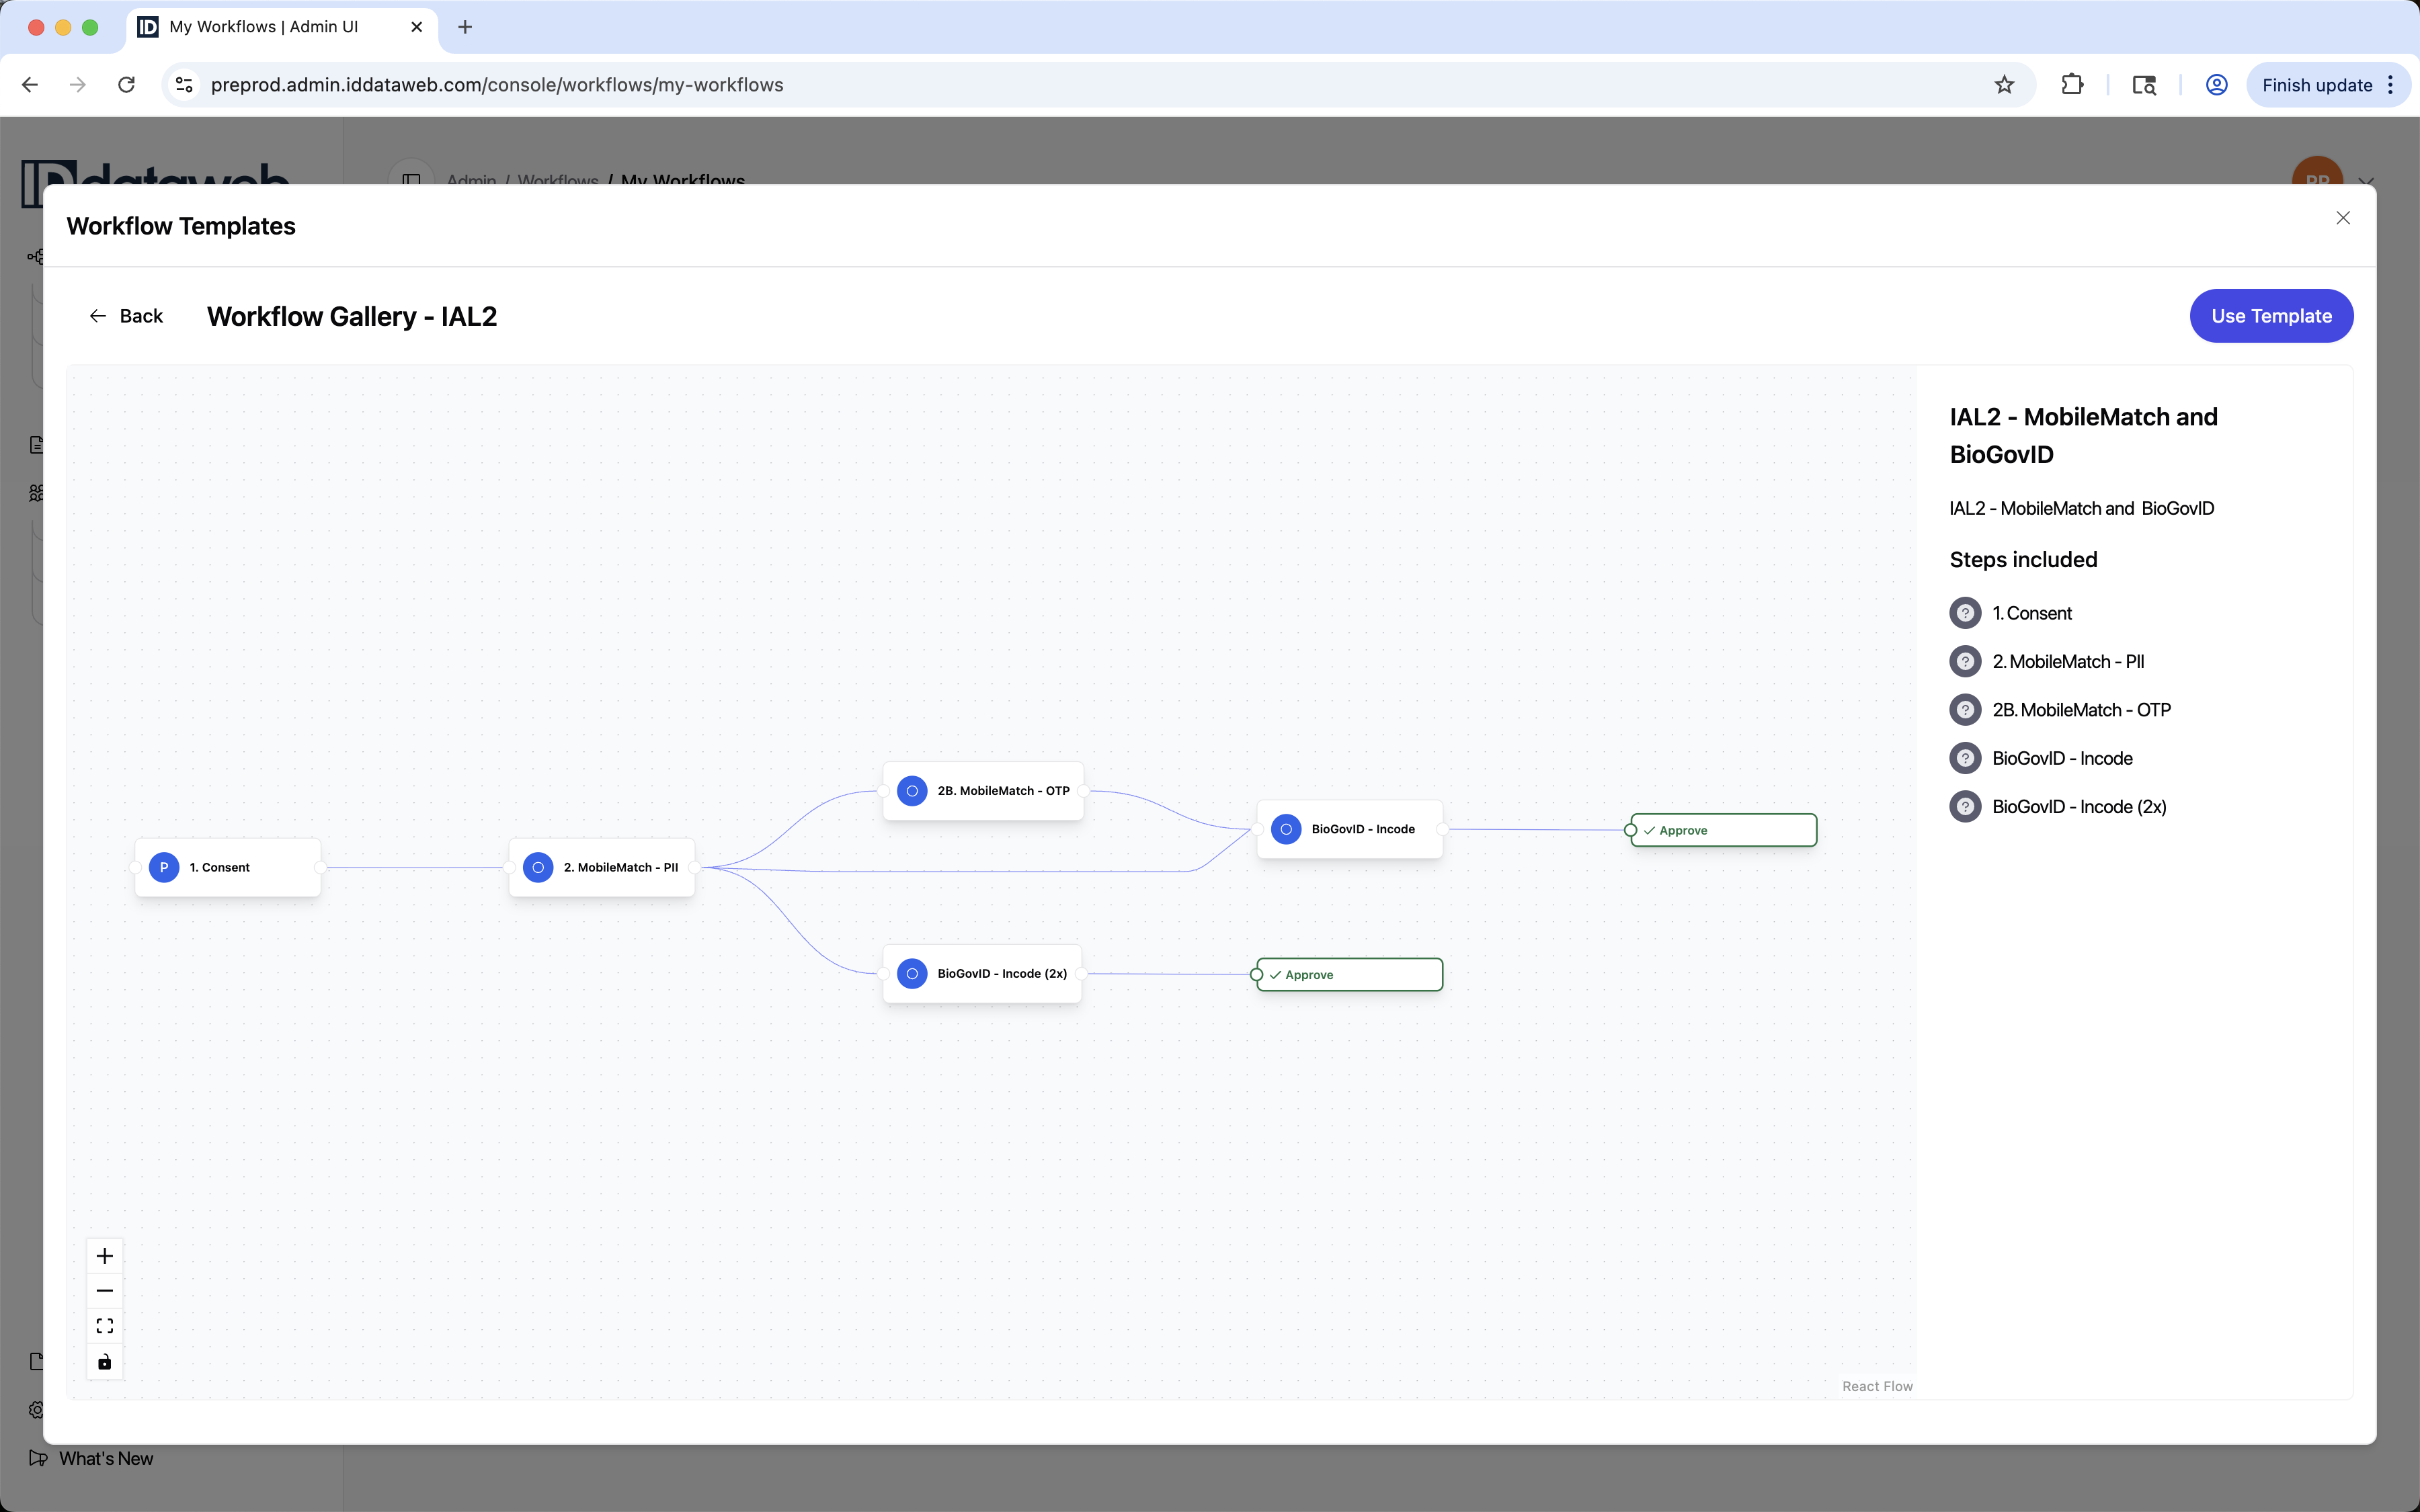
- "View Template >" link – opens a preview of the Builder view of the template, so you can get a feel for how various steps and checkers are layered and what the stepup progression looks like
Creating a Workflow from a Template
When you're ready, click "Use Template" in the top right corner. This opens a creation dialog where you provide: Organization, Subtenant, and Workflow name.
After completing the fields, the workflow is created and you're taken to the Builder view, where you can further customize the steps, inputs, checkers, and policy rules.
Starting from an Import
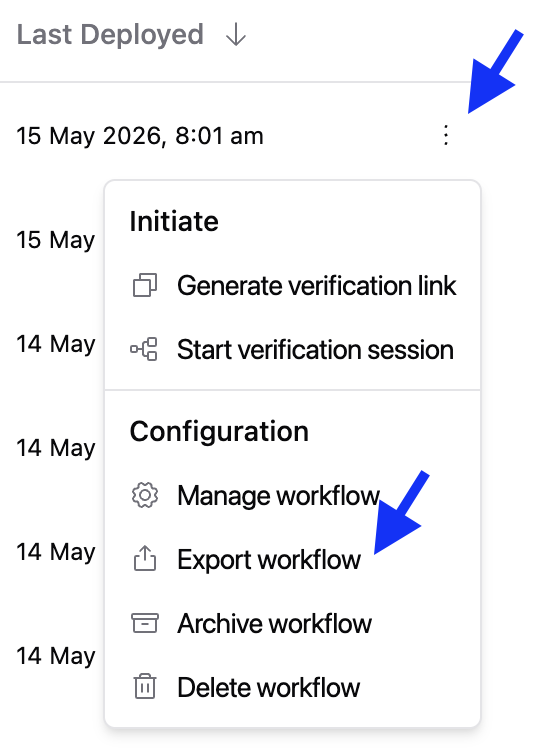
First, from the Workflow List page, open the three-dot menu to the right of any workflow and select "Export workflow".
Then, from "+ Add a workflow" select "Import".
Starting from a Copy of an Existing Workflow
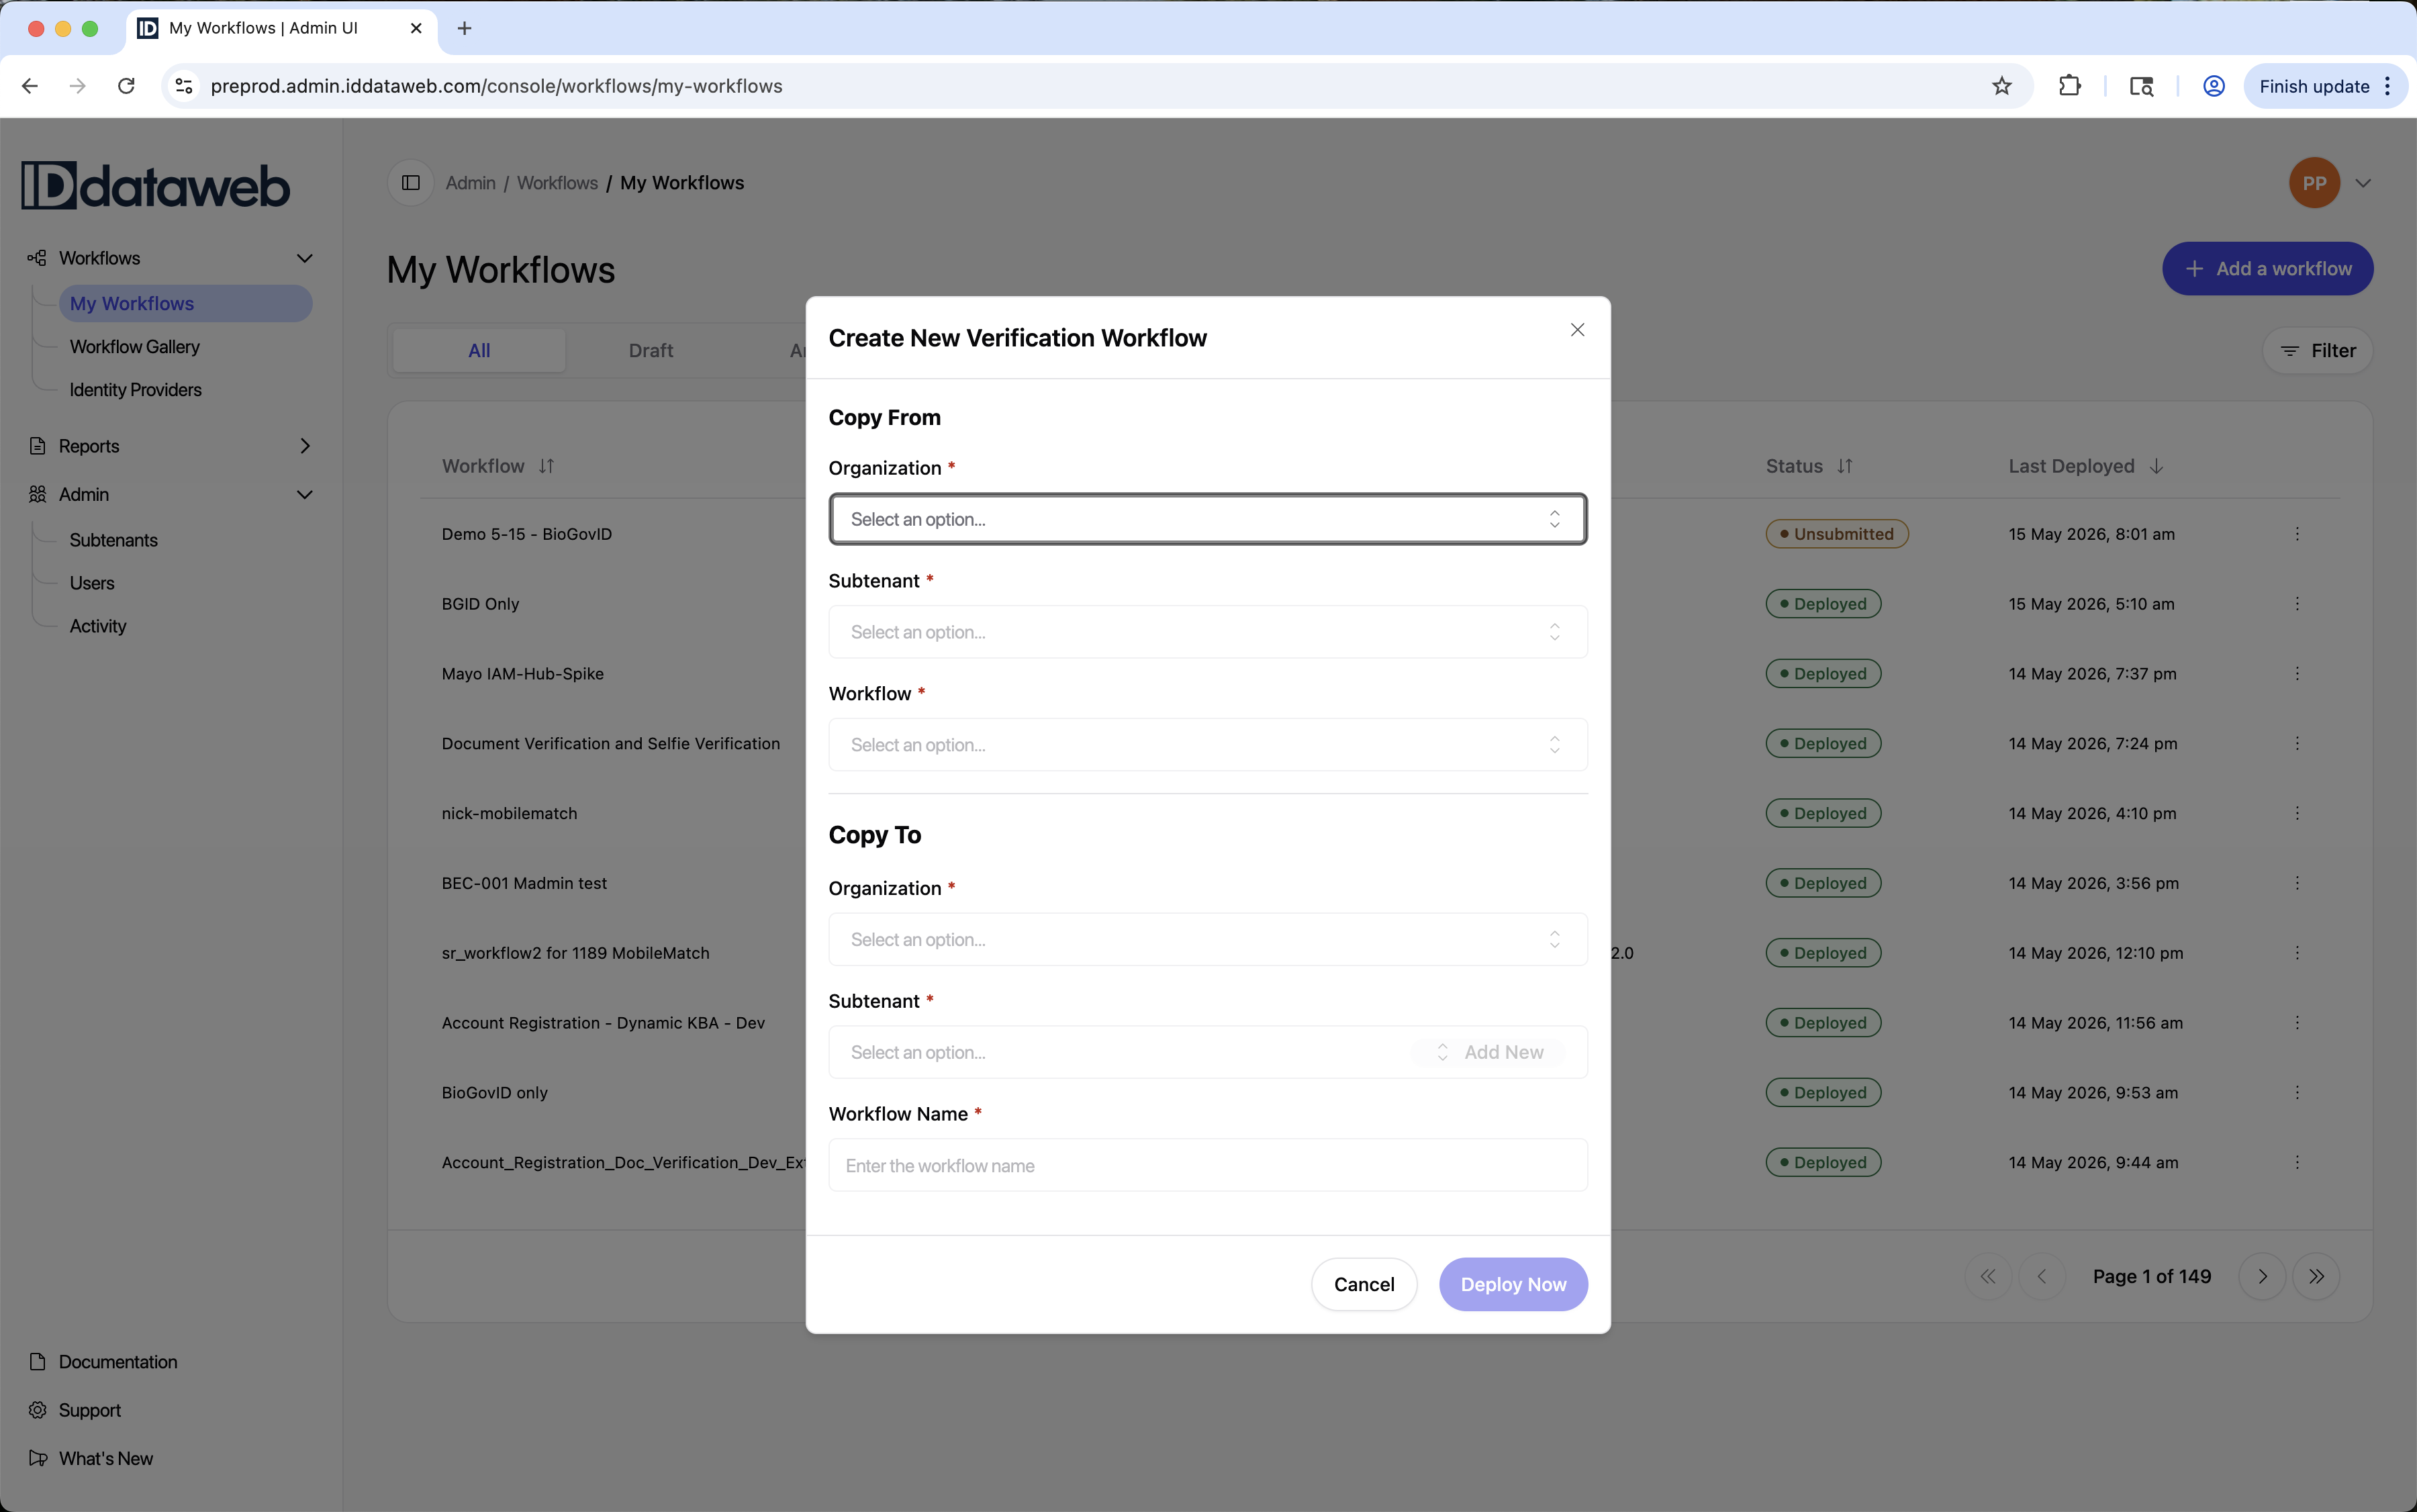
Lastly, you can also create a new workflow by duplicating an existing one. From "+ Add a workflow" select "Copy", then fill in Organization, Subtenant, Workflow for the original workflow and your new copy.
Updated 5 months ago