

Customize Workflows
How to extend gallery workflows with additional steps and checkers.
The Three Layers
Every verification experience is built from three layers:
| Layer | What it is | Example |
|---|---|---|
| Workflow | The top-level sequence — defines what the user goes through, in what order, with what routing logic | Identity Verification, NIST IAL2, Continuous Re-Authentication |
| Step | One user-facing interaction — a single form, challenge, or capture session. Each step has its own API key and produces a policy decision | PII Validation, SMS Link, Government ID and Selfie Match |
| Checker | A capability attached to a step — a data source or signal that evaluates evidence and returns assertions | Phone Registration Risk, Authoritative Database, Document & Selfie Match |
A workflow sequences steps. A step runs one or more checkers. Checkers return assertions. Policy rules evaluate assertions to produce decisions.
Start with the Gallery
The Workflow Gallery contains pre-built workflows designed to work out of the box for the most common verification use cases. They are the right starting point for almost every deployment.
Each gallery workflow includes a pre-configured step sequence, recommended policy rules, and pre-production test credentials — ready to deploy and test immediately.
Deploy first, customize later. Run the gallery workflow end-to-end in pre-production before making any changes. This confirms the baseline works and gives you a reference point for evaluating what each customization changes.
When to Customize
Gallery workflows cover the most common paths well. Customization is appropriate when you need to:
- Add a verification signal to an existing step without adding user friction (e.g., SIM Swap detection on the PII Validation step)
- Add a step for a subset of users (e.g., Government ID and Selfie Match as a fallback for users who cannot be corroborated via phone)
- Restrict what inputs a step accepts (e.g., passport-only on a Government ID and Selfie Match step)
- Adjust the risk thresholds that determine which path a user takes
If a gallery workflow already covers your use case, deploy it as-is. Customization adds configuration complexity — only add what you need.
Adding a Step
Steps are added in the Workflow Builder in the Admin Console.
-
Open the Workflow Builder and select the workflow to modify
-
Click Add Step at the position in the sequence where the new step should appear
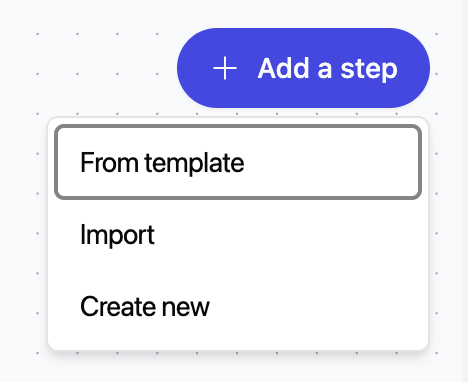
- "From template" to find your ideal, pre-configured step to add to your workflow, from the step template gallery, most of which are comprised of best practice combinations of Checkers
- "Import" to import a step file that you've exported from another workflow – to obtain a step file, a user can export an existing step within their organization by clicking the three dot menu icon on a step in the Builder canvas -> Export Step -> drag that file to the import modal
-
- "Create new" if none of the templates suit your needs, your ID Dataweb team can create one for you from scratch
- Not all of our checkers have made it into step templates. You can incorporate any checker into a step by using "Create new" or by adding them to an existing step during step configuration
-
Configure step-level options (document types accepted, delivery method, etc.) - see Configure Steps
-
A new API key is issued for the new step, which you'll need to deploy - see Deployment
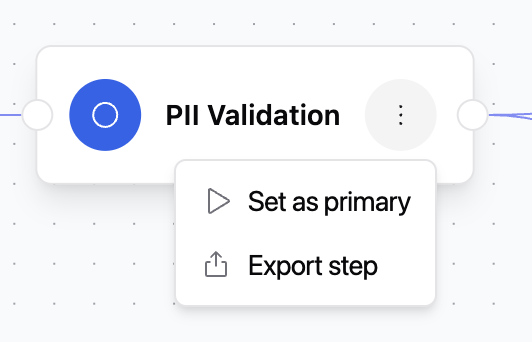
Each step you add introduces a new user interaction and a new API key. For Gateway integrations, the hosted UI handles everything automatically. For API integrations, your application will need to handle the additional step — see Integration: Custom Workflow Behavior.
Adding a Checker to a Step
Checkers add verification capabilities to an existing step without adding a new user interaction. The user sees the same form — additional signals are evaluated in the background.
- Open the Step configuration in the Workflow Builder
- Under Checkers, select Add Checker
- Choose the checker to add
- Configure any checker-level options (vendor, required signals, etc.)
- Save and deploy
Not all checkers are compatible with all step types. The Workflow Builder shows only compatible options for the selected step.
Common Customizations
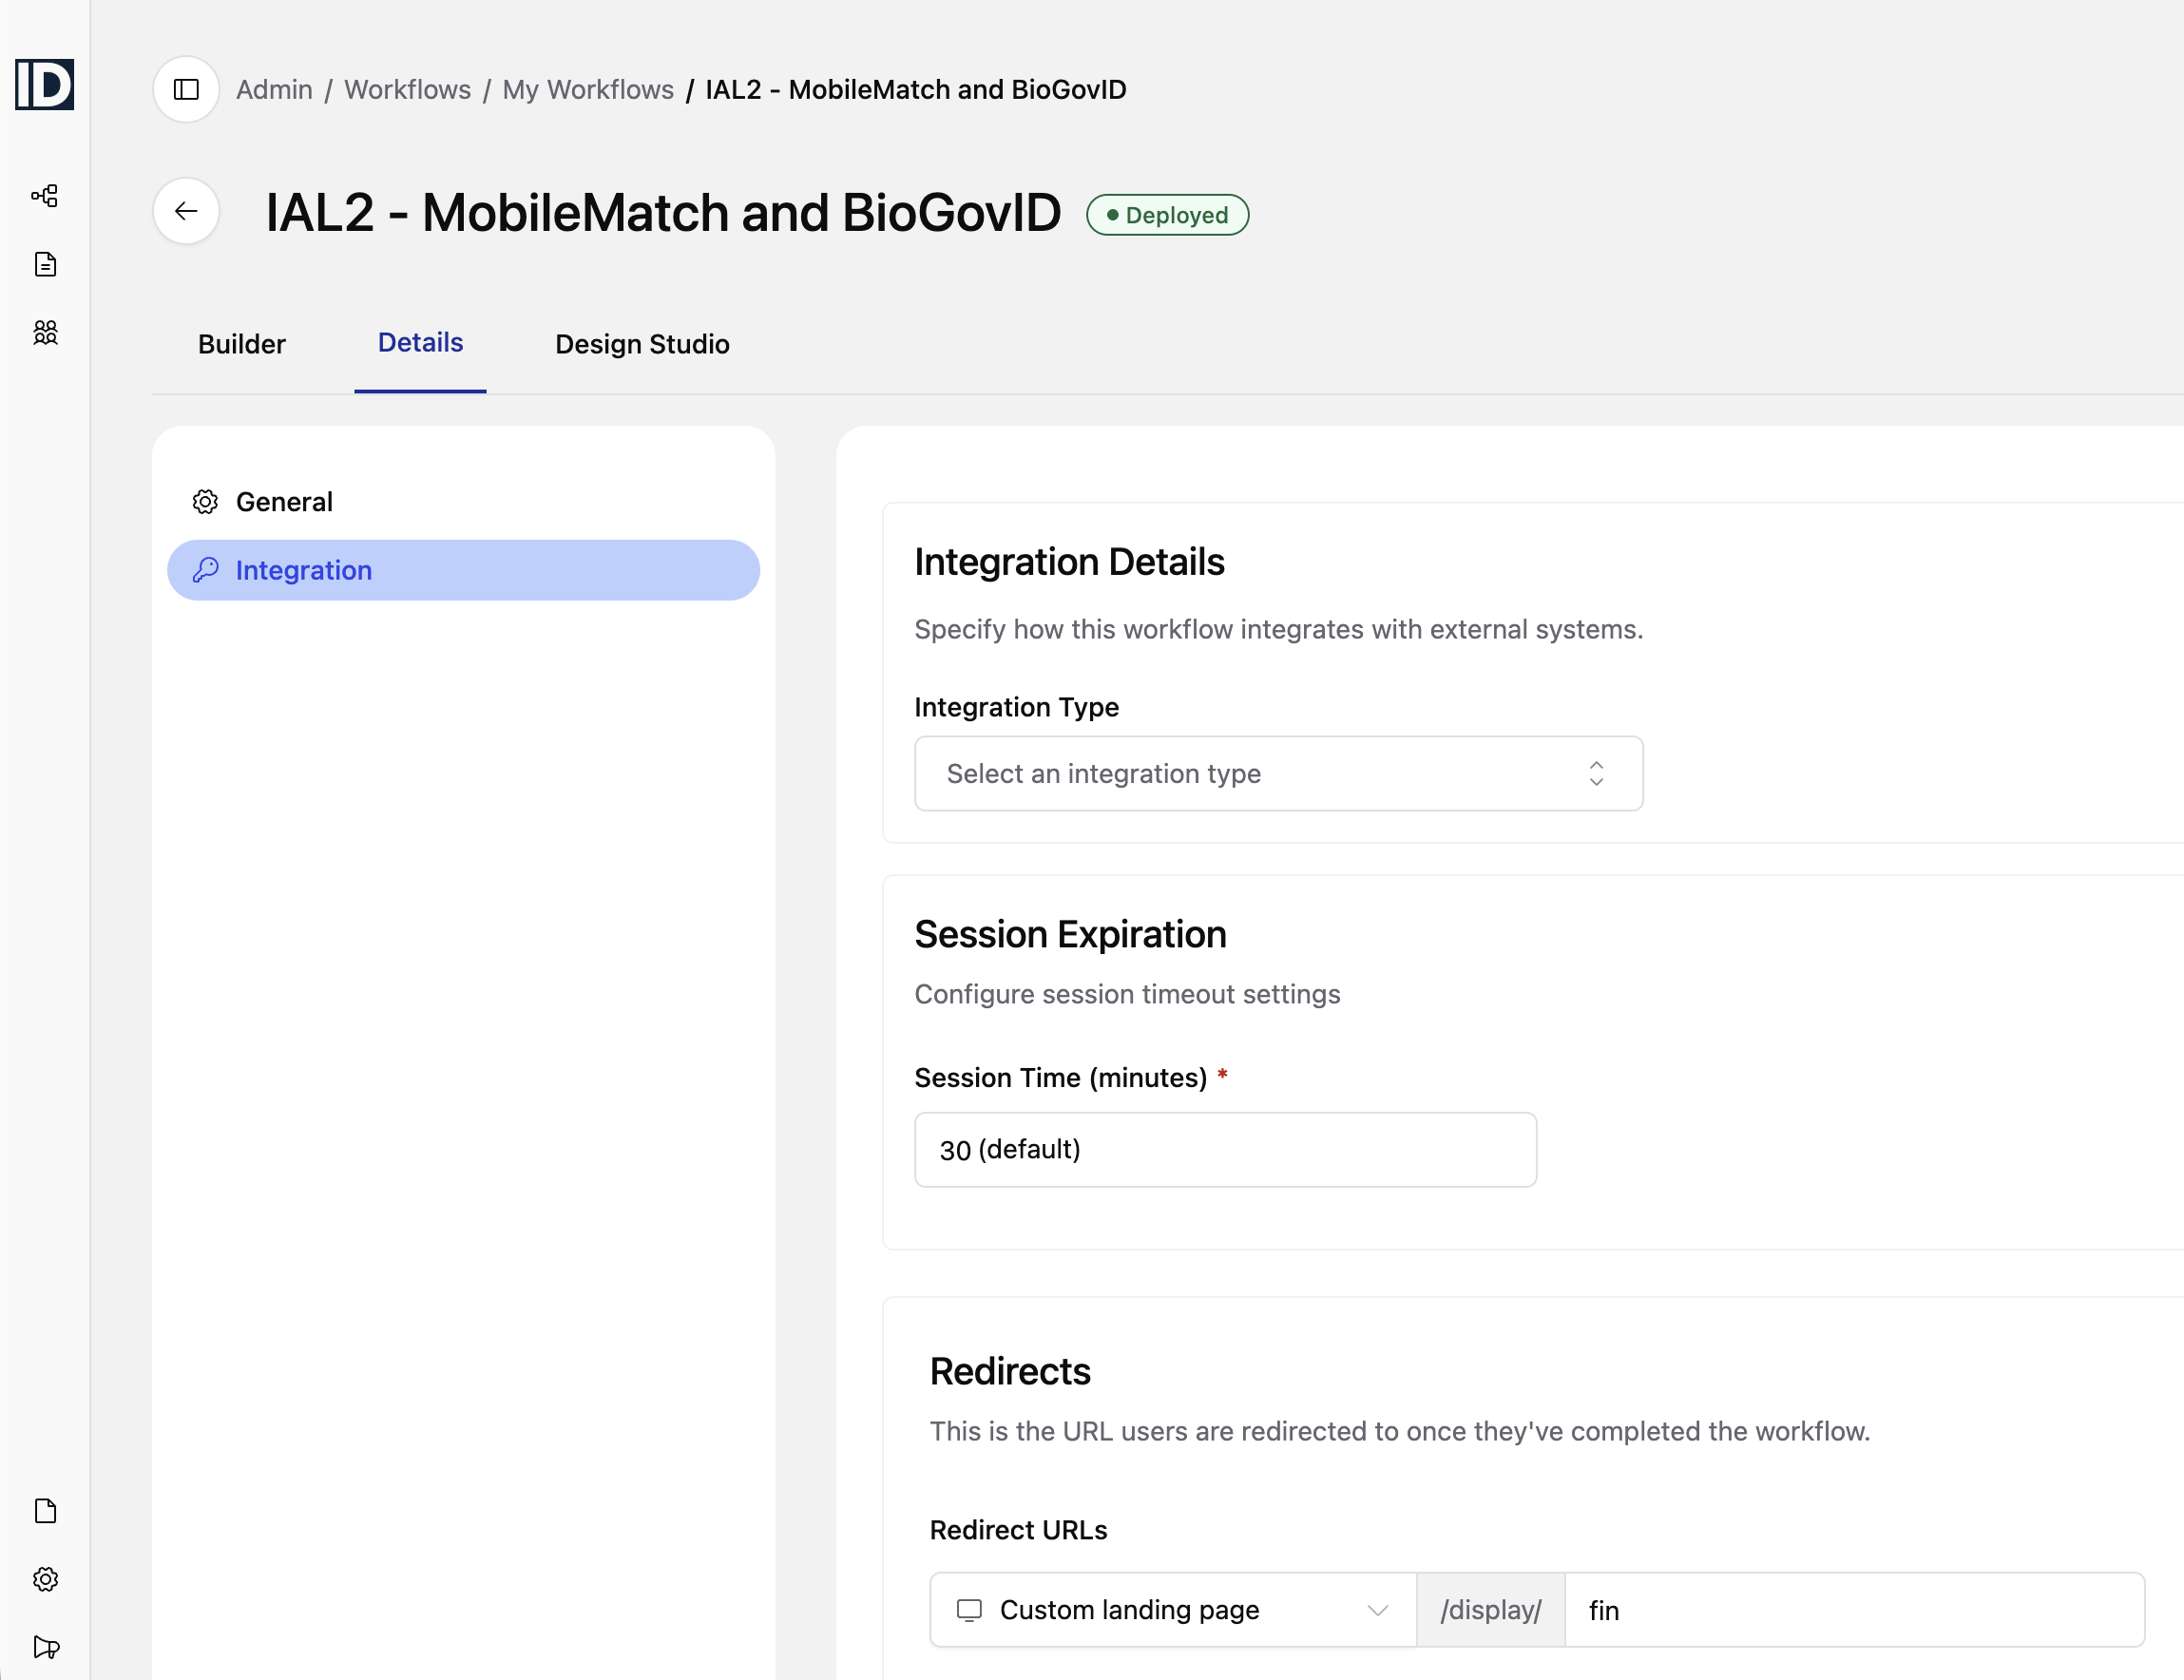
Add A Session Expiration — defines the maximum time allowed to complete a verification workflow after it is initiated; the default expiration period is 30 minutes.
**Enabled under the Details tab of the Workflow Builder
Add A Link Expiration — defines how long a verification link remains valid after it is sent; once the expiration period passes, the link can no longer be used. Note: Not yet available in Admin 2.0, but enabled in Legacy Admin.
Add SIM Swap detection to the PII Validation step — flags recent SIM port events before PII is evaluated. Zero additional user friction; adds a phone security signal to the step.
Add Email Risk to the Session Risk step — filters high-risk or disposable email addresses before the user reaches identity proofing. Zero additional friction.
Add a Government ID and Selfie Match step-up path — routes users who cannot be corroborated via phone to document capture. This is already the default Identity Verification configuration; the pattern can be applied to any workflow where phone-based verification is the primary path.
Restrict Government ID and Selfie Match to passport only — configure the document step to accept only passports. Raises assurance; increases friction for users without a passport.
Enable Trust Device on Continuous Re-Authentication — registers recognized devices on approval; returning users on recognized devices skip SMS Link on future sessions.
Related Resources
→ Workflows, Steps & Checkers | → Workflow Gallery | → Configure Steps | → Policy Manager | → Integration: Custom Workflow Behavior
Updated 5 months ago