

Workflow Configuration
Configuring workflow-level settings, branding, and access keys.
Workflow Details: Configuring your workflow
General settings
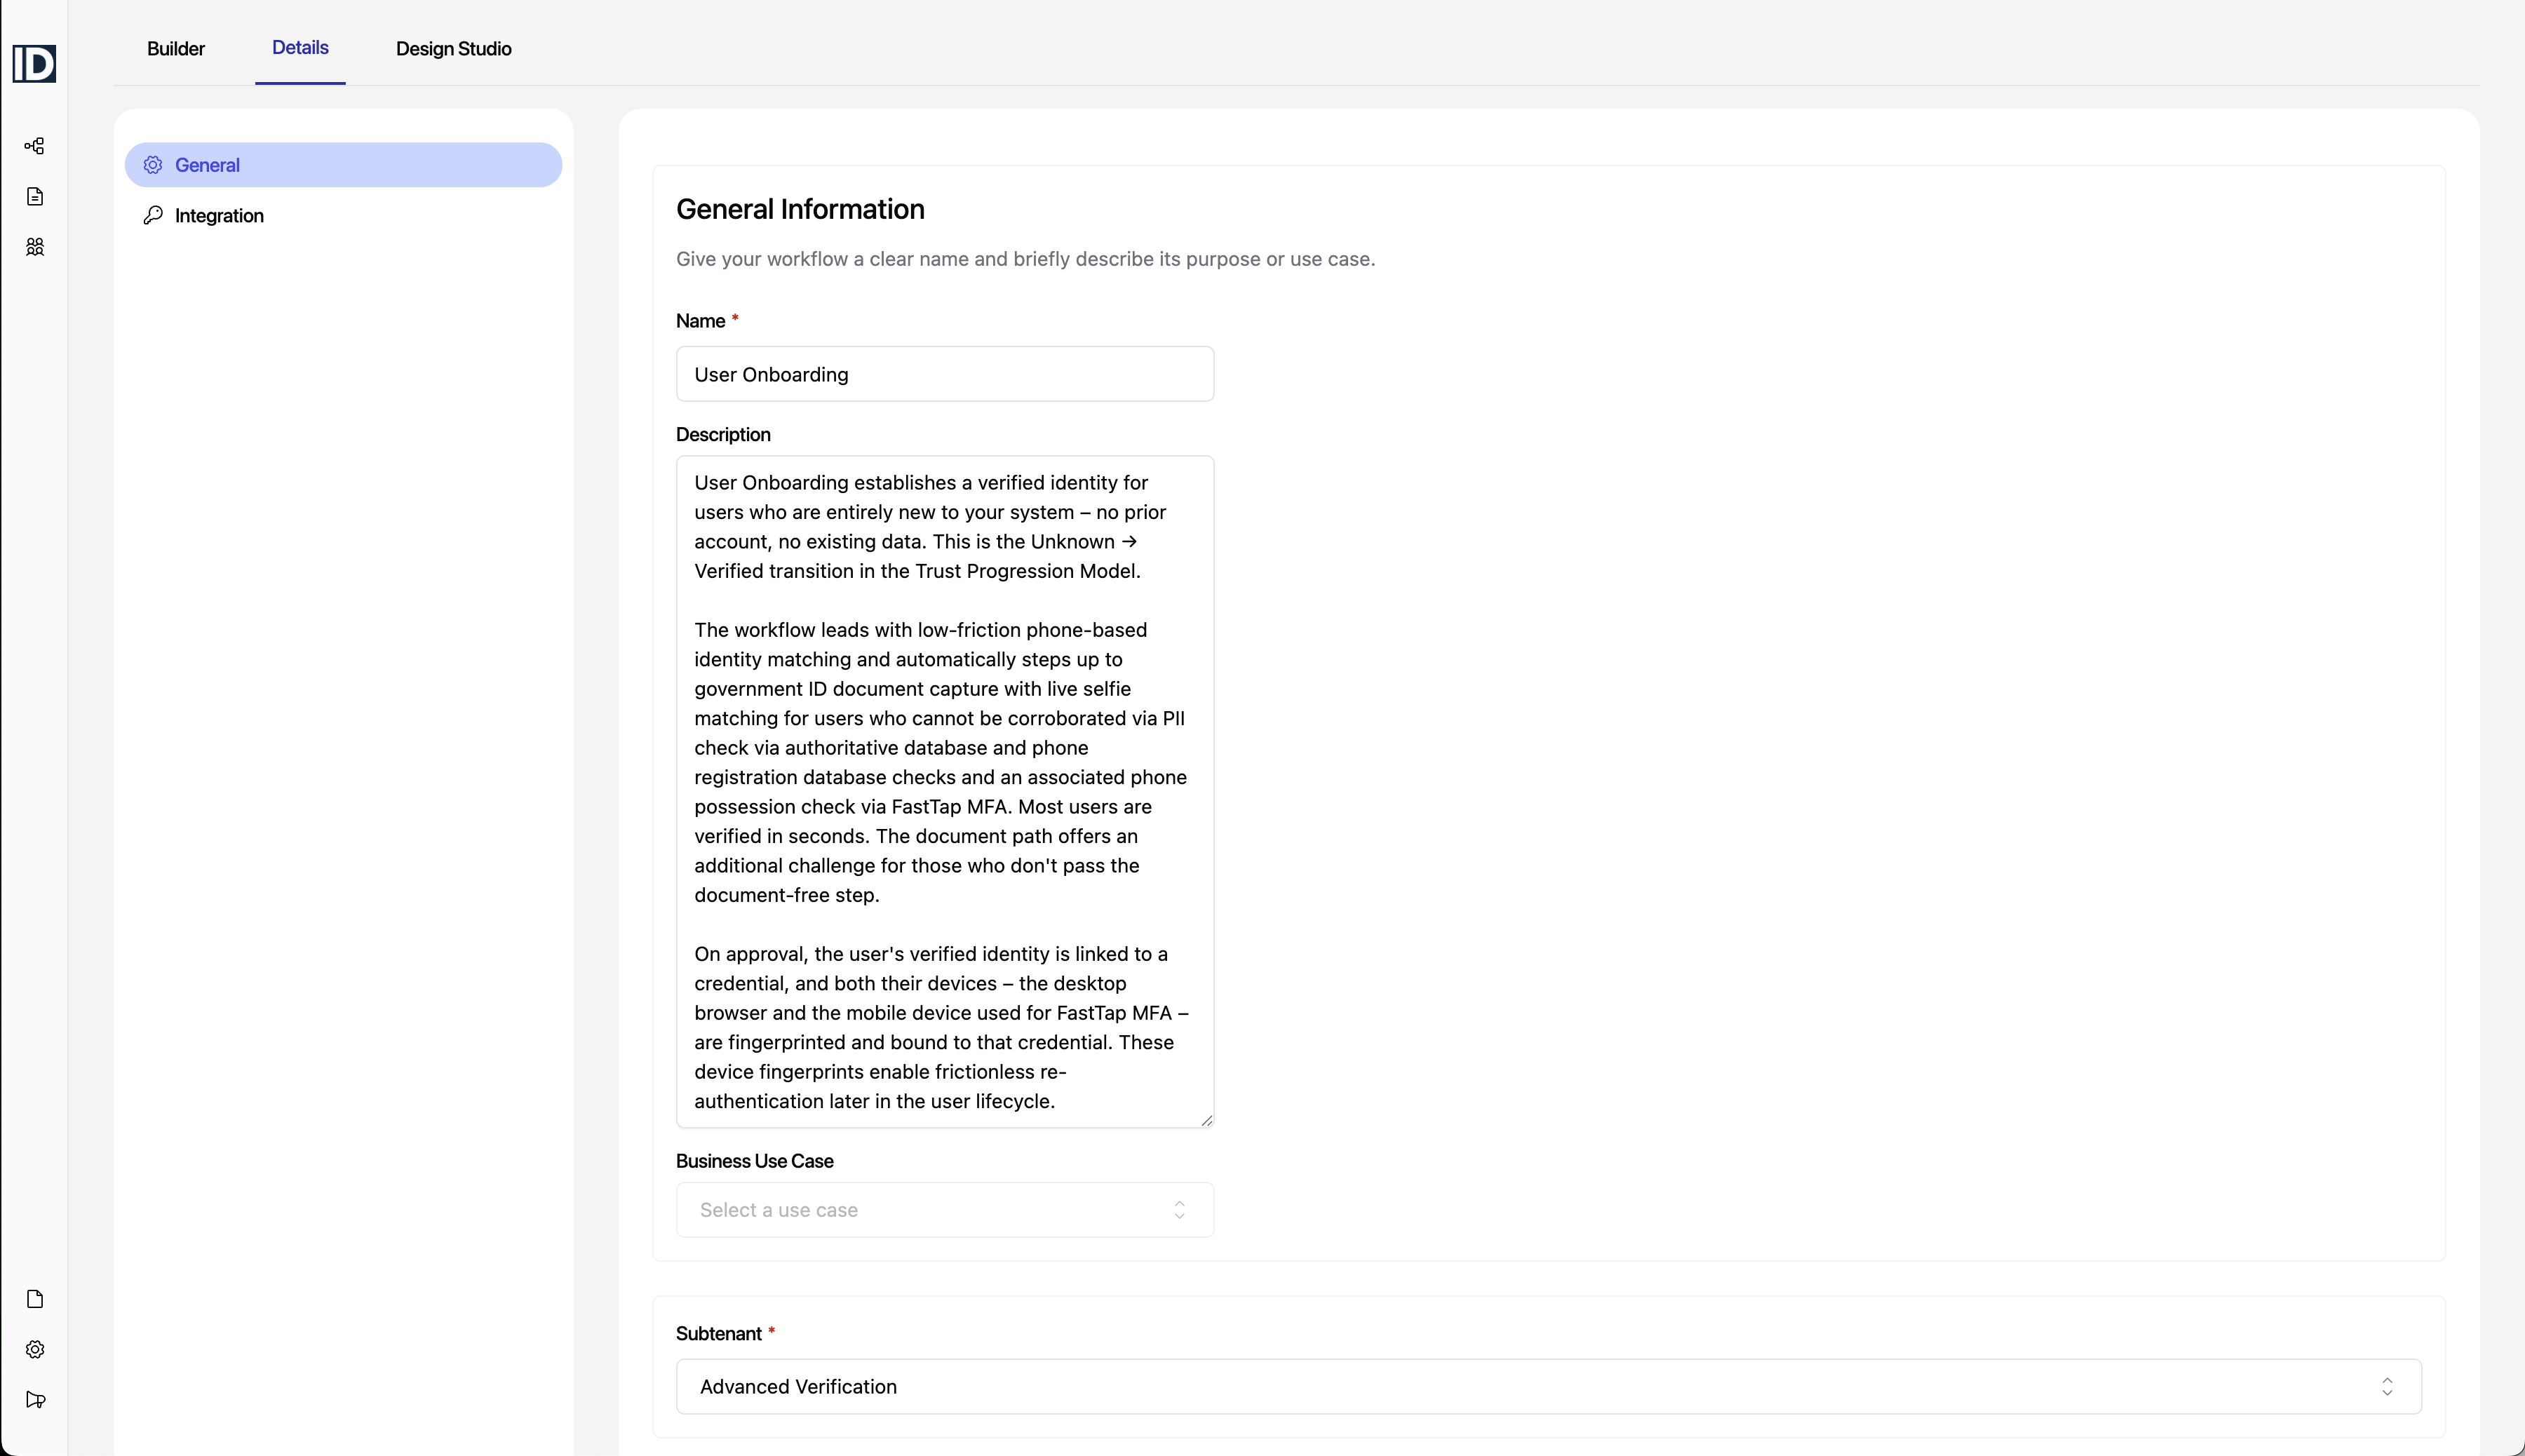
This section is pretty straighforward, providing quick access to the description and subtenant. Subtenant can be changed as needed.
Integration settings
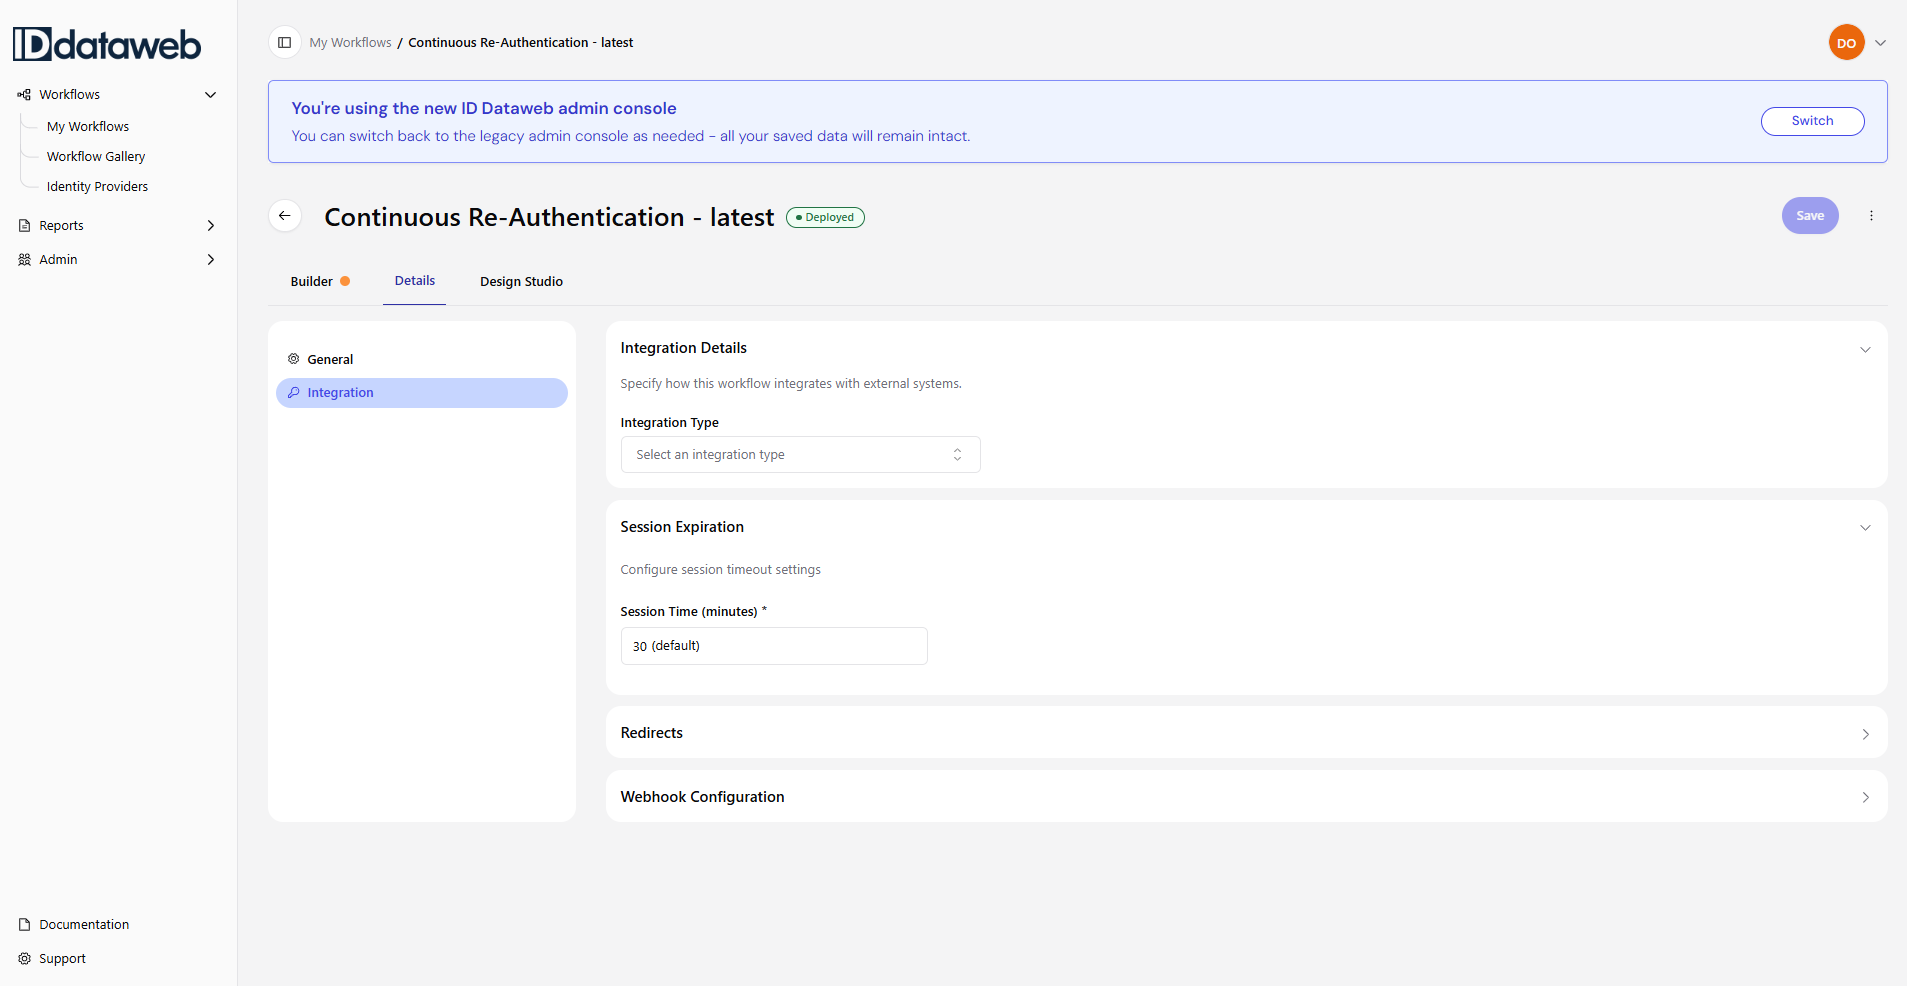
Integration Types
There are two primary ways to integrate a workflow with your application:
- Design Studio (Gateway/OIDC) – uses the hosted verification UI. The end-user experience is rendered by ID Dataweb's platform and can be customized in the Design Studio. This is the fastest path to integration and is also used for agent-initiated verification (generating verification links, starting verification sessions)
- Learn more in the Design Studio section below
- API Integration – uses the API to utilize the workflow into your own UI. You control the front-end experience entirely
Some customers use a hybrid approach – Design Studio for certain flows and API integration for others.
Information on selecting the best integration options for your workflows can be found here.
Session Expiration
Session expiration is a critical security setting controls how long a user has to complete the verification flow once started. We recommend a maximum of 30 minutes, with shorter expiration limits for higher risk use cases.
This is a separate setting from link expiration, which dictates how long a verification link remains valid to start a new session before it expires. Link expiration is controlled in legacy admin for the time being, but will be incorporated into Admin 2.0 in the near future.
Redirect URLs
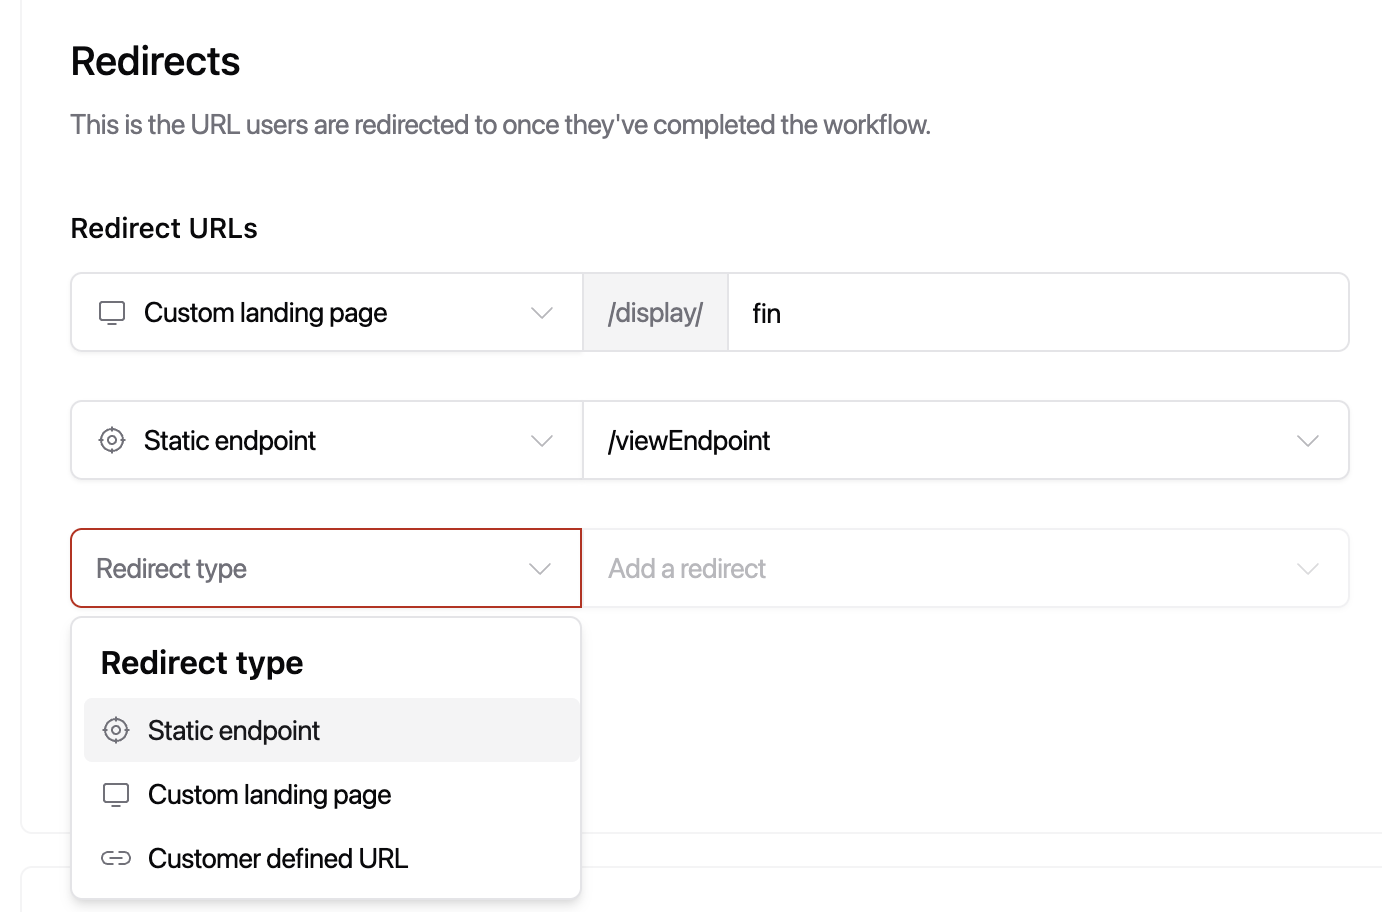
Redirect URLs determine where the end user is sent after completing (or abandoning) a verification flow. These URLs are configured at the workflow level, and can be static endpoints, custom landing pages
Using the Design Studio for Gateway OIDC integrations
The Design Studio is the visual editor for customizing the end-user-facing verification experience. Workflows that will be integrated strictly via API do not need anything configured in the Design Studio tab.
>
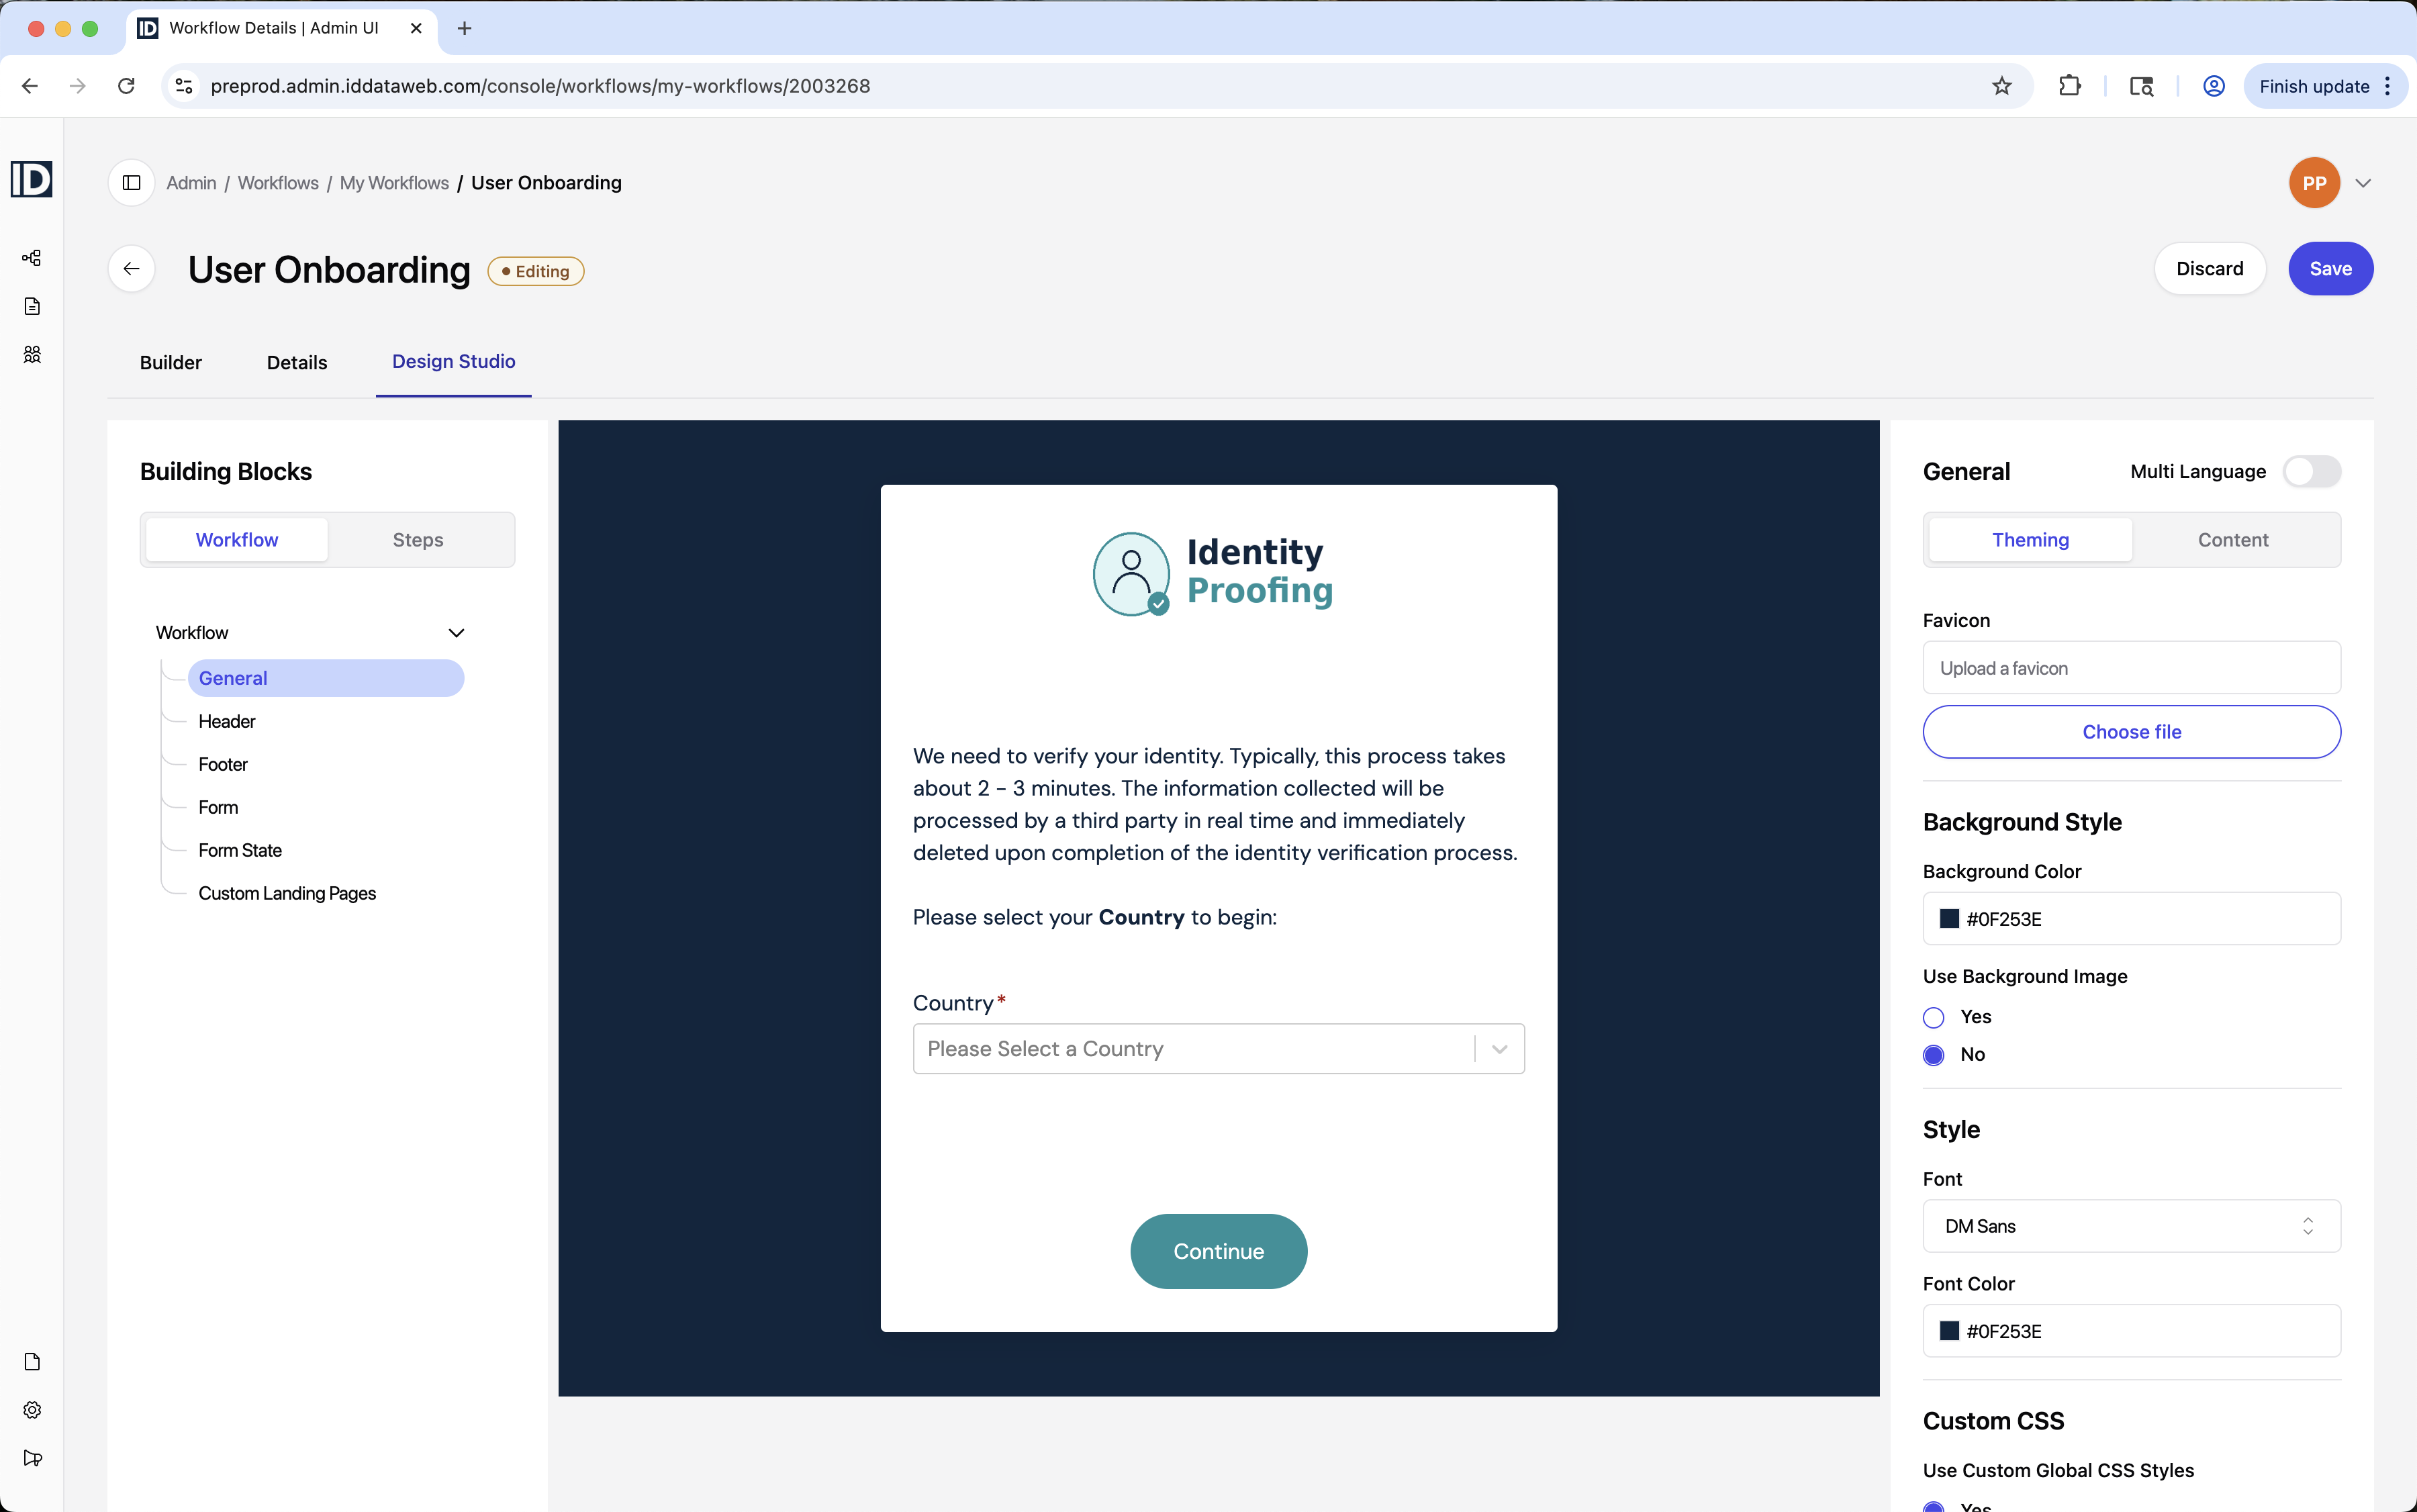
The Design Studio has a three-panel layout:
- Left panel – Building Blocks: A navigation tree for selecting which element you want to customize. There are two top-level categories:
- Workflow – Theming and content that persist throughout step
- Steps – Theming and content specific to a single step
- Center panel – Live Preview: A real-time preview of the end-user interface, showing how your theming changes look as you make them
- Right panel – Configuration: Settings for the selected building block, organized into Theming (visual styling) and Content (text and functional options, such as translation) sub-tabs
Editing, saving, and deploying changes
When you begin making changes to a workflow, it enters an Editing state – shown as a green "Editing" badge next to the workflow name. Changes are held in your local session and are not saved to the database until you explicitly act.
Your options depend on the workflow's current state:
- "Save" / "Discard" – appear when you're editing a deployed workflow. When you click "Save" you'll be prompted to either deploy immediately or save as an unsubmitted change. Discard reverts all unsaved changes.
- Deploy / Cancel – appear when you're working on an unsubmitted or draft workflow. Deploy pushes the configuration to production. Cancel exits without saving. (CONFIRM WHEN THIS DISPLAYS - NOT SEEING IT)
This editing model replaces the legacy Change Request workflow – you no longer need to "Start a Change Request" before making edits. You can start editing immediately, and the save/deploy prompt handles the rest.
Updated about 1 month ago