Device Profiling
Overview
This guide will walk you through how to conduct Passive Risk Analysis through Device Profiling with AXN Manage.
📘 Prerequisites
Download the Device Profiling Test Application
Download the Device Profiling Postman Project
Using Device Profiling Test Application
Opening the Test Application will profile your device using JavaScript:
<script
        src="https://api.preprod.iddataweb.com/v1/profile/tmx/tags.js?pageid=3&profilingdomain=content.maxconnector.com&org_id=716kkpe1&session_id=12345">
</script>
and generate your Session ID:
Your device was profiled successfully. Your session ID is: 5fb9f50f-7068-468c-a8d2-f0f90581dd0a
Users must remain on this page for 3–5 seconds to allow device profiling to complete.For example, we recommend that if there is a login or continue button, you should disable it until the script has finished running which on average takes around 3-5 seconds (code sample below).
<html lang="en">
  <head>
    <script>

    // Generate a Random Session ID.
    var sessionID = crypto.randomUUID()

    // Create an HTML script element.
    var profiler = document.createElement("script");

    // Set the script's source equal to the Threat Metrix endpoint + your Session ID.
        profiler.src = "https://api.iddataweb.com/v1/profile/tmx/tags.js?pageid=3&profilingdomain=content.maxconnector.com&org_id=716kkpe1&session_id=" + sessionID;
    // Append the script to the current web page.
    document.getElementsByTagName("head")[0].appendChild(profiler);

    // Enable your login button after 5 seconds.
    setInterval(() => {
      document.getElementById('login-button').disabled = false;
      document.getElementById('session-id').innerHTML = "Your Session ID is: " + '<b>' + sessionID + '</b>';
    }, 5000);

    </script>
  </head>
  <body>
    <p id="session-id">Your Session ID is: <b>...loading</b></p>
    <button style="width: 250px; height: 30px;" id="login-button" disabled>Login</button>
  </body>
</html>Session ID identifies your profiling session.
It is also used to obtain your device profiling results. It can be any length, but it must be a unique value.
Keep this Session ID on-hand. It will be used in the following step.
Profiling Complete Function
An alternative and safer approach is to use the profilingComplete function. This function is automatically called when the profiling step is complete and allows you to prevent the user from proceeding until the device is fully profiled. Specifically, you can disable the login button or prevent the /slverify API call from firing until the function completes. Here is a code sample:
// Implement a function to reenable the disabled button and call /slverify
function tmx_profiling_complete(session_id)
{
    console.log("tmx_profiling_complete called with session_id "+session_id);

    // Make login button clickable
	  document.getElementById('login-button').disabled = false;

  	// Call /slverify
const url = 'https://api.preprod.iddataweb.com/v1/slverify';
const data = {
   "credential": "[email protected]",
   "apikey": "your-threatmetrix-apikey",
   "userAttributes": [
      {
         "attributeType": "APSessionID",
         "values": {
            "apSessionId": "your-unique-session-id"
         }
      }
   ]
};

const token = 'YOUR_BEARER_TOKEN_HERE'; // Replace with your actual bearer token

fetch(url, {
   method: 'POST',
   headers: {
      'Content-Type': 'application/json',
      'Authorization': `Bearer ${token}`
   },
   body: JSON.stringify(data)
})
.then(response => response.json())
.then(data => {
   console.log('Success:', data);
})
.catch((error) => {
   console.error('Error:', error);
});

}
Using the Device Profiling Postman Project
Open the Postman Project. Then, generate an access token using the first request in the collection: Get Token.
This token will allow you to make requests to the AXN Verify API.
To generate an Access Token, use any API Key/Secret pair from ID DataWeb Admin > Workflows.
Place them in Postman under Get Token > Authorization, as Username and Password.
Your response body will contain the property: access_token. This token ensures that your next request is authenticated.

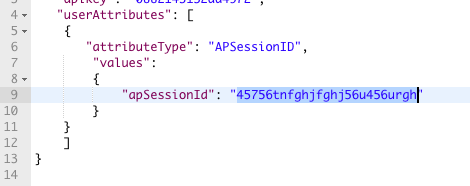
Grab the Session ID you created with your Test Application, and add it to the body of the next request, Get Score, under apSessionId.

Use the Bearer token obtained from the previous step to authenticate your request.
Click SEND, and within milliseconds, you'll receive the results from your Session.
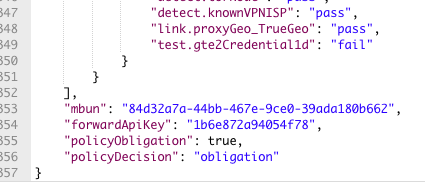
Scroll further, and you'll find the property, policyDecision.
This value expresses a decision (should the transaction proceed, or halt) made from assessing the information gathered from running your Test Application.
If your Device or User Activity was found to be of high-risk (fraud), this output would inform you of any fraudulent activity found, and the transaction (session) would be prevented from proceeding further.

Expected Output
 {
        "apikey": "",
        "userAttributes": [
          {
            "attributeType": "Country",
            "values": {
              "country": "US"
            },
            "dateCreated": "10/21/2025 15:34:22 UTC"
          }
        ],
        "acquiredAttributes": [
          {
            "attributeType": "TrueIPLineSpeed",
            "values": {
              "trueIPLineSpeed": "med"
            },
            "dateCreated": "10/21/2025 15:34:23 UTC"
          },
          {
            "attributeType": "OperatingSystem",
            "values": {
              "operatingSystem": ""
            },
            "dateCreated": "10/21/2025 15:34:23 UTC"
          },
          {
            "attributeType": "TrueIP",
            "values": {
              "trueIP": "35.125.235.10"
            },
            "dateCreated": "10/21/2025 15:34:23 UTC"
          },
          {
            "attributeType": "Platform",
            "values": {
              "platform": "browser_computer"
            },
            "dateCreated": "10/21/2025 15:34:23 UTC"
          },
          {
            "attributeType": "TrueIPLatitude",
            "values": {
              "trueIPLatitude": "23.49020"
            },
            "dateCreated": "10/21/2025 15:34:23 UTC"
          },
          {
            "attributeType": "TrueIPCity",
            "values": {
              "trueIPCity": ""
            },
            "dateCreated": "10/21/2025 15:34:23 UTC"
          },
          {
            "attributeType": "OperatingSystemVersion",
            "values": {
              "operatingSystemVersion": "11.2.4"
            },
            "dateCreated": "10/21/2025 15:34:23 UTC"
          },
          {
            "attributeType": "BiometricAnomalyScore",
            "values": {
              "biometricAnomalyScore": "Not Found"
            },
            "dateCreated": "10/21/2025 15:34:23 UTC"
          },
          {
            "attributeType": "BiometricReasonCode",
            "values": {
              "biometricReasonCode": "possible bot"
            },
            "dateCreated": "10/21/2025 15:34:23 UTC"
          },
          {
            "attributeType": "SubmissionTimestamp",
            "values": {
              "Timestamp": "21/10/2025 15:34:17"
            },
            "dateCreated": "10/21/2025 15:34:22 UTC"
          },
          {
            "attributeType": "WorkflowTransactionStageAttempt",
            "values": {
              "Count": "1"
            },
            "dateCreated": "10/21/2025 15:34:22 UTC"
          },
          {
            "attributeType": "ExactIDIPPersonaAgeMonths",
            "values": {
              "exactIDIPPersonaAge": "0"
            },
            "dateCreated": "10/21/2025 15:34:23 UTC"
          },
          {
            "attributeType": "DigitalIDConfidence",
            "values": {
              "digitalIDConfidence": "6202"
            },
            "dateCreated": "10/21/2025 15:34:23 UTC"
          },
          {
            "attributeType": "HTMLLocationLongitude",
            "values": {
              "htmlLocationLongitude": "Not Found"
            },
            "dateCreated": "10/21/2025 15:34:23 UTC"
          },
          {
            "attributeType": "SocialEngineeringScore",
            "values": {
              "socialEngineeringScore": "Not Found"
            },
            "dateCreated": "10/21/2025 15:34:23 UTC"
          },
          {
            "attributeType": "TrueIPLongitude",
            "values": {
              "trueIPLongitude": "-25.33284"
            },
            "dateCreated": "10/21/2025 15:34:23 UTC"
          },
          {
            "attributeType": "TMXScore",
            "values": {
              "tmxScore": "12"
            },
            "dateCreated": "10/21/2025 15:34:23 UTC"
          },
          {
            "attributeType": "BiometricBotScore",
            "values": {
              "biometricBotScore": "690.00"
            },
            "dateCreated": "10/21/2025 15:34:23 UTC"
          },
          {
            "attributeType": "HTMLLocationLatitude",
            "values": {
              "htmlLocationLatitude": "Not Found"
            },
            "dateCreated": "10/21/2025 15:34:23 UTC"
          },
          {
            "attributeType": "FuzzyDeviceID",
            "values": {
              "fuzzyDeviceID": ""
            },
            "dateCreated": "10/21/2025 15:34:23 UTC"
          },
          {
            "attributeType": "BiometricAssessmentScore",
            "values": {
              "biometricAssessmentScore": "123.11"
            },
            "dateCreated": "10/21/2025 15:34:23 UTC"
          },
          {
            "attributeType": "TrueIPGeoCountry",
            "values": {
              "trueIPGeoCountry": "US"
            },
            "dateCreated": "10/21/2025 15:34:23 UTC"
          },
          {
            "attributeType": "HoneypotFingerprintMatch",
            "values": {
              "honeypotFingerprintMatch": "Not Found"
            },
            "dateCreated": "10/21/2025 15:34:23 UTC"
          },
          {
            "attributeType": "BrowserSpoofReason",
            "values": {
              "browserSpoofReason": "audio_context"
            },
            "dateCreated": "10/21/2025 15:34:23 UTC"
          },
          {
            "attributeType": "ScreenResolution",
            "values": {
              "screenResolution": "1710x1107"
            },
            "dateCreated": "10/21/2025 15:34:23 UTC"
          },
          {
            "attributeType": "DeviceType",
            "values": {
              "deviceType": "desktop"
            },
            "dateCreated": "10/21/2025 15:34:22 UTC"
          },
          {
            "attributeType": "HTMLLocationAccuracy",
            "values": {
              "htmlLocationAccuracy": "Not Found"
            },
            "dateCreated": "10/21/2025 15:34:23 UTC"
          },
          {
            "attributeType": "DigitalID",
            "values": {
              "digitalID": ""
            },
            "dateCreated": "10/21/2025 15:34:23 UTC"
          },
          {
            "attributeType": "WorkflowTransactionStage",
            "values": {
              "Stage": "1"
            },
            "dateCreated": "10/21/2025 15:34:22 UTC"
          },
          {
            "attributeType": "BatteryStatus",
            "values": {
              "batteryStatus": "0.86 unplugged"
            },
            "dateCreated": "10/21/2025 15:34:23 UTC"
          },
          {
            "attributeType": "NEATPersonaAgeMonths",
            "values": {
              "NEATPersonaAge": "0"
            },
            "dateCreated": "10/21/2025 15:34:23 UTC"
          },
          {
            "attributeType": "OperatingSystemAnomaly",
            "values": {
              "operatingSystemAnomaly": "Not Found"
            },
            "dateCreated": "10/21/2025 15:34:23 UTC"
          },
          {
            "attributeType": "TrueIPConnectionType",
            "values": {
              "trueIPConnectionType": "tx"
            },
            "dateCreated": "10/21/2025 15:34:23 UTC"
          },
          {
            "attributeType": "BiometricFraudScore",
            "values": {
              "biometricFraudScore": "357.73"
            },
            "dateCreated": "10/21/2025 15:34:23 UTC"
          },
          {
            "attributeType": "FuzzyDeviceIDConfidence",
            "values": {
              "fuzzyDeviceIDConfidence": "100.00"
            },
            "dateCreated": "10/21/2025 15:34:23 UTC"
          },
          {
            "attributeType": "SmartIDBrowserstringPersonaAgeMonths",
            "values": {
              "smartIDBrowserStringPersonaAge": "0"
            },
            "dateCreated": "10/21/2025 15:34:23 UTC"
          }
        ],
        "preferenceAttributes": [],
        "userAssertionList": [
          {
            "provider": "Threatmetrix",
            "serviceOffering": "Threatmetrix Session Query Low Location Accuracy",
            "dateAsserted": "10/21/2025 15:34:23 UTC",
            "assertions": {
              "blacklist.device": "pass",
              "blacklist.ofacIP": "pass",
              "test.gte3Credential1d": "fail",
              "detect.browserAnomaly": "pass",
              "test.gte5Credential1d": "fail",
              "test.lte3ProxyToday": "pass",
              "test.trustedDevice": "fail",
              "test.lte3CredentialsDevice7d": "pass",
              "test.gte5Device1d": "pass",
              "detect.possibleVPNOrTunnel": "pass",
              "link.timeZone_TrueGeo": "pass",
              "test.gte5CredentialDevice1d": "fail",
              "test.credentialLTE500mi1hr": "pass",
              "test.exactIDAgeGTE7d": "pass",
              "test.trueIPLTE500miInputIP": "pass",
              "detect.vpn": "pass",
              "detect.proxyAnonymous": "pass",
              "test.apSessionIDNotReplay": "pass",
              "detect.jailbreak": "pass",
              "test.expectedLanguage": "pass",
              "blacklist.ip": "pass",
              "link.proxyOrg_TrueOrg": "pass",
              "detect.malware": "pass",
              "test.gte10Credential1d": "pass",
              "detect.torExitNode90d": "pass",
              "detect.mobileTethering": "pass",
              "test.trustedDevice28days": "fail",
              "test.gte20Credential1d": "pass",
              "detect.aggregator": "pass",
              "test.smartIDAgeGTE7d": "pass",
              "detect.proxyOpenTransparent": "pass",
              "detect.unusualActivity": "pass",
              "detect.proxyHidden": "pass",
              "link.proxyISP_TrueISP": "pass",
              "detect.tor": "pass",
              "detect.torNode": "pass",
              "detect.knownVPNISP": "pass",
              "link.proxyGeo_TrueGeo": "pass",
              "test.gte2Credential1d": "fail"
            }
          }
        ],
   "policyDecision": "approve"
}
Understanding the results
The results of this API call provide the full risk score of your device.
For a high-level overview of all the results receivedFor a detailed-look at any_one_ of your result's properties
For more information on_policyDecision_, and how it relates to your application
Next Steps
See Trust Device to learn how to trust your user post-device profiling.
Updated 4 months ago
