Creating Test Users
All verification services have the ability to use the test users Andrew and Andrea Roshell to provide fake data to attribute providers and still get approval decisions. If your testing needs require use of test users other than Andrew or Andrea Roshell, this guide will show you how to make additional users for your organization.
Making New Test User Components
Under the hood, all test users are policy components that check for specified attribute values, such as First Name, Last Name, Date of Birth, Address, etc.
To make a policy component for your test user, log in to the AXN Admin Console and follow these steps:
- Navigate to Policy Components on the left hand side and then select Add Policy Component on the top right hand side of the page.
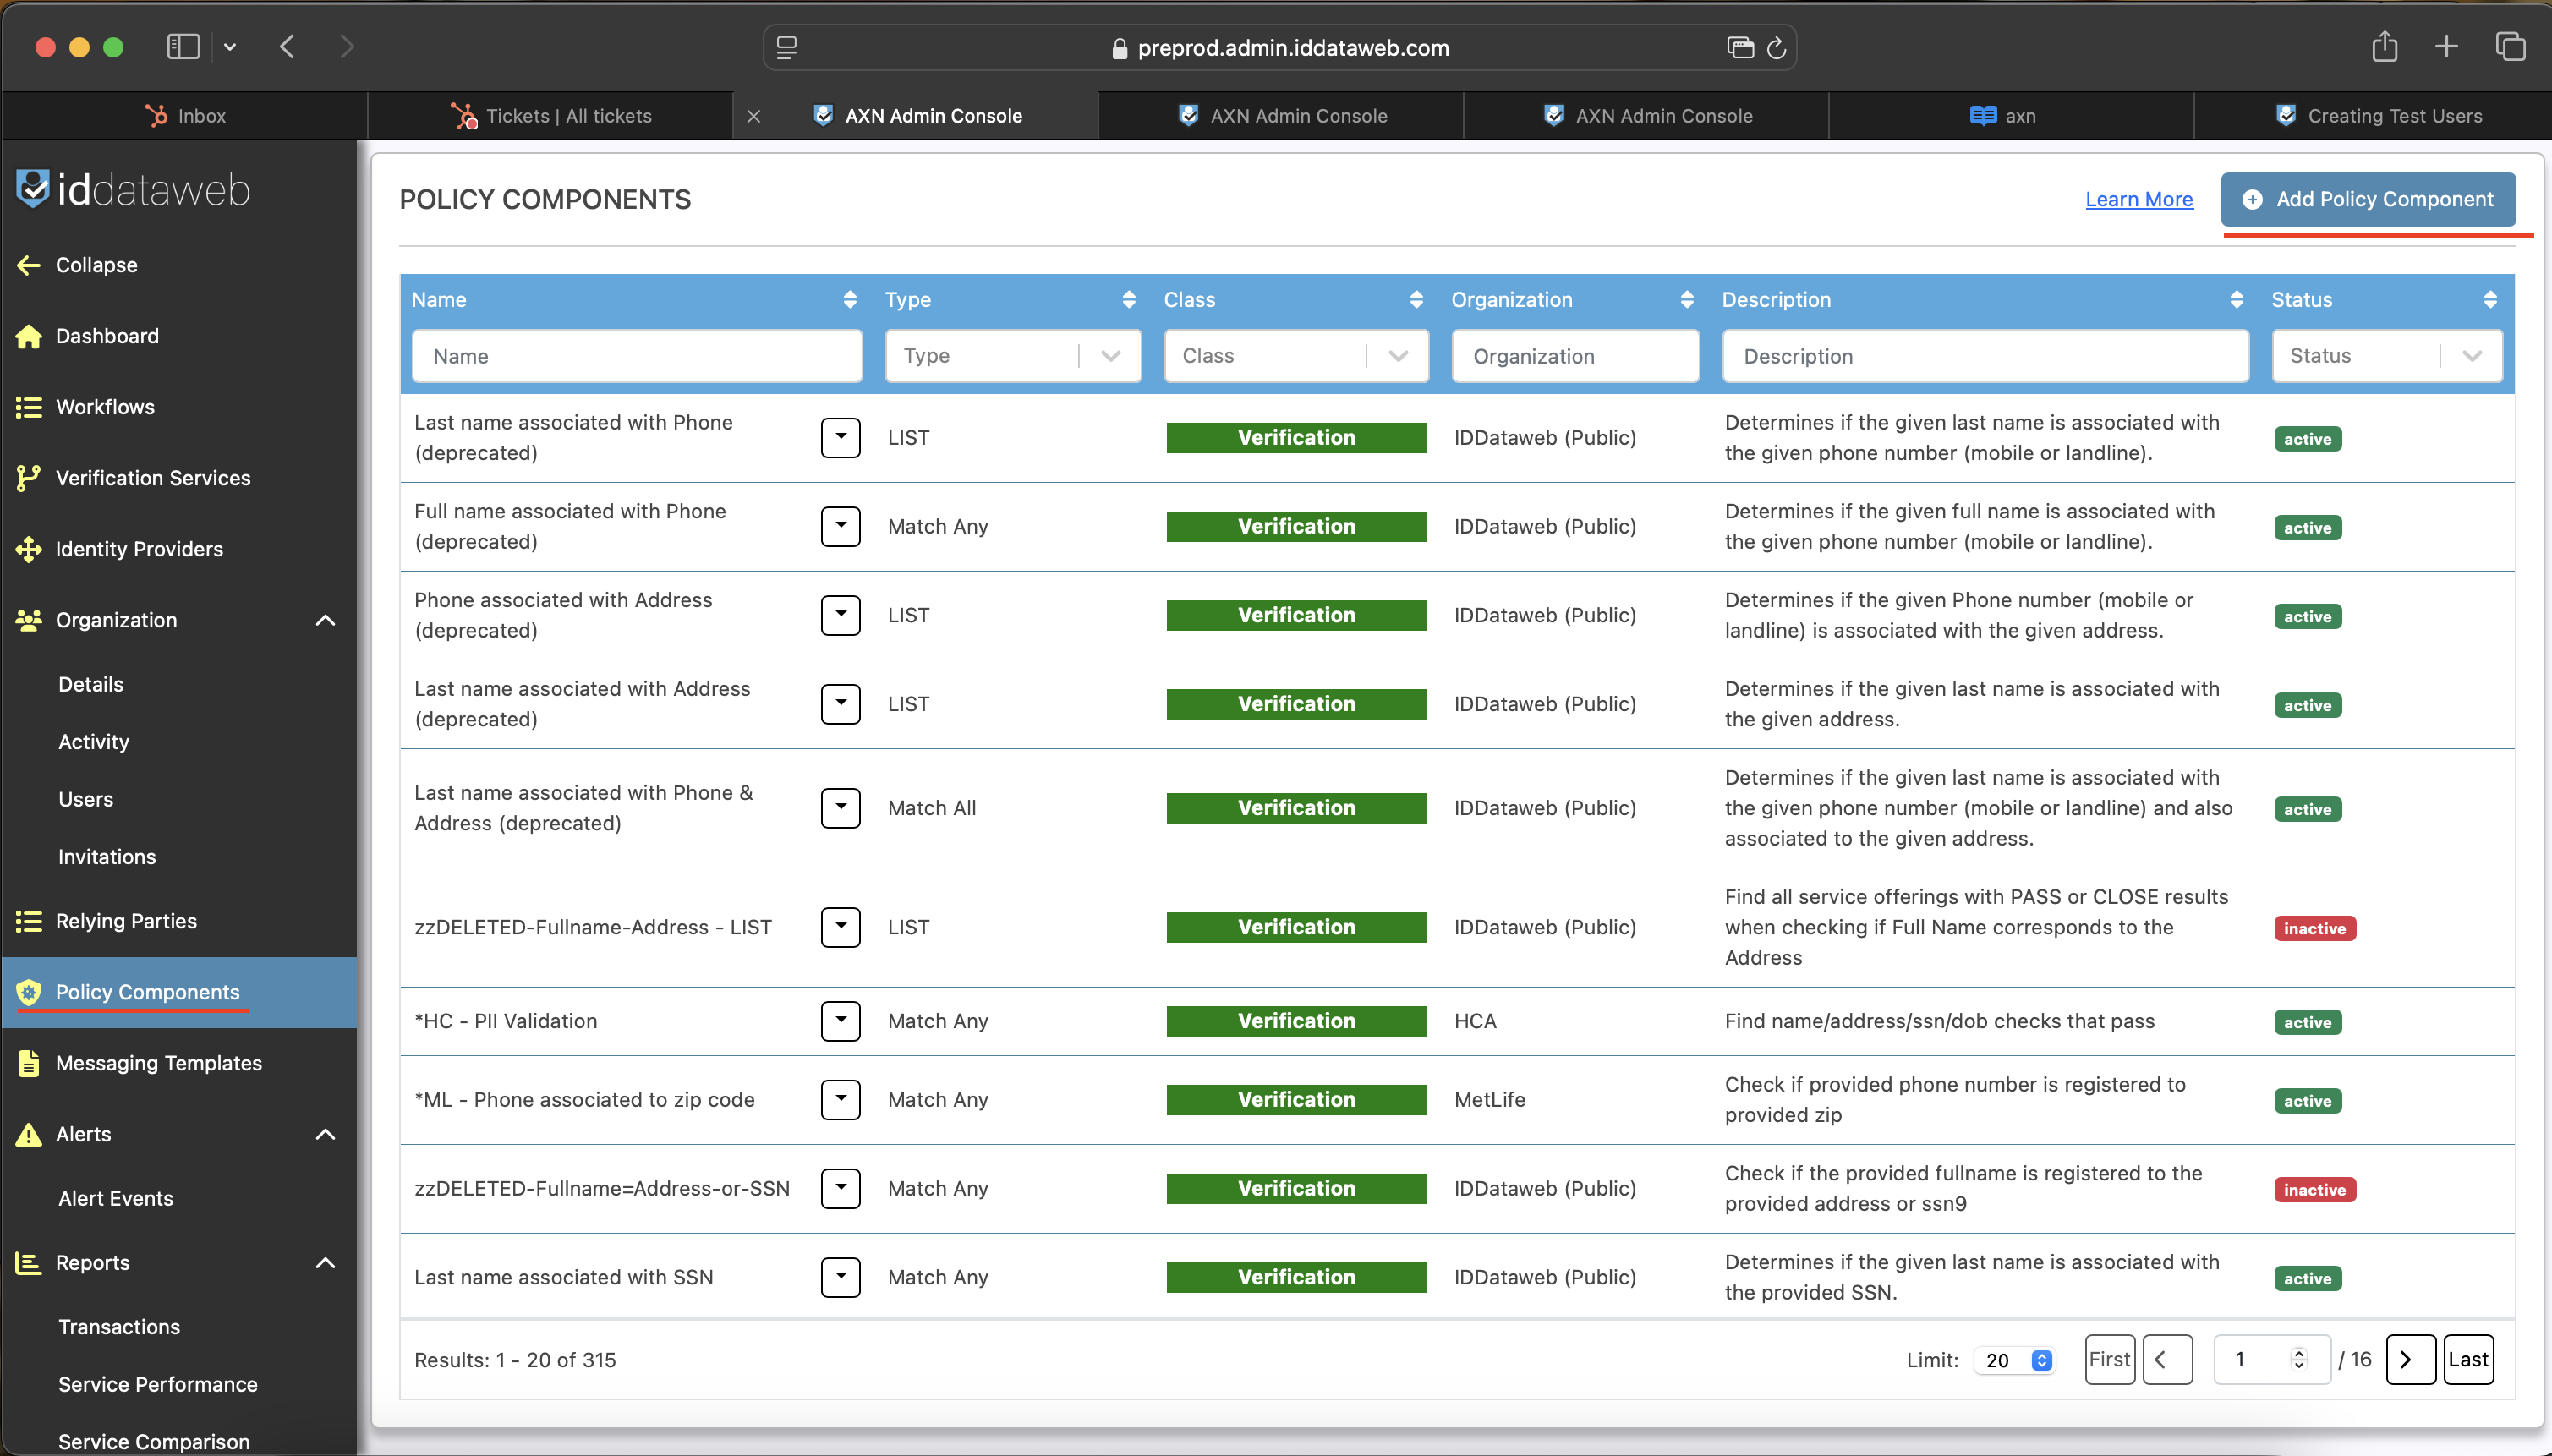
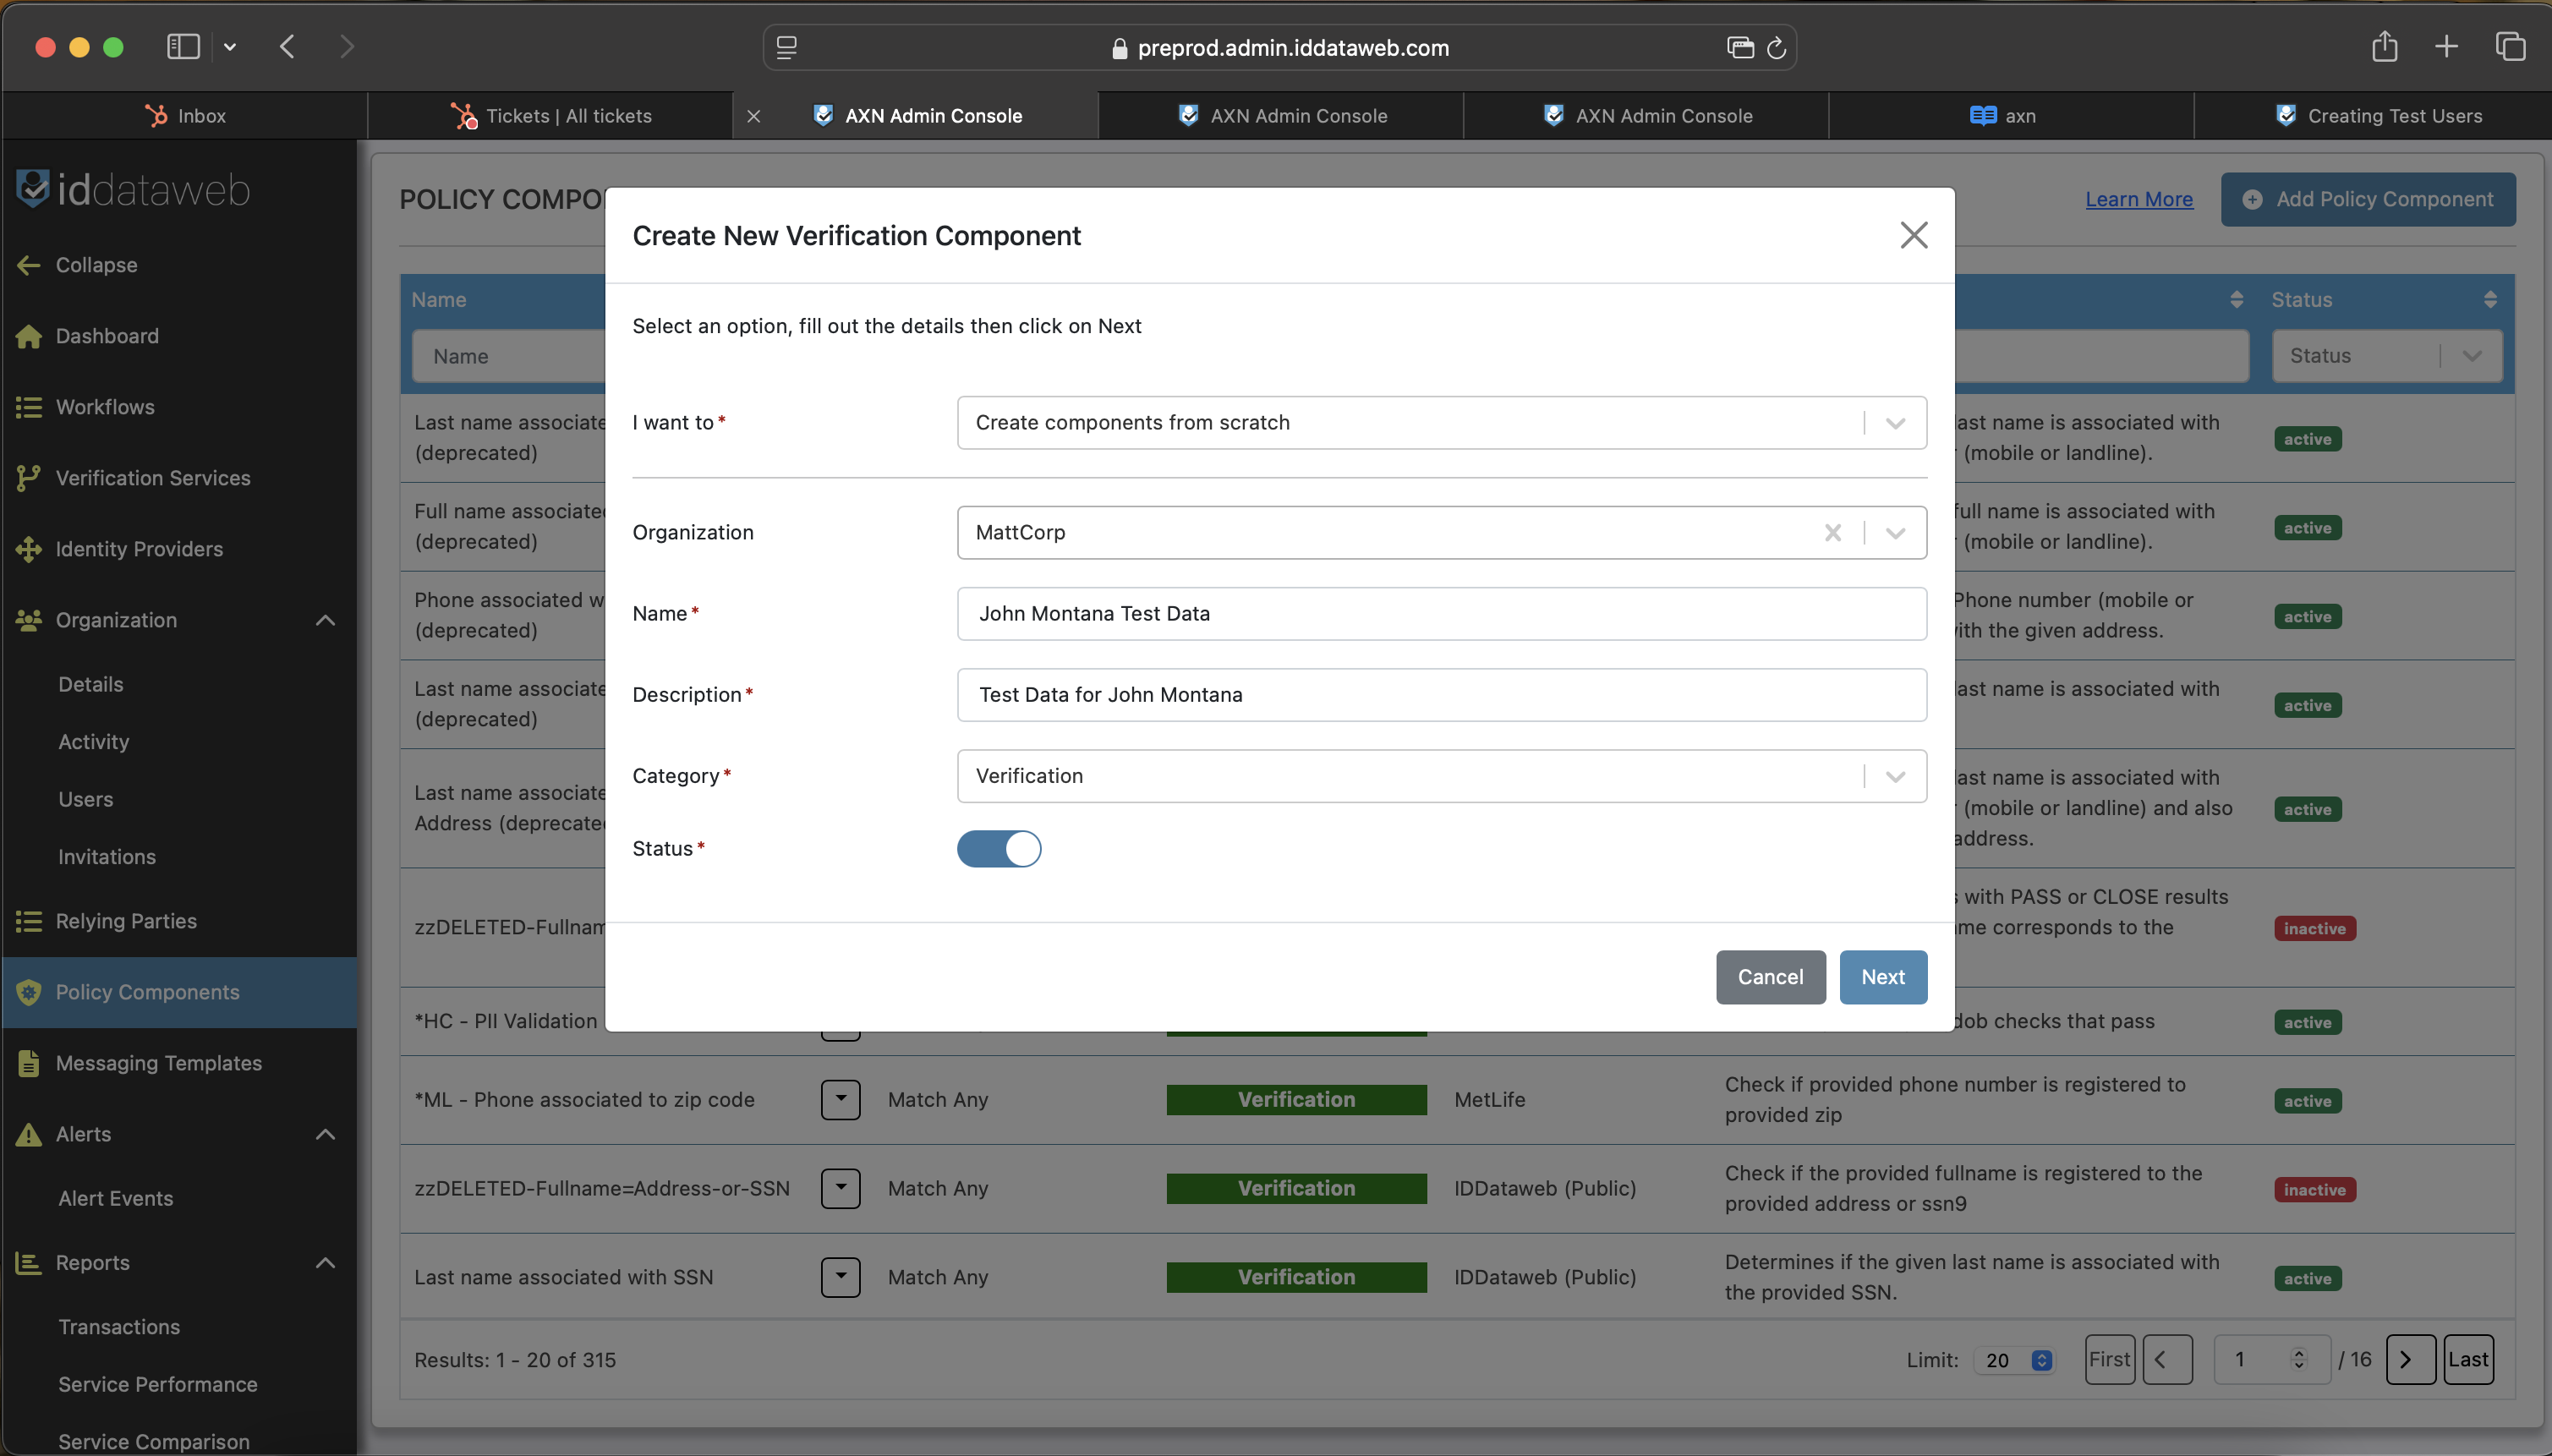
- Choose "Create component from scratch", enter a name and description for the component, and select "Verification" for category.
- On the next page, select "User Attribute" from the drop down list of Trigger Types, choose which kind of attribute type you would like to check for (in our case we are choosing "FullName"), select which Attribute Field Name you would like, such as "First Name", choose what kind of comparison you would like, and then enter the value you want checked.
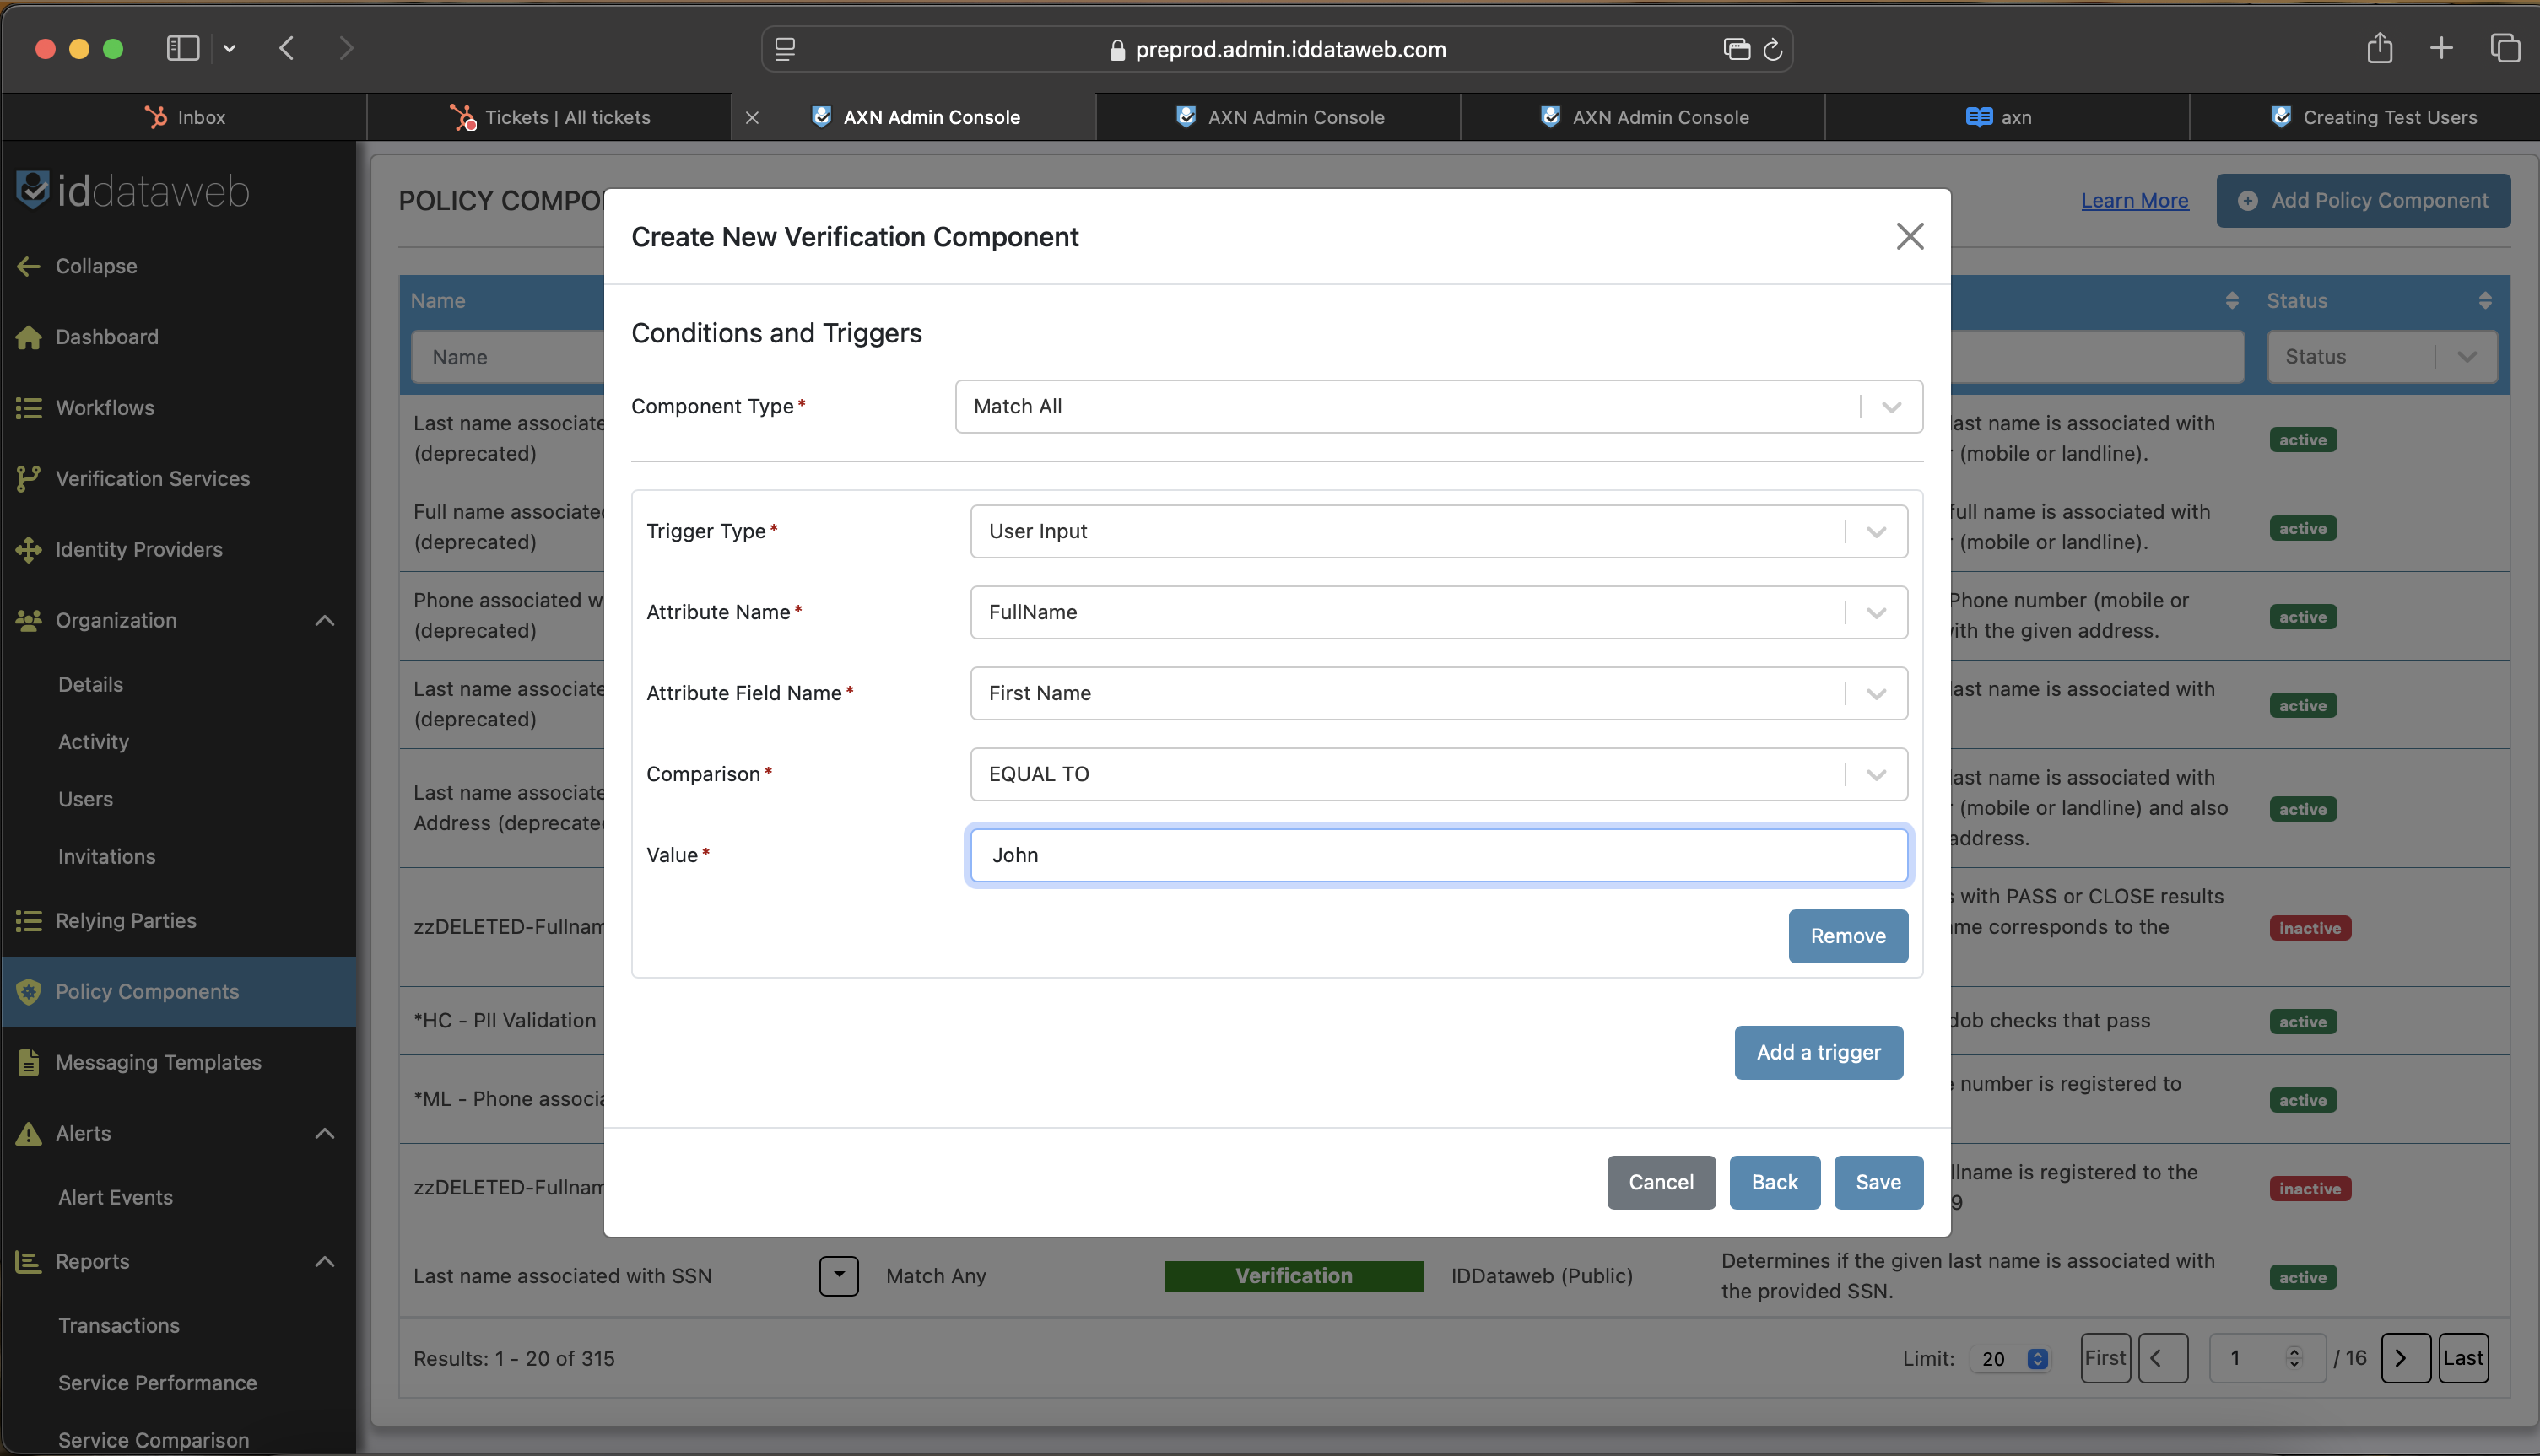
- To add more attributes to the component, select "Add a trigger" and go through the previous step again.
- When you are done setting up your test user, click save and your policy component will be available to use for testing in your verification services.
Note: For more information on creating policy components, please follow this guide
Setting Up Tests for New Test Users
Now that you have a test user created, the next step is to set up a policy in your verification service(s) to to handle policy decisions for the user.
To set up a policy in your service, follow these steps:
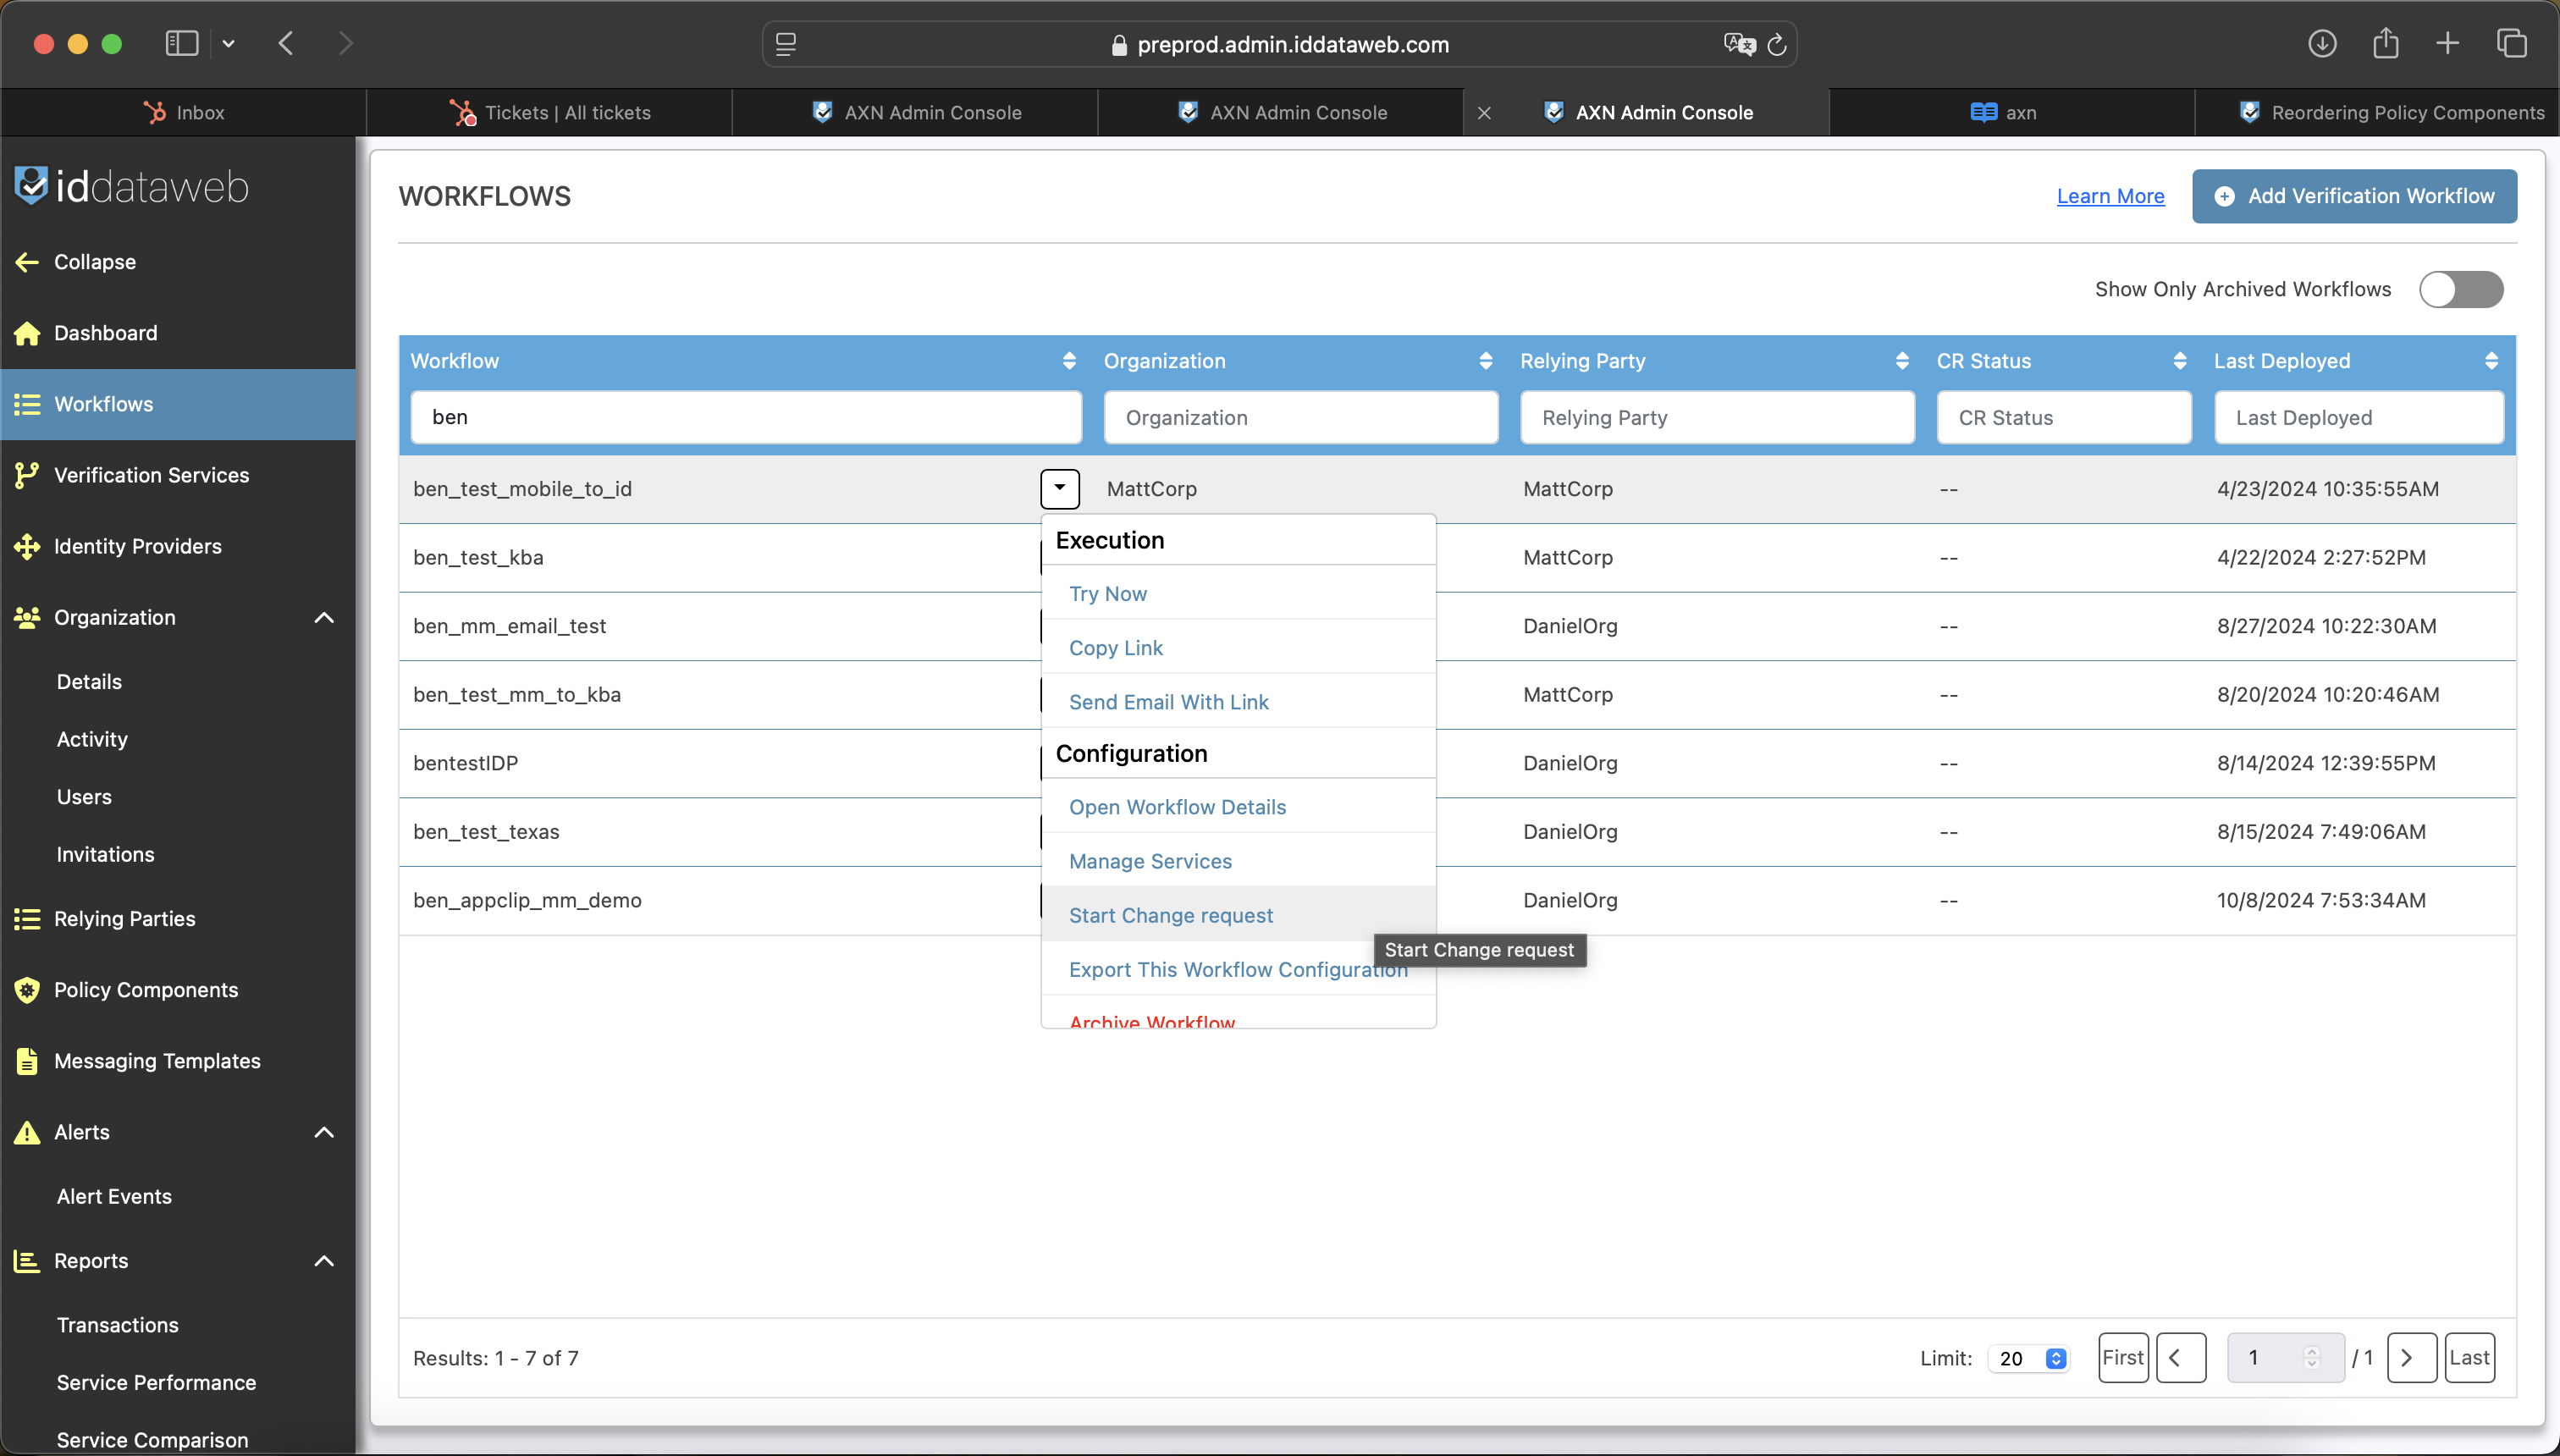
- In the AXN Admin Console, Navigate to Workflows on the left hand menu and search for workflow that your verification service is a part of.
- Click the drop down menu and select "Start Change Request"
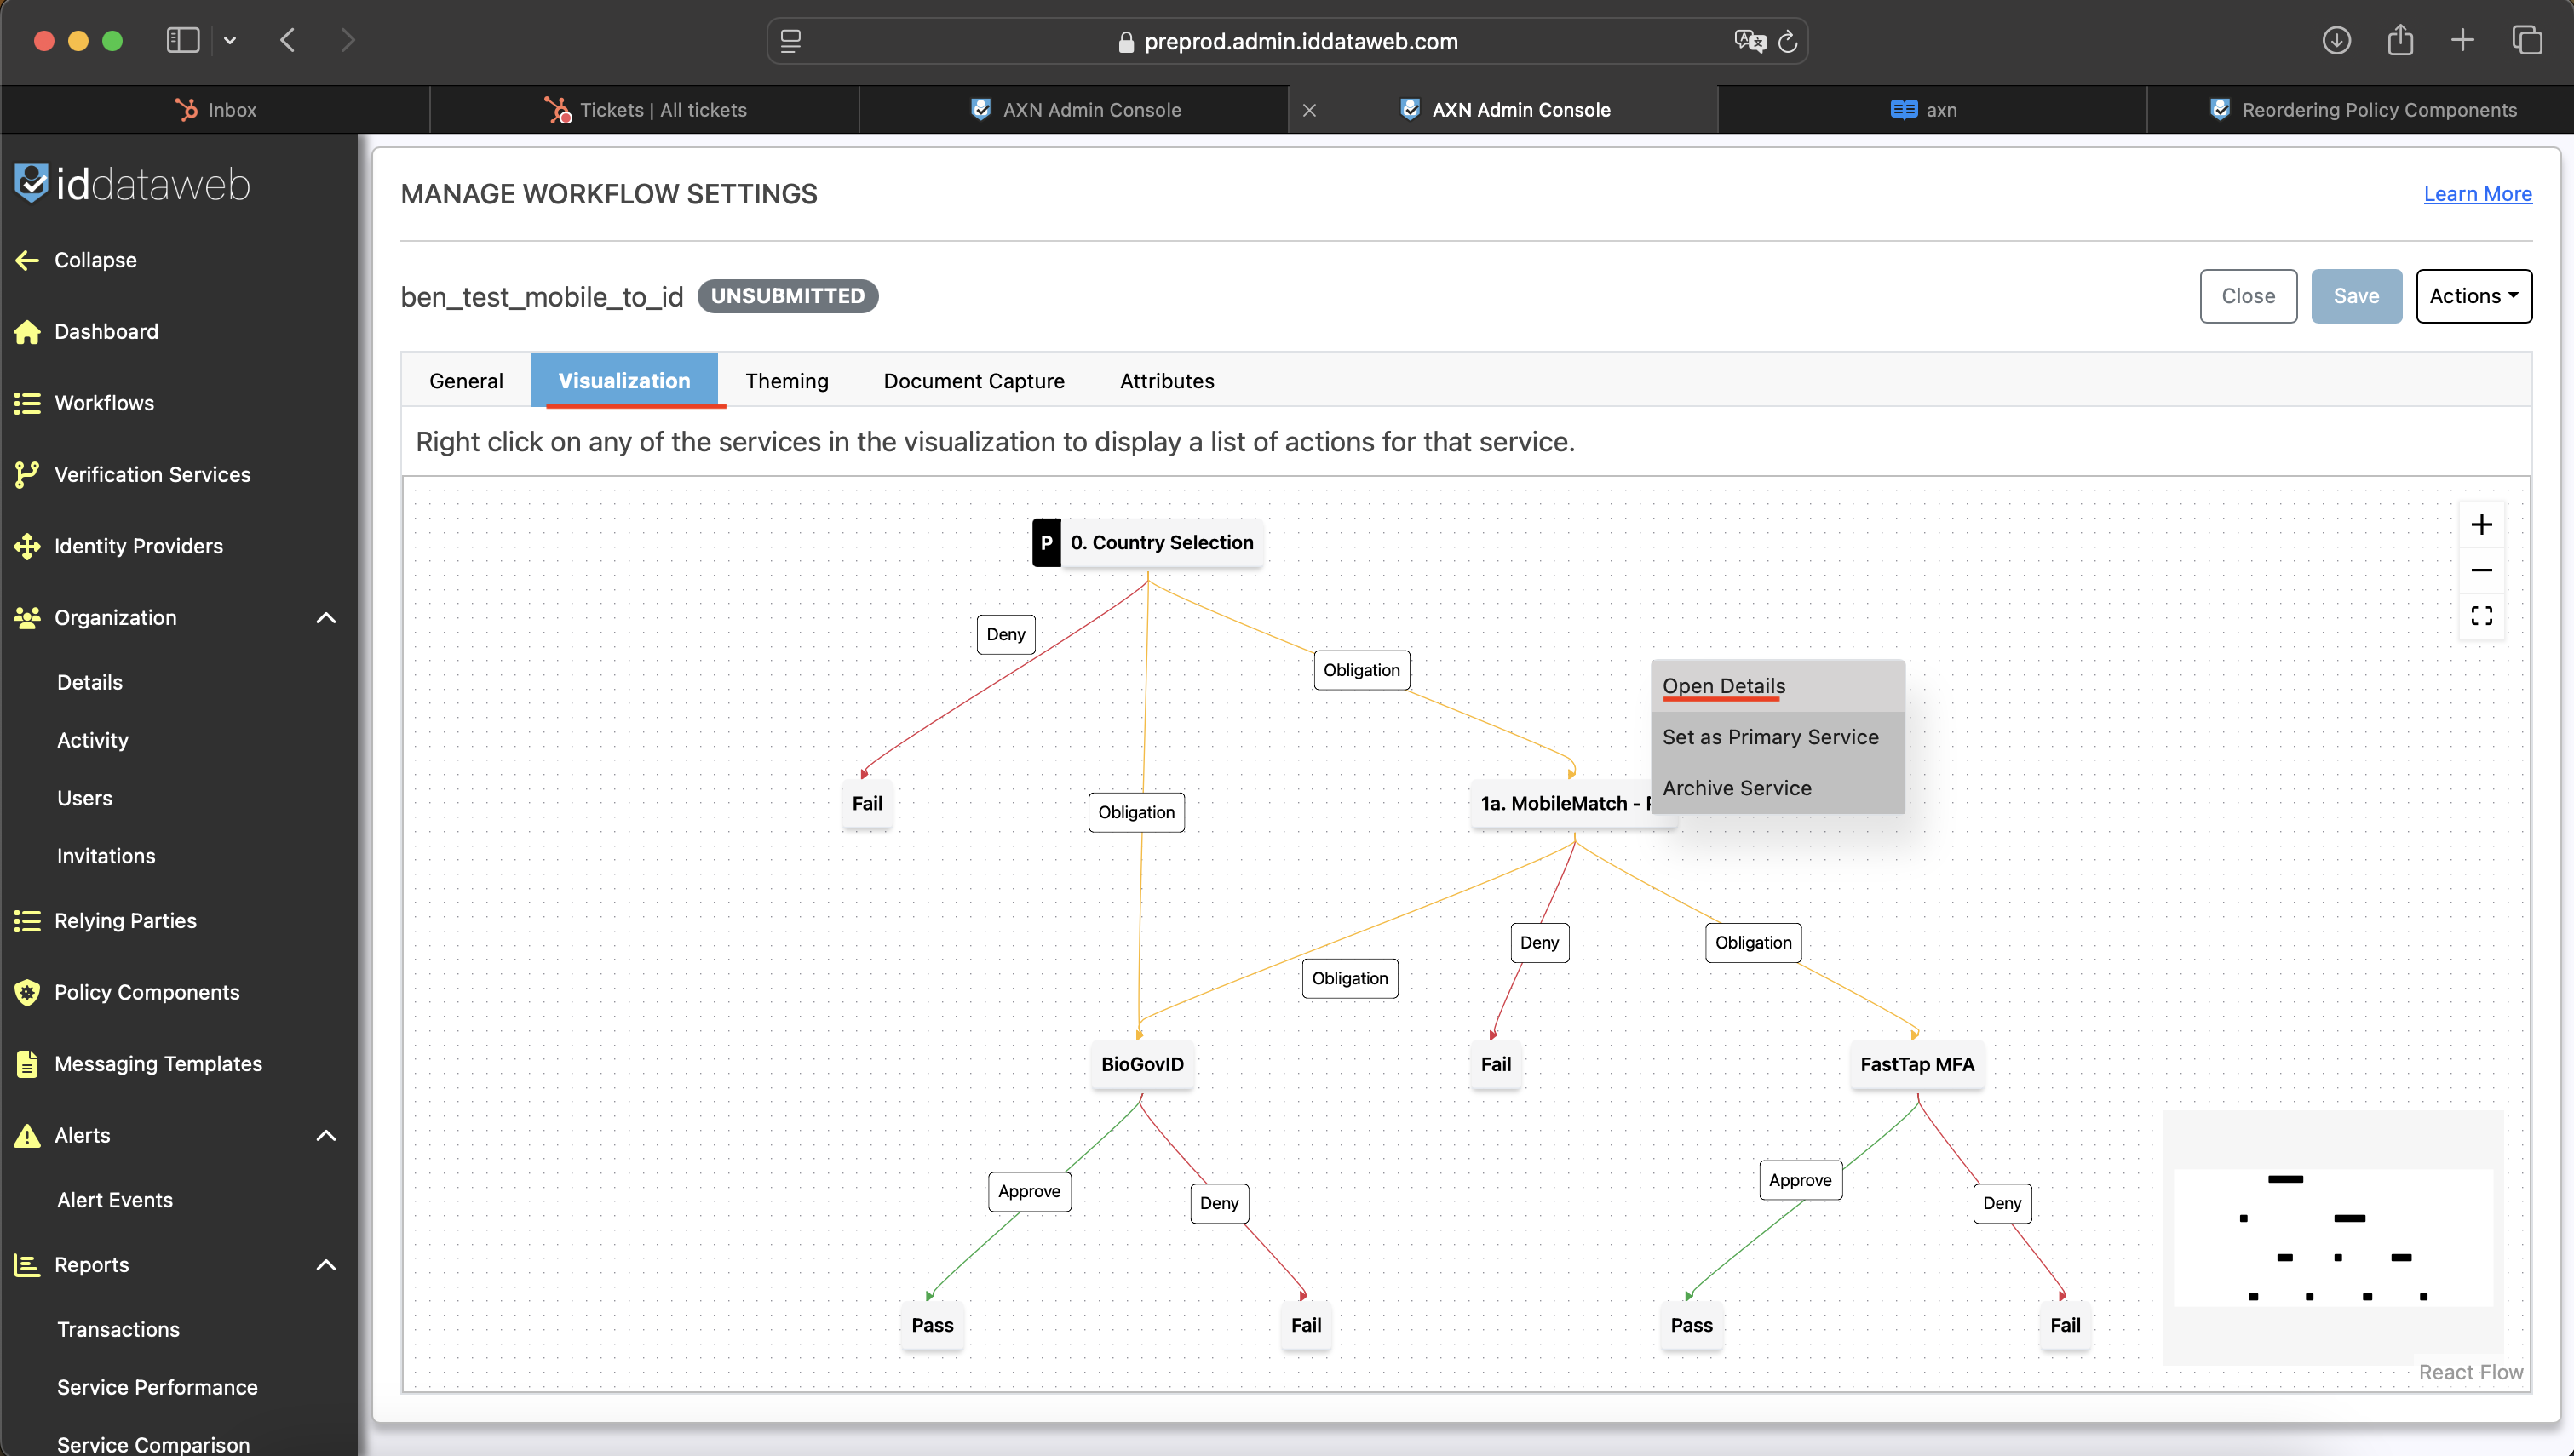
- Navigate to the Visualization tab, find the verification service you would like to setup your tests for, right click the service and select Open Details.
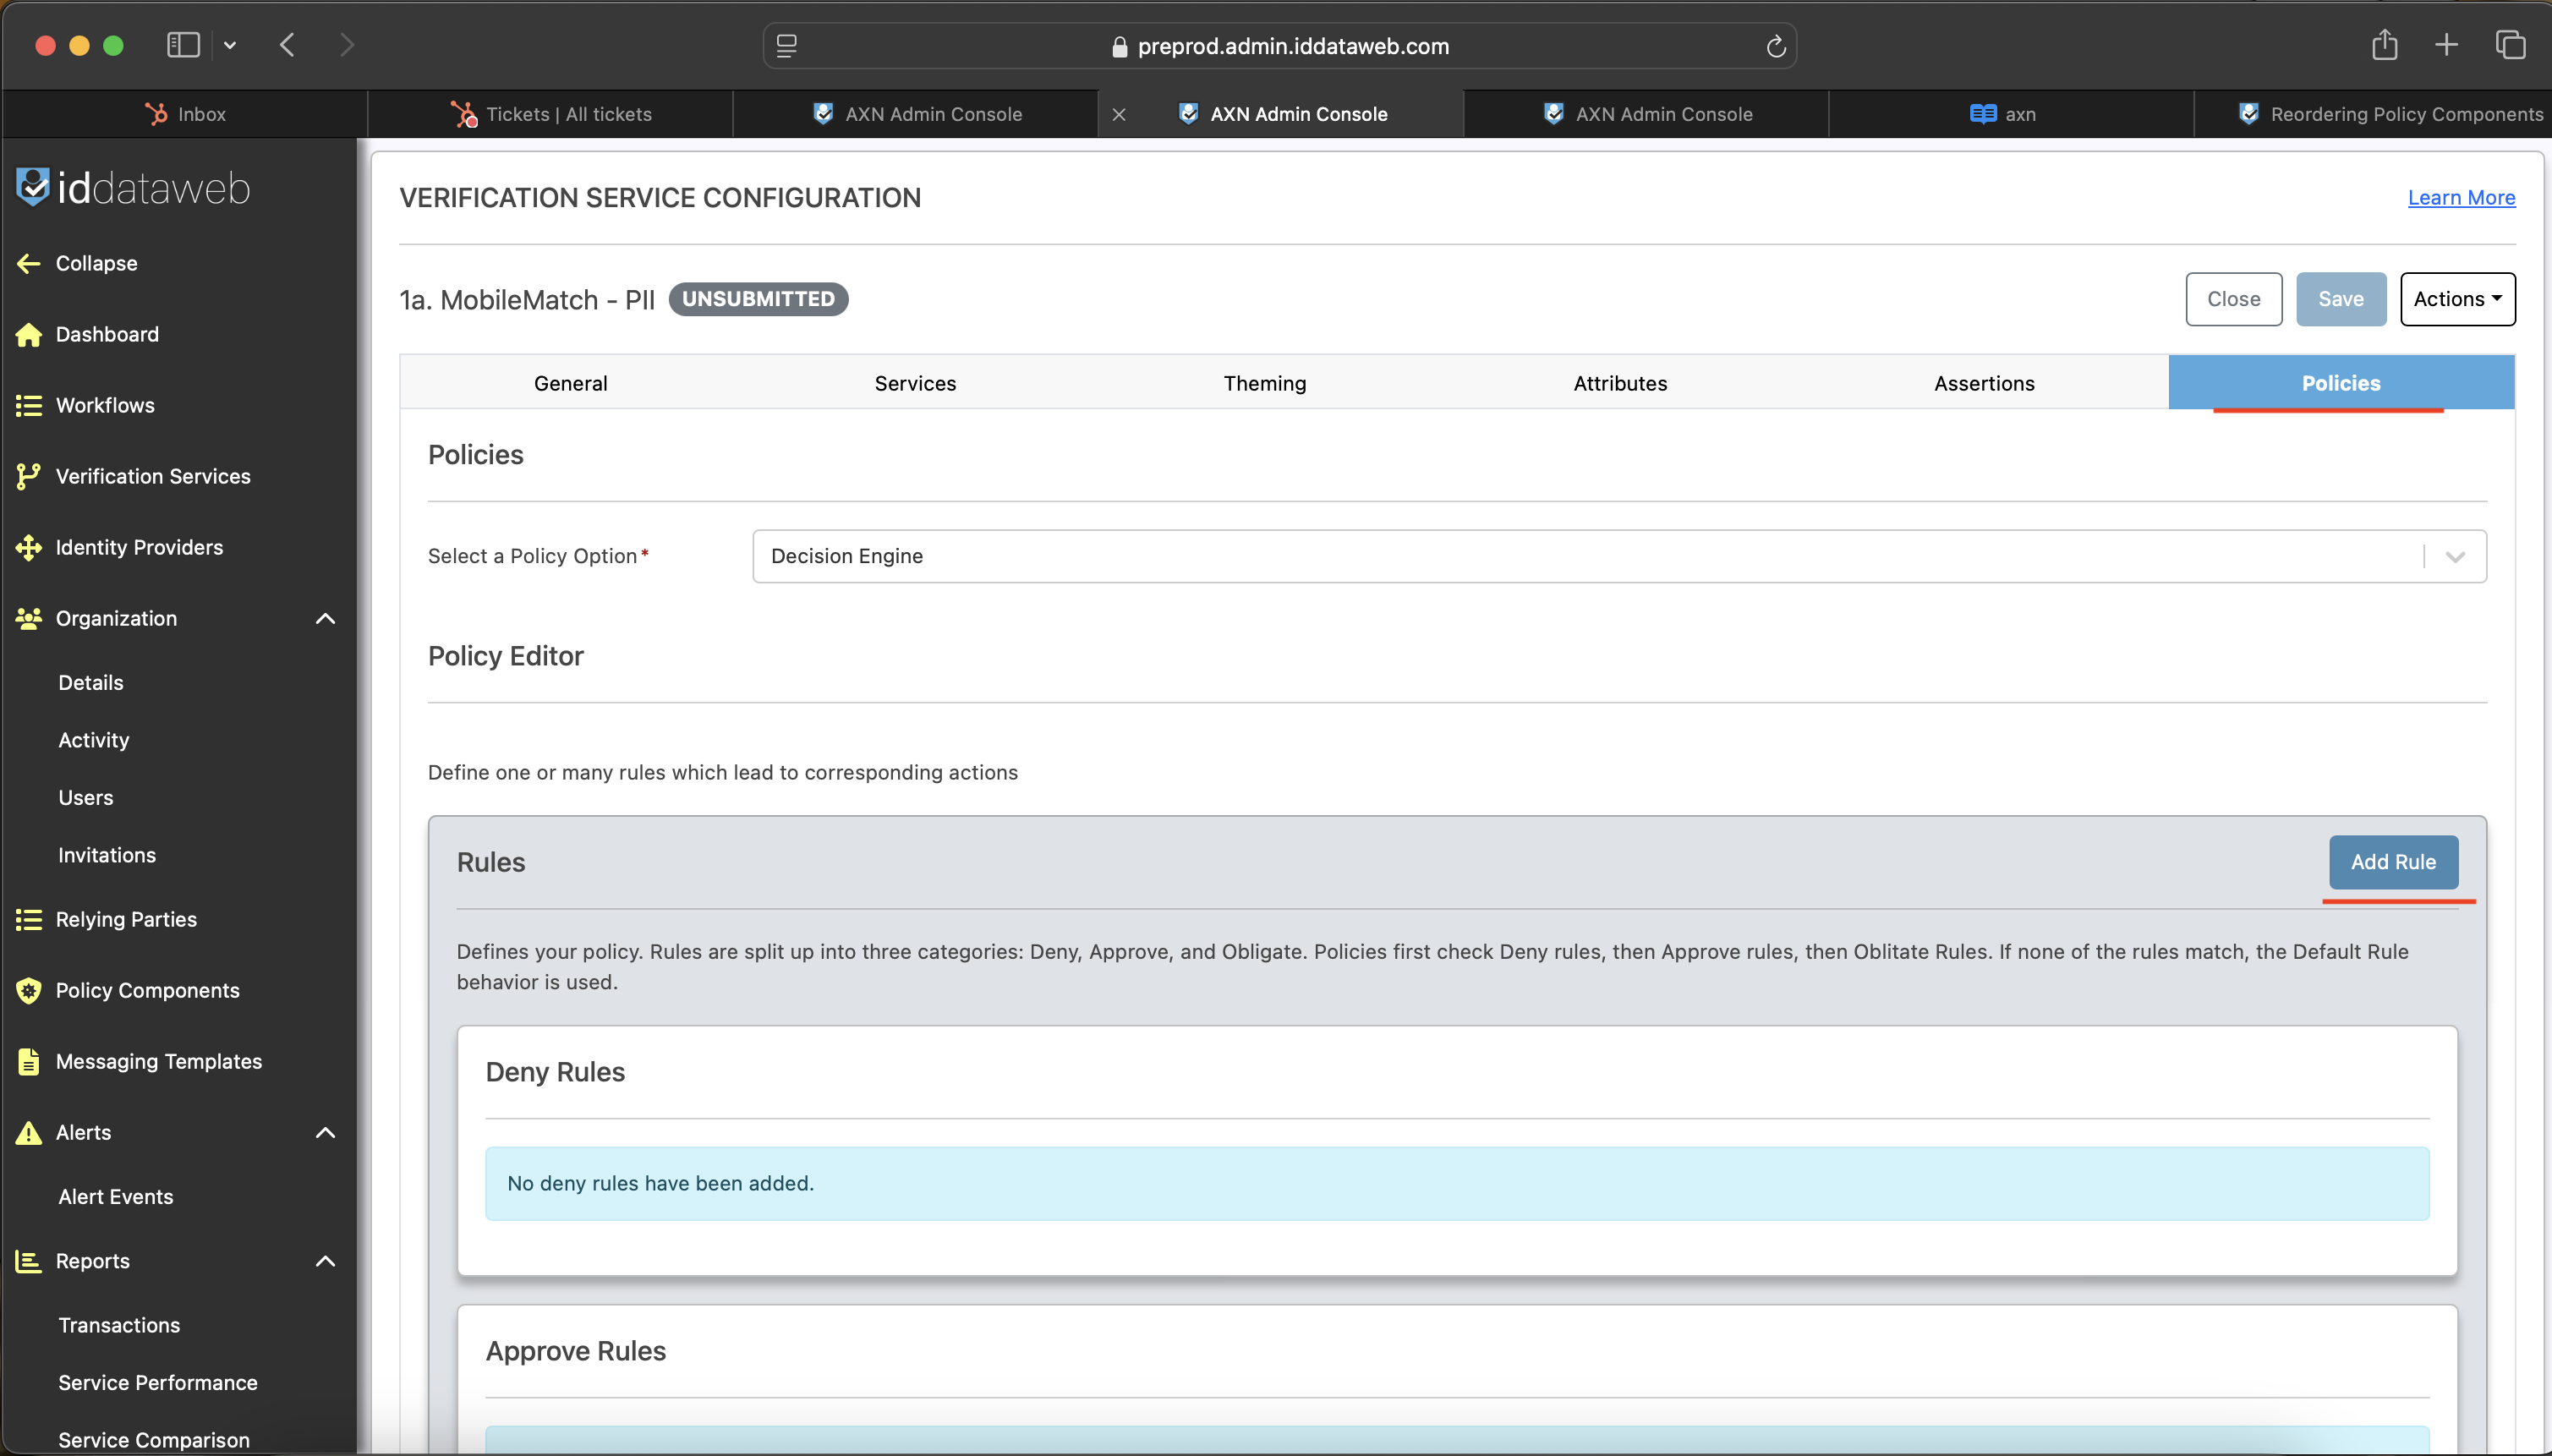
- When the service settings open, navigate to the "Policies" tab
- Select "Add Rule"
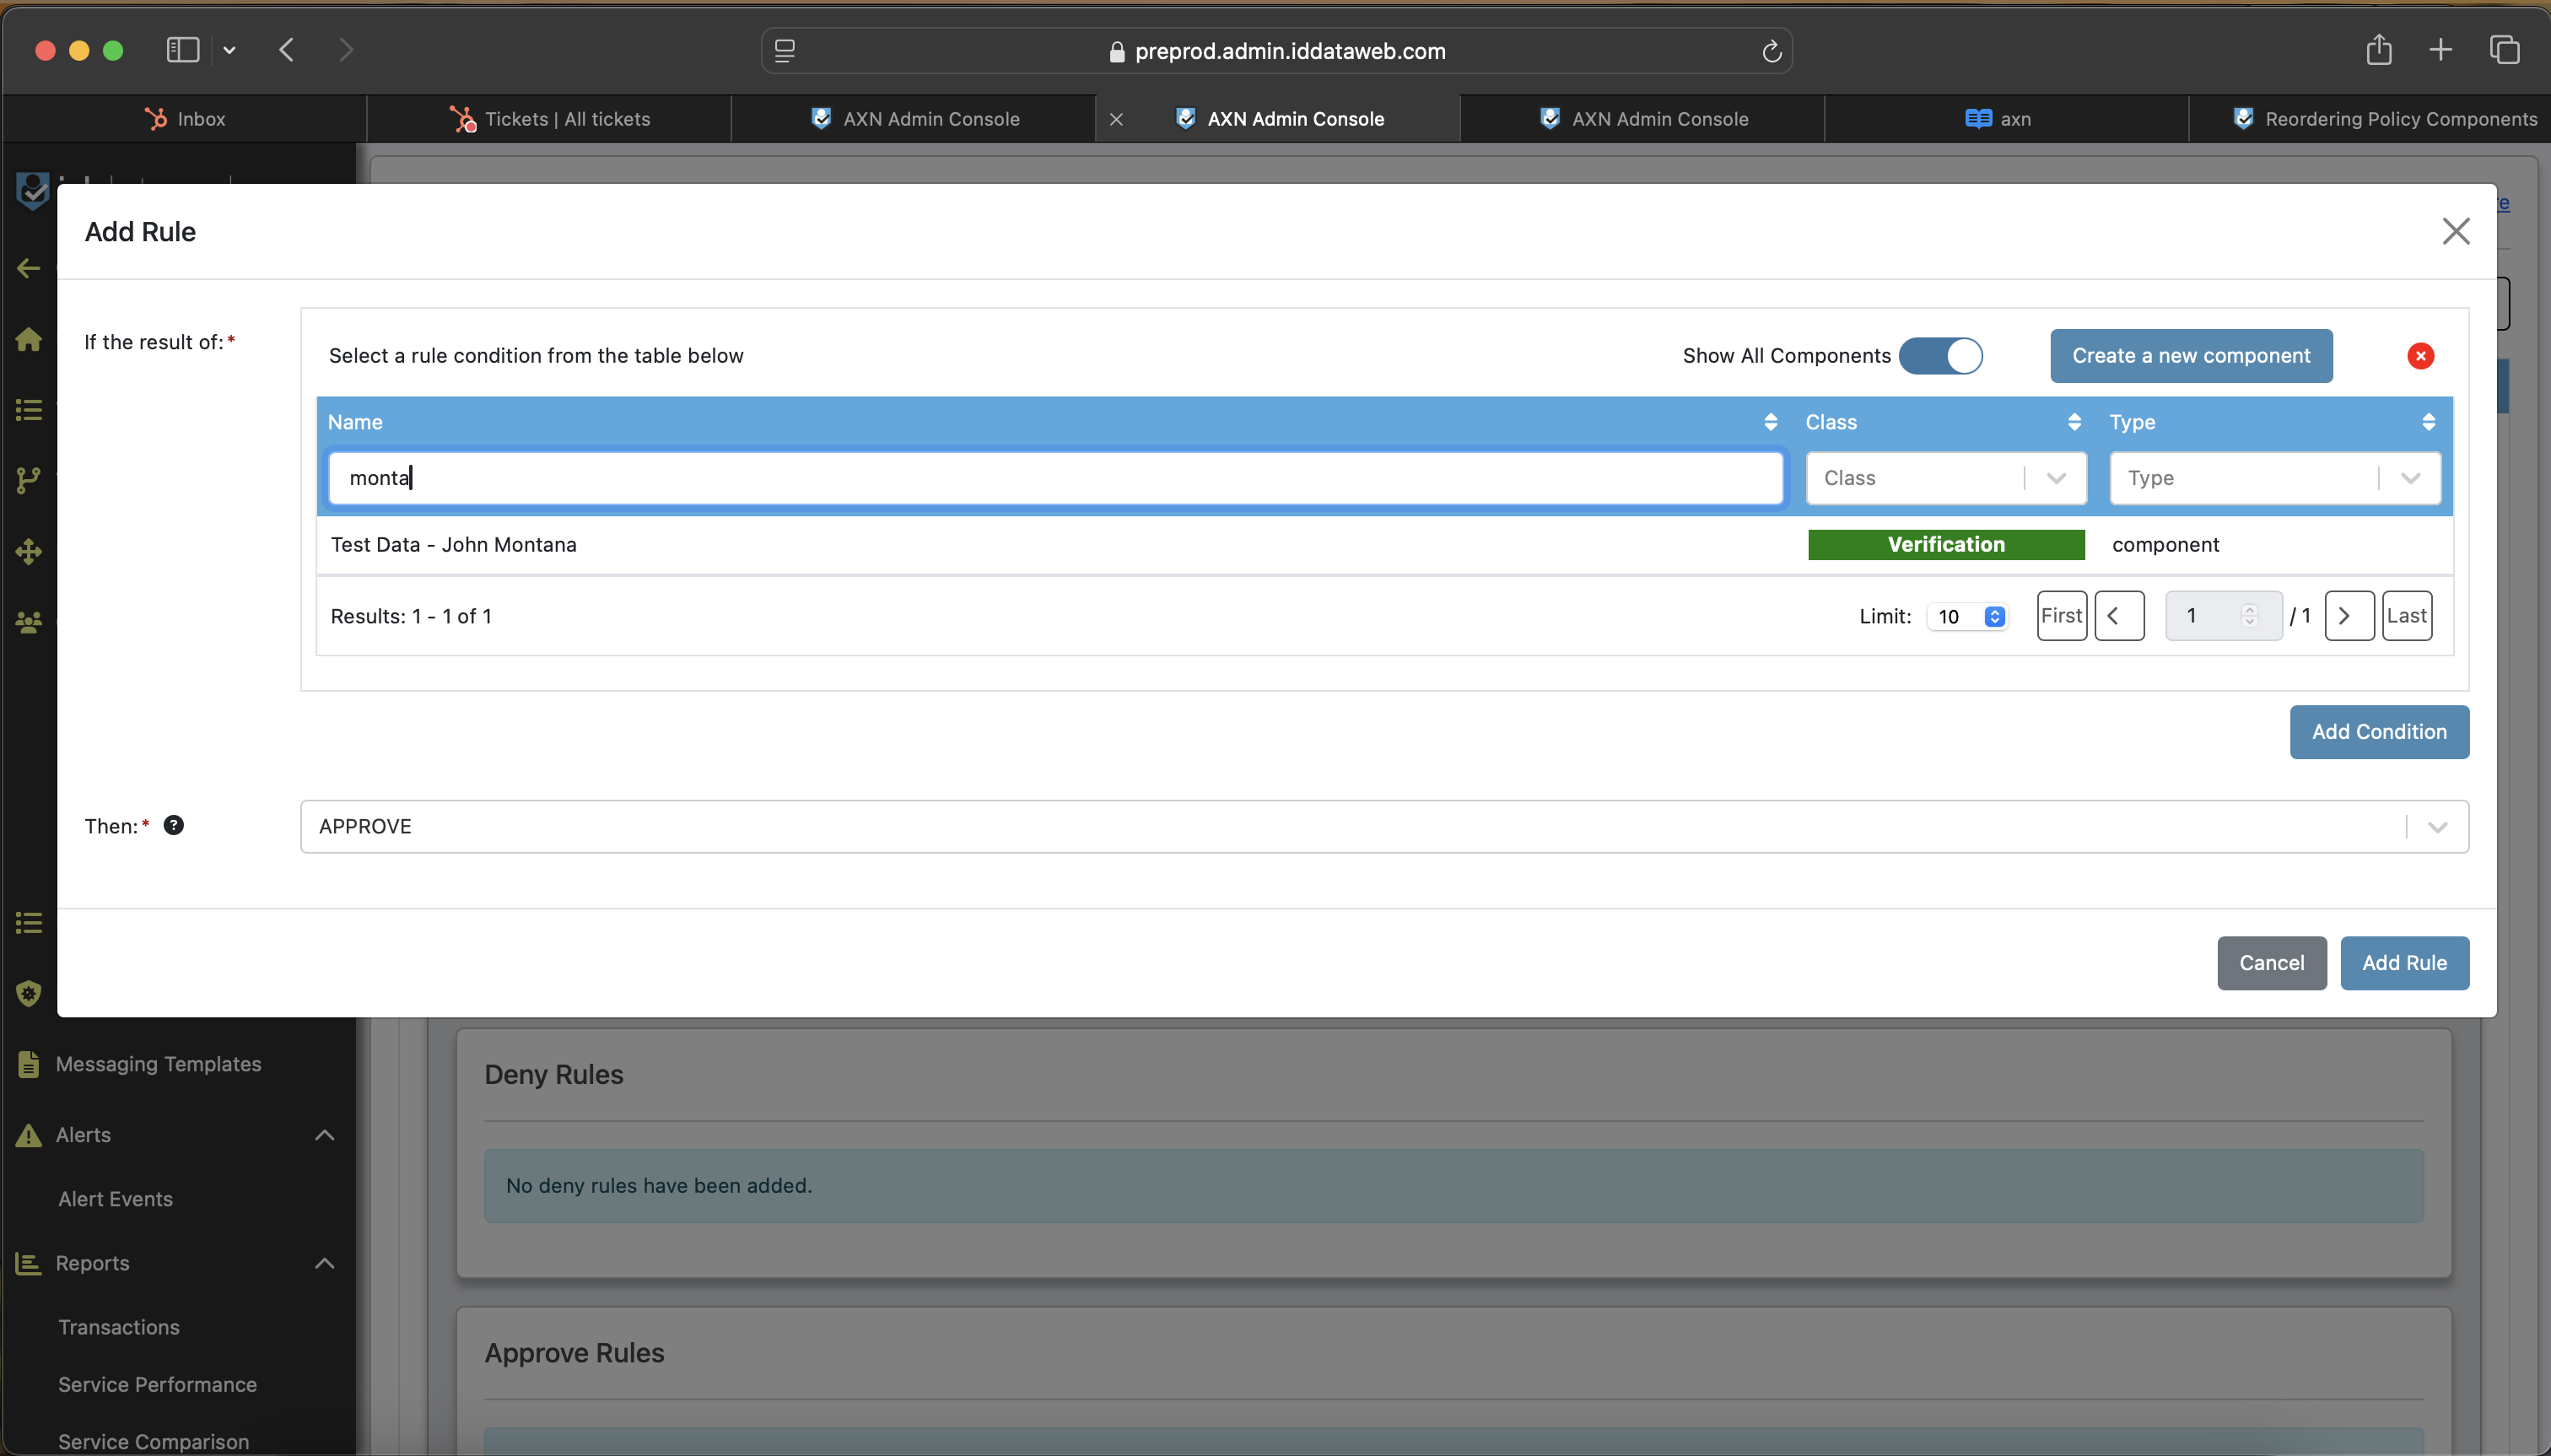
- Once the Add Rule popup appears, select "Add Condition"
- Enter the name of the policy component you made for your test user. If the component does not appear, toggle the Show All Components option and re-enter the name of the component.
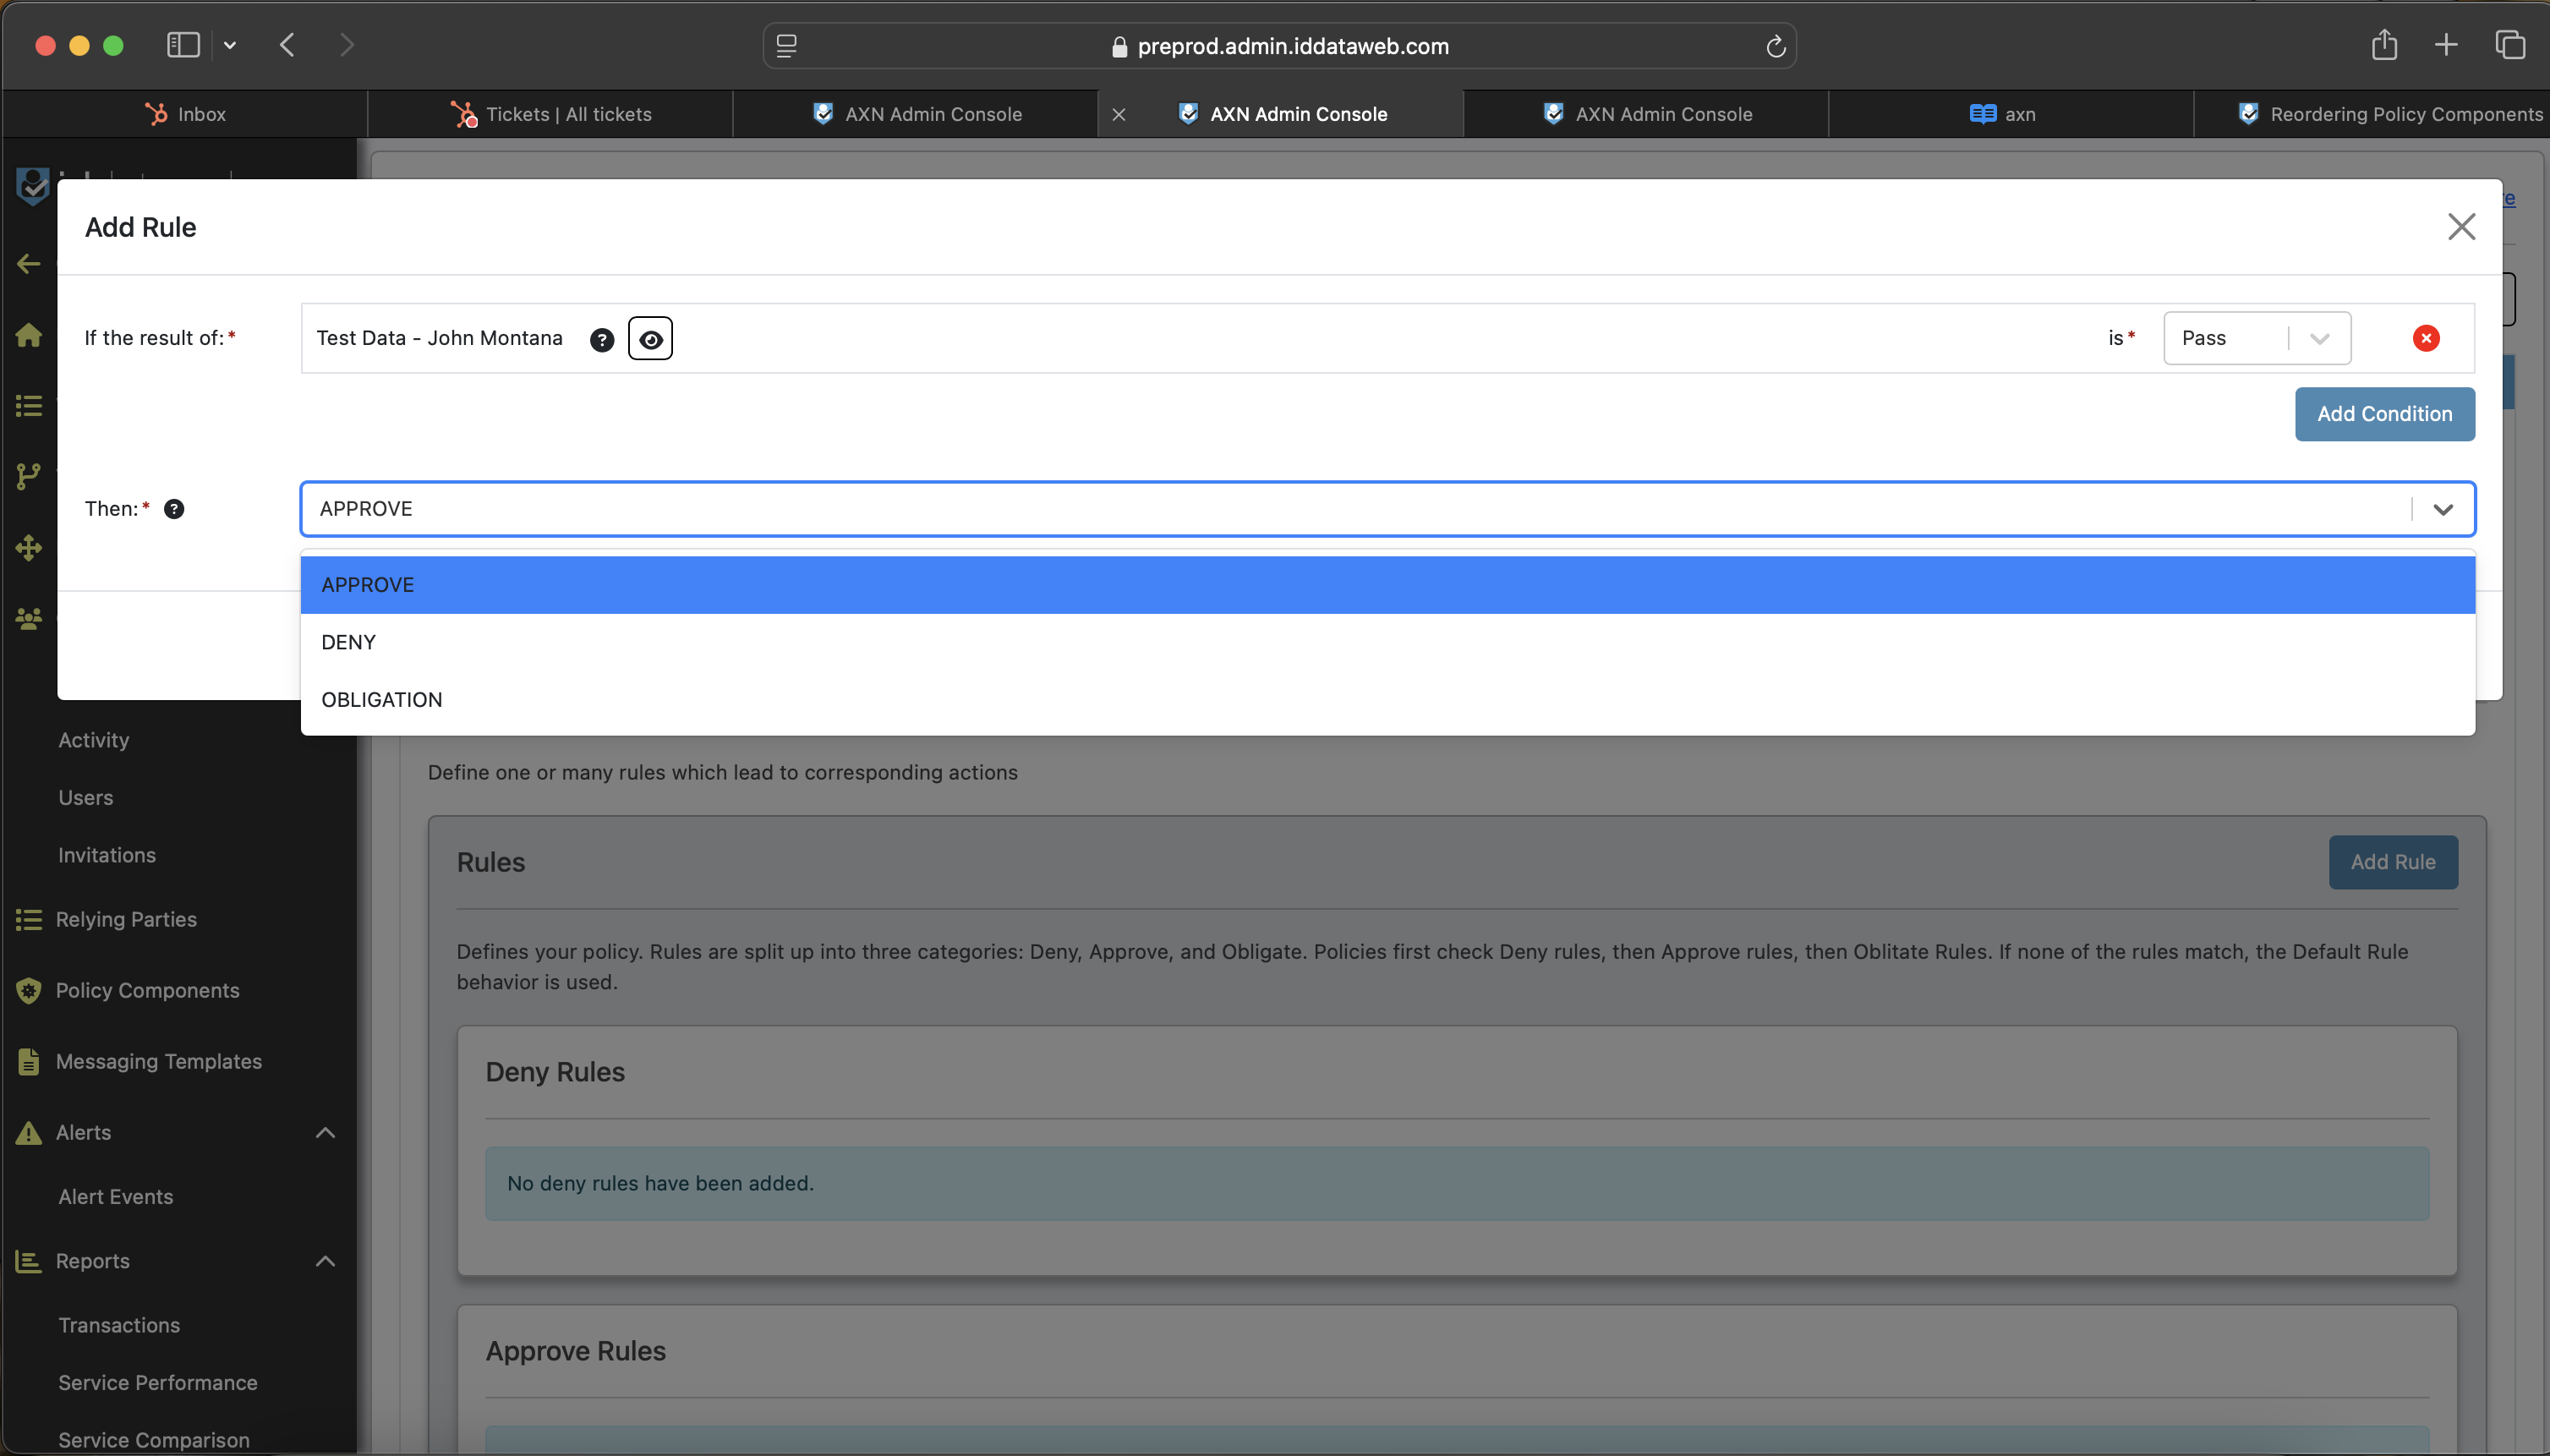
- Select your component and then choose what kind of test result you want to use. The test will "Pass" if the submitted data matches the data in the component and it will "Fail" otherwise.
- Choose what policy decision you would like to be made as a result of your test. You can either have your test user Approved, Denied, or Obligated to another verification service.
- Once your test is setup, select Add Rule, Save at the top right of the page, then click the Actions drop down menu and deploy the change request.
After your tests are setup, saved, and deployed, you are ready to test your verification service using test user data!
Updated 8 months ago
