Managing Verification Services
Overview
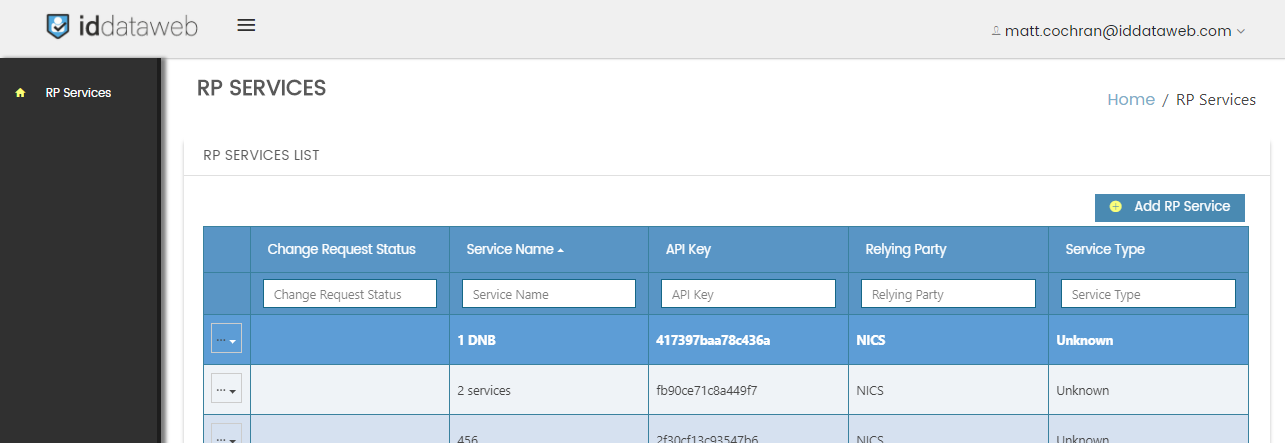
From the Dashboard, you can see all Services configured for your account. You can filter each column to quickly find what you’re looking for.
Creating a new RP Service
To create a new RP Service, click on the “Add RP Service” button in the top right of the screen.

This will bring up a new screen which gives you options on how you’d like to create your new service.
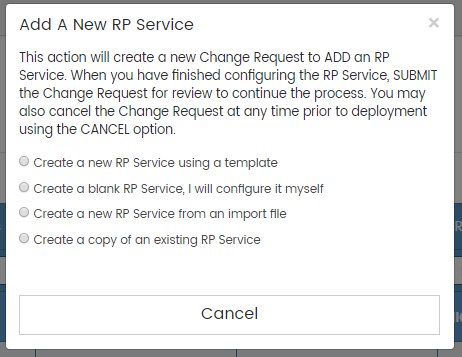
Create a new RP Service using a template (recommended starting point)
With this option, you have the ability to choose a preconfigured policy template based on popular customer deployments. ID DataWeb adds new policy templates based on our research and development. For more information, please review our “Policy Templates” article.
Create a blank service, I will configure it myself
This option will give you a blank slate for service configuration. You will then have the ability to add attributes, services, and assertions yourself, to build the perfect service for your business or use case.
Create a new RP Service from an import file
This option allows the administrator to import a JSON configuration file to setup a policy. These JSON files can be exported from the AXN Admin tool, and used in your existing version control systems (eg. Github.)
Create a copy of an existing RP Service
If you already have a service you like, and you’d like to start from there, you can use this option to create a copy that can be adjusted to meet your new requirements.
Regardless of which option you choose, you will be brought to the RP Service Details page.
RP Service Details
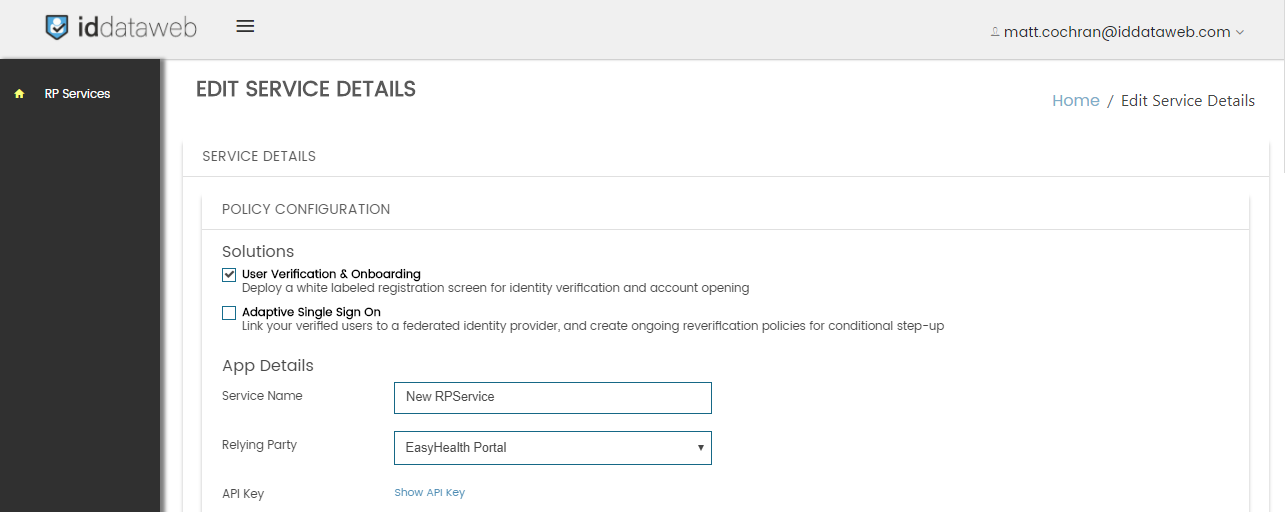
This page allows you to create and customize your RP Service.
Solutions
This section allows you to specify the high level functionality of this RP Service. Depending on which solution you select, the appropriate screens will be shown below, either User Verification and Onboarding alone, or both User Verification and Onboarding + Adaptive Single Sign On. For more information on Solutions provided by ID DataWeb, see the Solutions page.
- User Verification & Onboarding - Deploy a white labeled registration screen for identity verification and account opening
- Adaptive Single Sign On - Link your verified users to a federated identity provider, and create ongoing reverification policies for conditional step-up
Client Details
- Service Name – A human readable name for your RP Service.
- Relying Party – the RP which your application is associated with.
- API Key – the machine readable identifier of your RP Service. (This is your OAuth2 client_id.)
- Shared Secret – the “password” for your application to access this RP Service. (This is your Oauth2 client_secret.)
- Redirect URL – Required for the “Gateway” model (covered in the Deployment Options page.)
- Error URL – Where your end users will be redirected if there is an error in the system. (Deprecated)
User Verification and Onboarding
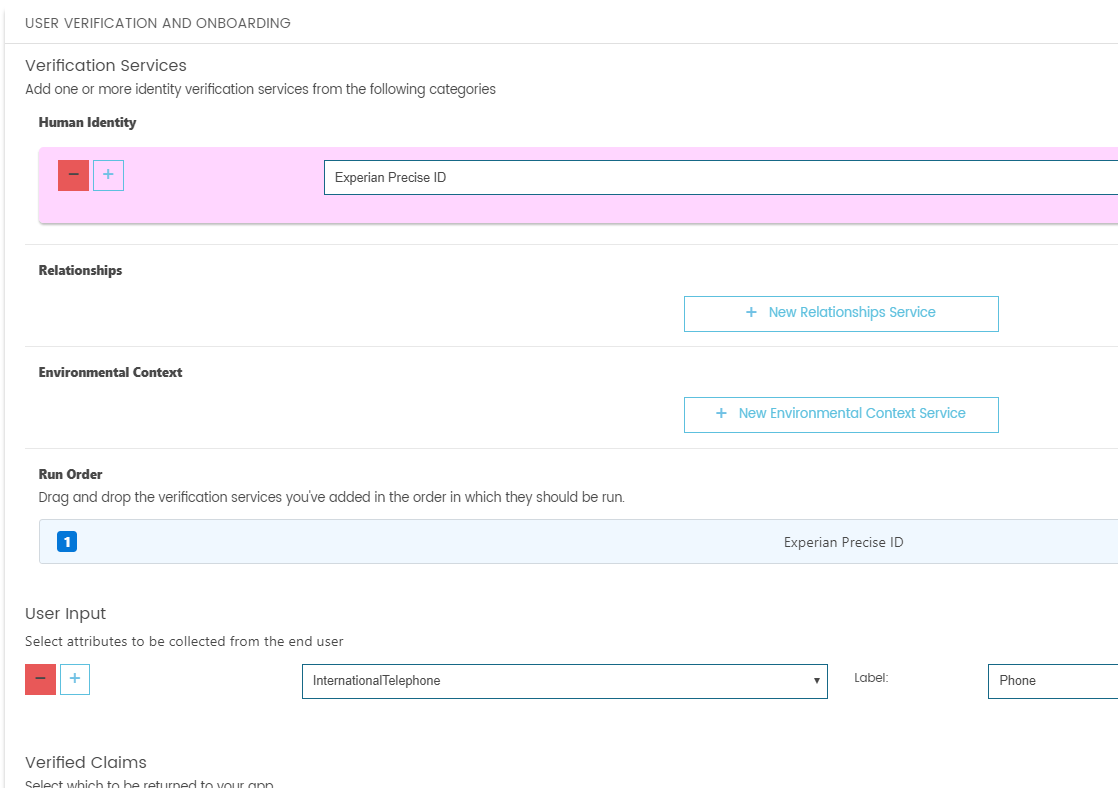
This section allows you to specify how to digitally verify your user’s identity, also known as Identity Proofing. ID DataWeb operates a network of verification services across three main domains, as described in the “Verification Services” section below. Once you’ve selected which services you’d like to be a part of your RP Service, you can specify the order which they are called from our cloud service in the “Run Order” section. The “Verified Claims” section includes assertions (or test results) of the identity verification event, which will be returned to your application or policy engine.
Verification Services
This section allows you to choose how to verify your user’s identity. For a full list of providers and descriptions, please see the “Attribute Providers” page.
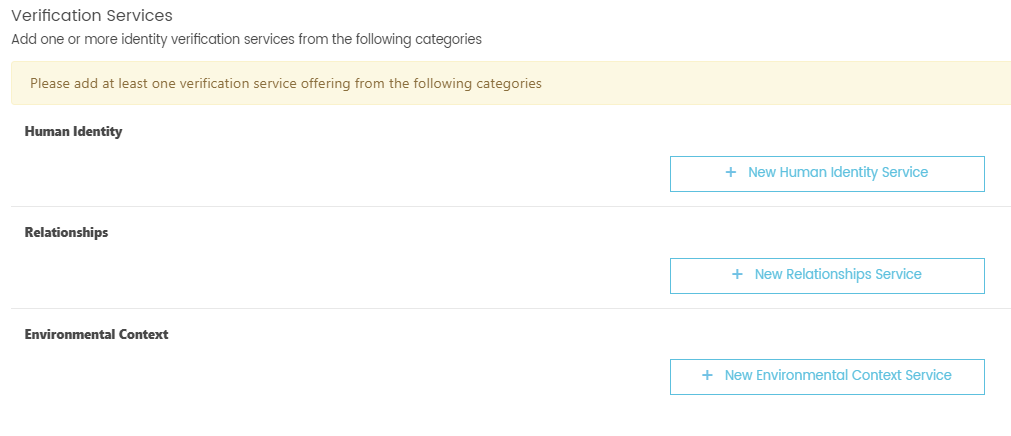
Categories
- Human Identity – verify the legal identity of your end users. This category includes domestic and international services to verify Personal Information, as well as Government Issued ID scanning solutions.
- Relationships – verify relationships of your end users, for example employment and criminal background.
- Environment – Verify that your users are coming from a low risk environment, including analysis of their device, location, and network. You can also plug into international blacklists for device identity, IP, mobile numbers, locations, and email addresses.
Run Order
Once you’ve selected which services you’d like to be a part of your RP Service, you can specify the order which they are called from our cloud service in this section. By default, services are automatically put into sequential order depending on when they were selected. The numbers on the left of each row indicate which order the service will be called. To change the order of a service, click and drag the Triple Bar icon to the far right.

User Input

This section specifies what information you will capture from your end users to aid the identity verification process. As you select Attribute Providers in the Verification Services section, the required attributes to support these services will be prefilled in this section. You can then add additional attributes to be collected (for example, preferences, or other information needed for your application’s downstream processing.)
Add New Attribute
To add a new attribute, click the + button next to any existing attribute. A new row will be created, where you can choose which attribute you’d like to add to your RP Service. For a full list of attributes and descriptions, please see our “Attributes” page. To remove an attribute, click the red '–' icon. This attribute will no longer be collected from your end user, or accepted through the API.

Adding an Existing AttributeIf you accidentally try to add an existing attribute, the system will notify you of your error.
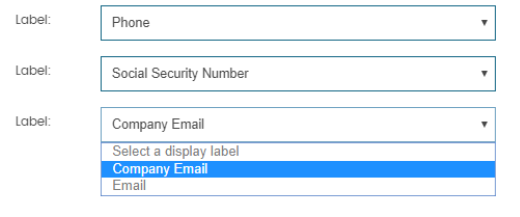
Display Labels
If you plan to access your service through the Gateway model, you can adjust the Label of your attributes in this section. For example, you can change “Email” to “Company Email” if you are specifically asking your end users for their corporate email address. The end user UI will be reflected with this change.
Verified Claims
The “Verified Claims” section includes assertions (or test results) of the identity verification event, which will be returned to your application or policy engine. As you choose new Attribute Providers, Verified Claims are pre-populated in the list. You can then choose to add or remove additional Assertions based on your business needs. For a full list of Assertions and descriptions, please see our “Assertions” page.
Attribute Provider Sections
Each Attribute Provider you’ve selected will get their own configuration section. In this section, you will be able to specify which assertions are returned. For each section, you can only add assertions which are tied with that specific Attribute Provider. This makes it easy to see what your options are, and what additional Assertions you can add to your RP Service.
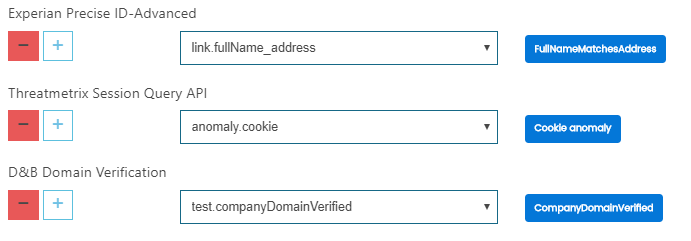
Adding a New Assertion
To add a new Assertion, click the + icon next to any row. A dropdown will appear where you can select which assertion you’d like to add to your RP Service.

Adding Assertions which Need More AttributesIf you attempt to add an Assertion which relies on an Attribute which isn’t currently configured, the system will notify you of this. You can then either add the additional Attribute, or remove this Assertion.
Adaptive Single Sign-On
This section will allow you to configure the ongoing access policy for your RP Service.

Identity Providers
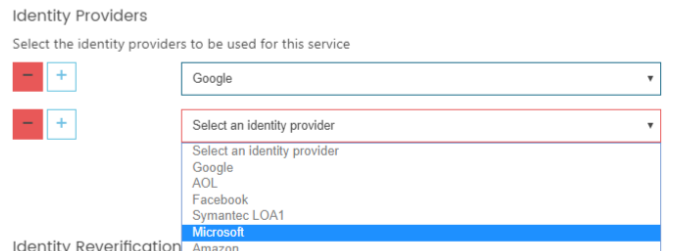
In this section, you can bind a verified identity to a federated Identity Provider, like Google or your Enterprise Single Sign-On account. If your identity provider does not exist in the list, your Account Manager can have it added for you.
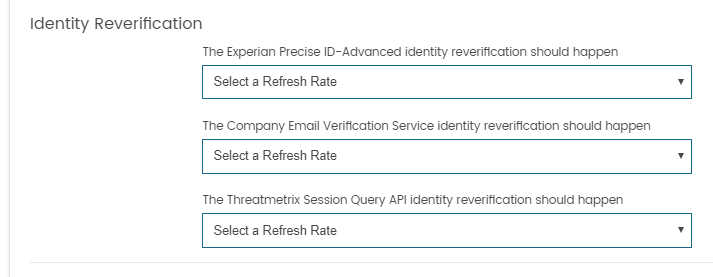
Identity Re-verification
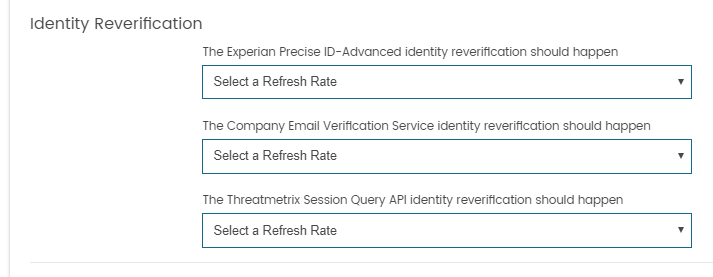
The Identity Reverification section allows you to specify how often you would like to reverify aspects of your end user. Using this section, you can choose to reverify at each login, daily, weekly, monthly, or never. You can have different settings for each Attribute Provider you’ve selected. This gives you the ability to handle heavy verification checks one time at the beginning (for example, document verification,) basic PII checks every month (example – reverify personal address,) and lightweight checks at each login (example – device identity.)
Choosing a Re-verification Setting
For each Attribute Provider, click the dropdown to select how often you’d like to trigger this service to re-verify your user.
Saving Your RP Service
When configuration is complete, click "Save" to confirm your settings, and return to the RP Services page.
Note - Your Service is not Yet Deployed!Note - this service is not deployed, but can now go through the change management and deployment process, as outlined below.
Updated 9 months ago
